Managing traditional cultivars for optimum outputs
Producing rice seeds in a farmer's field
Determination of rice seed quality
Rice seed dormancy
Rice seed collection and handling
Common botanicals and other materials in rice seed protection during storage
On-farm grain storage
Clonal propagation: a method of seed multiplication
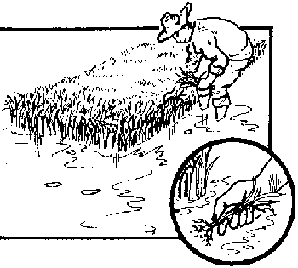
Raising seedlings by the wetbed method
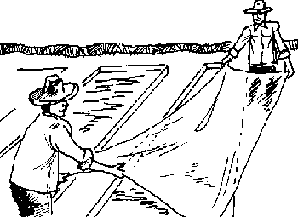
The dapog method of raising rice seedlings
Line markers for rice transplanting
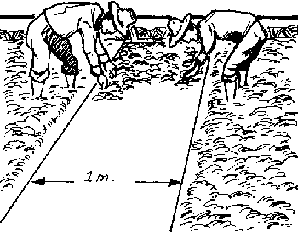
Straight-row planting using the square and triple-row spacing
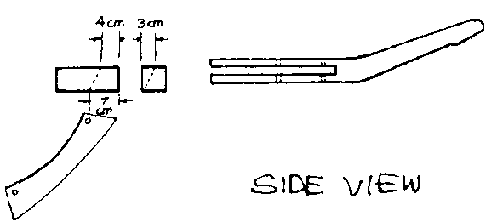
A manually operated rice transplanter
A drum seeder for direct seeding
Inoculating rice seedlings with Azospirillum
Integrated nutrient cycling
(introduction...)
Integrated nutrient cycling in lowland rice production: an ecosystem approach
Nutrient cycling on a basic irrigated or rainfed rice farm
Using soil test values to determine fertilizer needs for rice
Fertilizer placement in wetland rice
Using limited nitrogen fertilizer with HYVs
Treatment for zinc deficiency in lowland rice
Fertilizer from livestock and farm wastes
Chicken manure for lowland rice
Food, fodder, fertilizer and fuel from paddy dikes
Using rice straw for lowland rice farming
Azolla: green manure profile
Using azolla as fertilizer for lowland rice
Multiplying the azolla
Troubleshooting common problems in azolla production
Green leaf manuring in lowland rice
Green manure utilization in lowland rice
Sesbania aculeata: a bio-fertilizer source for lowland rice
Indigofera: green manure profile
Crotalaria: green manure profile
Lablab bean: cover crop/green manure profile
Rice bean: green manure profile
Sesbania spp.: green manure profile
Animal and green manure practices among the Mangyans (Alangan tribe in Mindoro)
Waste management practices (Tuwal and Ayangan tribes in Ifugao)
Pest/weed control
Major rice insect pests, their natural enemies and economic threshold levels
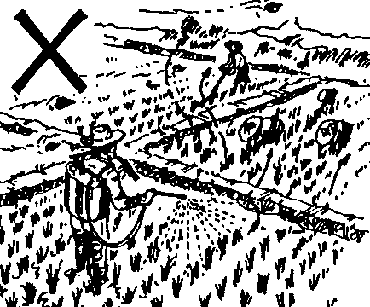
Pesticide poisoning
Efficient and safe use of pesticides
Low-cost control methods for golden snails (kuhol)
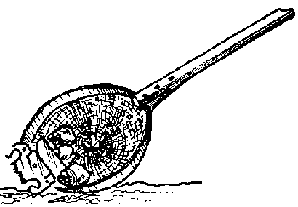
Easy ''do-it-yourself'' snail collector
Makabuhay, a natural pesticide for lowland rice
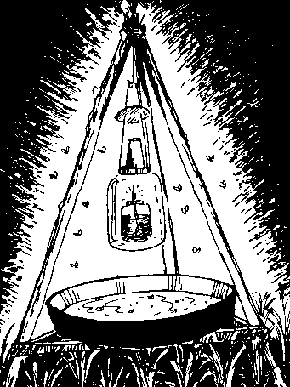
Low-cost insect trap
Weed management
Weed control in lowland rice
Water management for weed control in rice
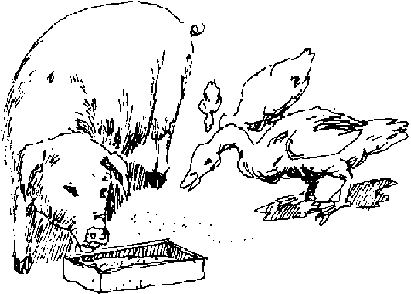
Using ducks for low-cost weed management
Water management/cropping patterns
(introduction...)
Water management for rice in drought-prone locations
Legume crop rotation with rice
Rice ratooning
Sorjan: towards rice-based integrated cropping systems
Maximizing the dry season for post-rice alternatives
Watermelons in rice paddies
Use of rice plant by-products
(introduction...)
Improving the taste and nutrient availability of rice straw
Briquettes: fuel from farm wastes
Making charcoal from rice hulls
Rice-hull stoves
Farm implement
(introduction...)
Thresher options for the farmers
Dryers: investment for the rainy days
Slicer for sesbania and other green manures
Integrated systems (rice-fish-livestock-trees)
(introduction...)
Rice-clam culture
Rice-fish culture
Rice-pig-fish culture
Vegetable-duck-fish culture (Tinola garden)
Care and management of mini-ponds
Backyard poultry project using compost litter system
Backyard piggery project
Backyard duck raising for meat and eggs
Backyard carabao raising for draft and milk
Azolla meal for layers and broilers
Azolla silage as feed for growing pigs
Multipurpose trees for the lowlands
Additional livestock feed resources
Farm management
(introduction...)
A guide to decision-making for technology adoption based on production costs
Simple record-keeping for LIRP
Workshop to develop the low-external input rice production technology information kit
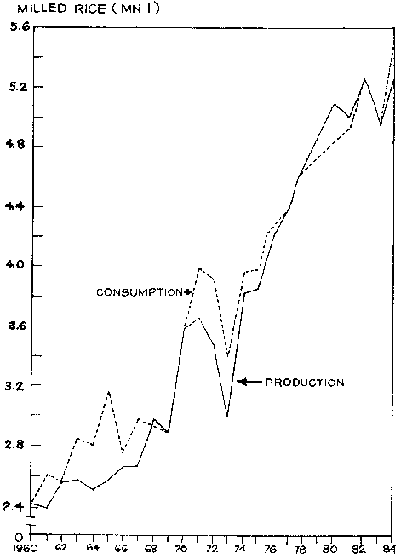
Rice production situationer in the Philippines
Workshop participants
(introduction...)
Workshop contributors
Project managers
Editorial support
Artwork and graphics
Administrative and secretarial support
Low-external Input Rice Production (IIRR, 292 p.)
Seeds/seedlings/transplanting
(introduction...)
Managing traditional cultivars for optimum outputs
Producing rice seeds in a farmer's field
Determination of rice seed quality
Rice seed dormancy
Rice seed collection and handling
Common botanicals and other materials in rice seed protection during storage
On-farm grain storage
Clonal propagation: a method of seed multiplication
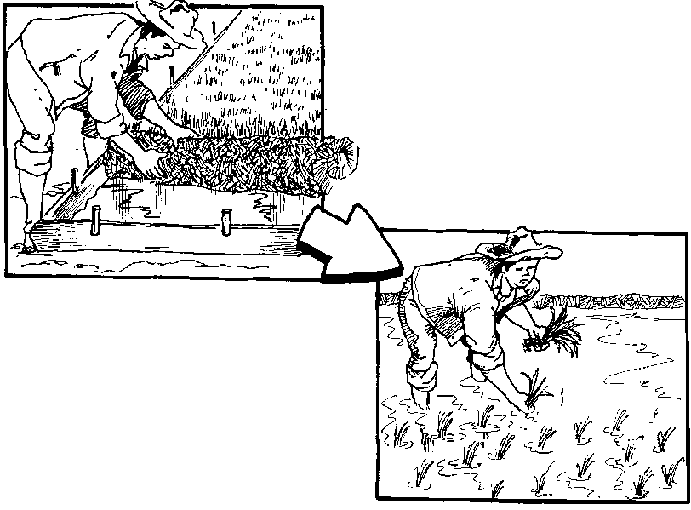
Raising seedlings by the wetbed method
The dapog method of raising rice seedlings
Line markers for rice transplanting
Straight-row planting using the square and triple-row spacing
A manually operated rice transplanter
A drum seeder for direct seeding
Inoculating rice seedlings with Azospirillum
Low-external Input Rice Production (IIRR, 292 p.)
Seeds/seedlings/transplanting
Managing traditional cultivars for optimum outputs
Traditional cultivars possess several attributes which make them
indispensable for low-input rice production (LIRP). Among these characteristics
include inherent resistance to certain pests and diseases, greater flexibility
in the time seedlings can be transplanted, lower requirement for irrigation
water and fertilizers and low seed-degeneration rate. Moreover, traditional
cultivars have a higher (40%) market price than high-yielding varieties (HYVs).
However, traditional cultivars which have characteristics, such as leafiness,
tall stature; photoperiod sensitivity and susceptibility to lodge, usually have
lower yield potential than HYVs. If a farmer would like to shift from planting
HYVs to traditional cultivars, he should modify his practices to receive optimum
output. Some cultural management practices that should be followed are:
1. Proper selection of cultivars. Study site characteristics
(soil, climate) in order to select the bestsuited cultivars for the site:
Rice cultivars
· Assuming that there is enough water, select cultivars to
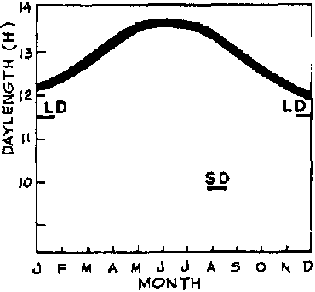
fit photoperiodic patterns. In the Philippines, short-day flowering rice
cultivars are best planted from August to September while long-day flowering
cultivars are best planted December to January. · Select traditional
cultivars which mature only 10-15 days longer than modern rice cultivars if long
vegetative period is not wanted. · Select semi-dwarf traditional
cultivars (Pinili, Bengawan, Lubang, Abrigo, Improved Borong, Senador) to avoid
lodging in typhoon-prone areas. If tall cultivars are used, some tillers should
be cut before flowering to minimize lodging. · Do not plant tall
varieties in:
- soils of inherently high fertility swampy areas -
flood-prone areas - areas with poor drainage - sites with high weed
infestation. Select for traditional cultivars those which have droopy and long
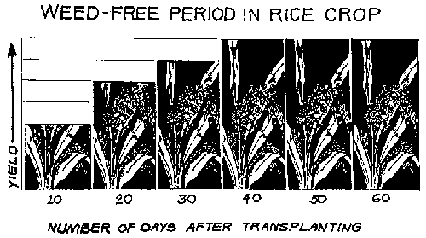
leaves for more effective shading of the weeds. As in HYVs, the field should be
kept weed-free 35-45 days after transplanting.
2. Alter the time of planting. Alter planting schedules to fit
the climate in the area, specially the occurrence of typhoons and floods. The
typhoon season for most parts of the Philippines usually occurs from June to
September. Planting late (September) would be beneficial as grain filling and
maturity will not coincide with the typhoon season. This also minimizes lodging.
3. Modify plant spacing and populations. Wider row spacing is
recommended for traditional cultivars. Wider spacing lessens mutual shading,
making plants sturdier end less prone to lodge.
The following row spacings are recommended for traditional
cultivars:
Rainy Season
Dry Season
0.25 x 0.25 m
0.30 x 0.20 m
0.30 x 0.25 m
0.25 x 0.20 m
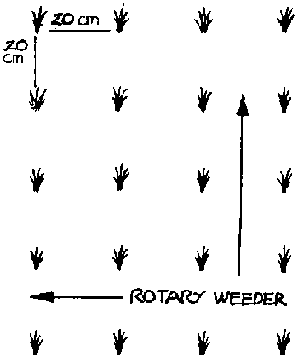
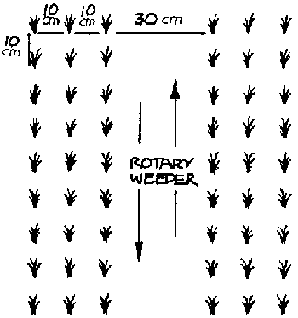
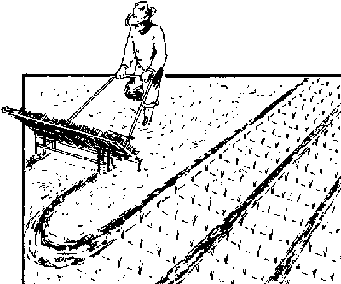
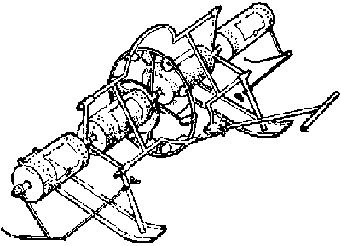
Additionally, a 0.30 x 0.15 m spacing is convenient when rotary
weeders are used.
Planting 1-2 seedlings/hill is recommended. This practice
produces more productive tillers and tends to make plants less likely to lodge.
4. Practice good water management. Keeping rice continuously
flooded makes stems more succulent, thus more susceptible to lodging.
Traditional cultivars do not require continuous flooding during the vegetative
period. However, it is beneficial to flood the field at flowering. Water is
withdrawn once the hard dough stage is reached.
Infields with heavy weed infestation, irrigate the field 2-5
days after transplanting and gradually increase the water level. Water can be
withdrawn once canopy closure is reached.
5. Reduce fertilizer use. Traditional cultivars do not require
as much fertilizers as HYVs. Large doses of fertilizer make plants tall and
prone to
lodging.
Producing rice seeds in a farmer's field
Seeds for planting constitute a considerable portion of a
farmer's production inputs. Ordinary seeds cost from P5.00-P5.50/kg; certified
seeds can cost as much as P8.00-P10/kg. Although the production of rice seeds
for planting requires more special care than production of rice grain for food,
it is possible for the farmer to produce seeds right in the farm. These simple
procedures guarantee reduction in production costs and a steady source of
quality seeds for planting.
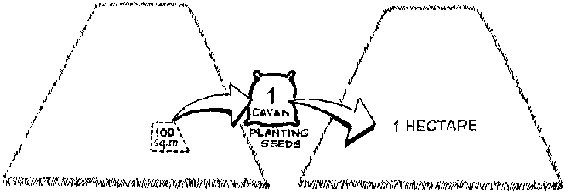
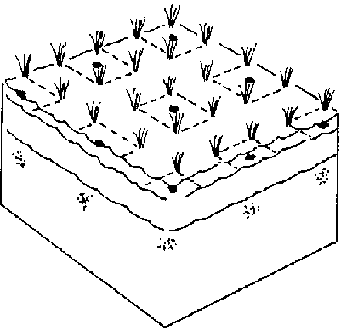
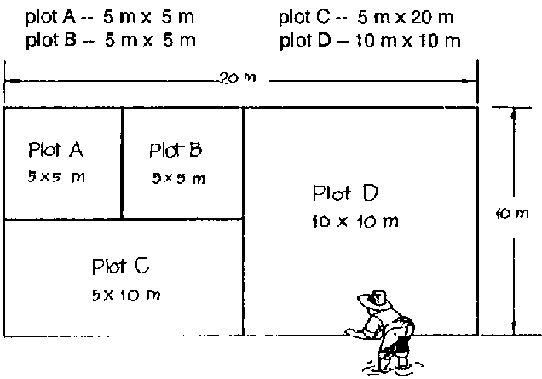
1. Seed and Area Requirement. Estimate the farmer's production
per unit area. For example, if the farmer produces 100 cavans/ha (10,000 sq.m),
then he needs 100 sq.m to produce 1 cavan (50 kg). If seeds are of high quality,
1 cavan is often sufficient to plant 1 hectare (for most cultivars). Thus, if
the farmer needs to plant 5 hectares, then a 500 sq.m seed production area would
be required to harvest 5 cavans of seeds.
Seed and Area Requirement
2. Site Selection and Preparation. Select the best area within
the field for seed production. It should be near the water source, with good
drainage and accessible. The soil should be free from weeds, relatively fertile
and well-prepared. Mark the required seed production area.
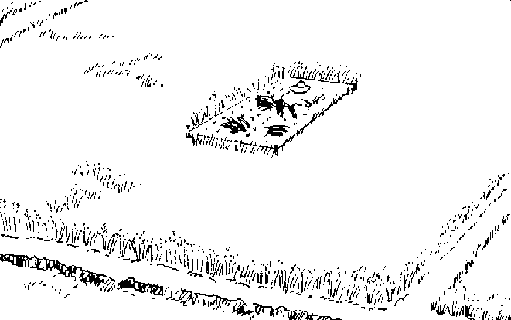
3. Transplanting. If possible, use only seedlings of high
quality (high viability, pure, healthy, etc.) seeds. To ensure uniformity of
growth end easy identification of off-types, transplant only 1 seedling/hill, in
straight rows.
Ideally, plant the whole area with the cultivar of interest to
avoid contamination. However, if there are not enough seeds of the desired
variety, keep the designated seed production area at least 5 m away from other
cultivars.
Transplanting
If using certified seeds, seeds of the same variety which are
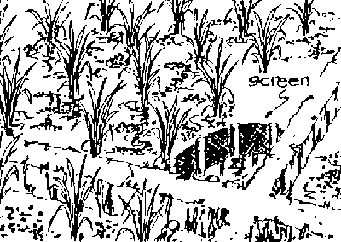
not certified can be planted around it. However, 4-5 rows surrounding the seed
production area should be planted with the same certified seeds. These border
rows will act as "screen," but seeds coming from them will not be used for
planting.
4. Field/Crop Maintenance. Visit. the area several times during
the growing season especially from tillering up to harvesting. Pull out unwanted
plants such as off-types (see box), weeds and other crops. Follow regular soil
management (fertilization, irrigation, etc.) and crop protection practices to
ensure healthy crops.
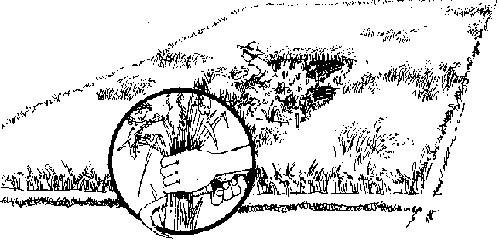
5. Harvesting. To avoid contamination and possible mixture,
harvest the designated seed production area first before the rest of the field.
Seeds can be harvested a few days earlier than the usual harvest time without
sacrificing quality.
6. Threshing, Cleaning, Drying. Process the seeds produced from
the designated seed production area separately. Be sure to clean the thresher,
drying surfaces and seed container properly such that they are completely devoid
of other seeds and other contaminants. Keep seeds of different cultivars
well-dried and distinctly labeled in separate containers.
PULL OUT THESE OFF-TYPES:
1. All plants growing outside or between the rows -- whether
rice or weeds. 2. At tillering stage, all plants not having the same height,
average tiller number, stem and leaf color as the majority. 3. At flowering
stage, all plants not having the same height, average tiller number, stem and
leaf color, average flowering time, flag leaf length and angle as the
majority. 4. At harvesting stage, all plants not having the same height,
average tiller number, average maturity, color, size, shape of grains end
presence of own, flag leaf length and angle as the
majority.
Determination of rice seed quality
Knowing the quality of rice seed will enable one to decide the
appropriate practices that could help maintain or improve the performance of
seedlots.
Seeds on hand can be tested for the following:
1. Dryness. Most seeds, including rice, store better when dry.
High moisture level could result to heating, further accumulation of moisture,
active growth of storage insects and fungi and even unwanted germination. Seeds
which have not been properly dried are also damaged during processing.
- Sundrying for 3-5 days is often sufficient to bring the
moisture content of the freshly harvested seeds down to the safe level (13% or
less). If the seeds have been stored for quite some time or were obtained from
other sources, dryness could be checked by biting the seeds. If brittle, the
moisture content is 13% or less the desired moisture for planting or storage.
The biting test should not be done if seeds have been treated with chemicals. If
not sure, simply redry the seeds for 1-2 days.
Dryness
2. Purity and Seed Health. Impurities, such as weed seeds, other
crop seeds, other vegetative parts and inert matter, should be removed. These
could serve as hosts of crop pests and seed-transmitted diseases or affect seed
(and seedling) performance in the field or in storage. Weed seeds could
germinate in the field and add to the existing weed population. Seeds of other
cultivars, when present, could also lead to genetically impure seedlots.
Purity and Seed Health
- Examine the seedlot for impurities, diseased seeds (symptoms
are discoloration and presence of fungal bodies) and infested seeds (seeds with
holes or are partially eaten by insects, presence of eggs/egg mass or larva).
- If a large proportion of the sample consists of impurities,
the seedlot should be cleaned prior to storage or planting. Cleaning can be done
by winnowing or soaking the seeds in water. Defective seeds, weed seeds and
other inert matter float to the surface, while seeds that sink are of higher
density and are usually of better quality.
- If the seedlot contains a large proportion of seeds of other
cultivars, some form of manual sorting must be done before storage or planting,
unless the mixture was intentional.
- Seedlots which contain a large proportion of diseased or
infested seeds are not recommended for storage or planting. If the proportion of
diseased or infested seeds is minimal, remove such seeds if possible and soak
the rest of the seedlot in hot water (5256°C) for 5 minutes (if seeds are
wet) or 10 minutes (if seeds are dry).
- Other diseases which do not readily show visible symptoms can
be detected only by using special techniques. If these diseases are suspected,
have the seeds certified for health at the Bureau of Plant Industry or do not
use them for planting. Chances of developing diseases in the succeeding crops
are minimized if seeds are harvested from healthy plants and healthy
surroundings.
3. Seed Germination and Seedling Health. Germination results
could serve as a guide as to whether the seeds could or should still be stored,
immediately planted or discarded. Also, they give an idea as to how much seed is
required for planting. Seeds with low percentage germination will not keep long
and will produce less vigorous plants.
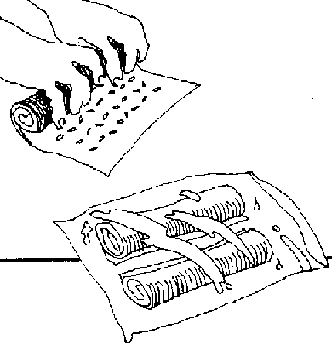
- Sow the pure seeds sampled from the seedlot in moist, clean,
absorbent cloth or paper. Roll the cloth or paper loosely (ragdoll method) or
keep it on a flat surface covered with the same material.
Seed Germination and Seedling Health
Keep the medium constantly moist by watering, taking care not to
flood it. Too much water encourages mold and bacterial growth. Alternatively,
seeds could be kept moist by carefully dipping the rolled medium in a pail of
water, then putting it in a partially opened plastic bag. Keep seeds being
tested in the shade and away from mice, ants and rain.
Keep the medium constantly moist
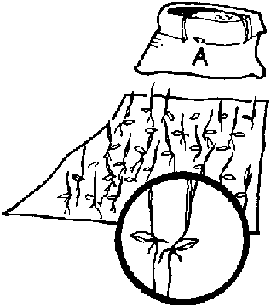
Good germination, good vigor
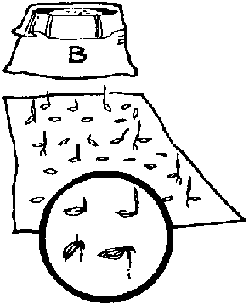
Poor germination, poor vigor
- Count normal seedlings after 4-5 days. Percentage germination
is calculated as
% germination = No. of normal seedlings/Total no. of seeds
tested x 100
- If germination is below 80%, but above 60%, use more
seeds. Do not use or store seeds if germination percentage is below 60%.
- Observe for seed vigor since germination results alone could
not fully predict the performance of seeds especially under stressed conditions.
A seedlot with seeds that emerged rapidly and uniformly is considered more
vigorous than one with slow and non-uniform emergence and growth, even if
germination percentages are comparable.
- Growing seedlings should also be examined for lesions, spots,
blighting (general death of tissue) and streaking. These are symptoms of
potentially serious crop diseases. Treat germinated seedlots showing these
symptoms in the same manner as seeds found to be infected or
infested.
Rice seed dormancy
Rice seeds that do not sprout when planted in favorable soil and
atmospheric conditions are either dead or dormant. Wild and traditional rice
cultivars have higher degrees of dormancy than modern ones. Rice seeds may be
dormant up to 80 days but most of the cultivated ones have only 2-3 weeks
dormancy. A cultivar may be considered slightly dormant (germinates within 15
days from harvest); moderately dormant (germinates within 15-60 days from
harvest); or highly dormant (germinates within 60 days from harvest or later).
Others, especially many modern varieties, have no dormancy at all. Dormancy is
naturally broken through time.
Dormancy can be a plant's natural means to prevent mature seeds
in the panicle from sprouting especially during the rainy season in the tropics.
For man, it is an advantage when seeds being dried are rained on as these could
sprout and lead to losses. However, dormancy becomes a problem when seeds are
purposely planted or assessed for germination.
Traditional and modern cultivars
DETECTION OF DORMANCY:
The degree of dormancy of rice seeds are often judged based on
previous knowledge about the cultivar and the length of time the seeds have been
stored. It can be determined along with the germination rate by sowing mature
seeds in moist sand, soil, absorbent paper or cloth. After 5-7 days the seeds
are checked and any ungerminated seeds that are not moldy or rotten (easily
determined by gently squeezing ungerminated seed) are judged dormant.
BREAKING DORMANCY IN RICE:
Any of the following methods could be used before planting or
during germination testing to break dormancy, but their effectivity depends on
the cultivar or storage time which determine the degree of dormancy:
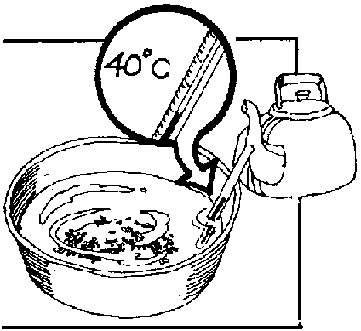
· Soak one part seed in 5-10 parts water at 40°C
(approximated by allowing boiling water to cool off for 8-10 minutes).
· Heat seeds which have been sundried for 3-5 days (seed
moisture content approximately 10%) in an oven at 50-55°C for 7 days.
Soak one part seed in 5-10 parts
water
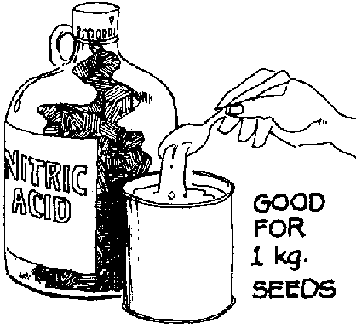
· Soak 1 kg of seeds for 16-24 hrs in 1 liter nitric acid
solution (HNO3) prepared by pouring 1 1/4 tsp (6.3 ml) concentrated nitric acid
(of 68% purity) into a liter of water (a motor oil can = 1 liter). After
soaking, sundry seeds for about 3-7 days.
Soak 1 kg of seeds
Caution: The acid must be poured into the water during the
preparation of the solution. Do not pour water into the acid because an
explosion could result.
· Soak 1 kg seeds for 24 hrs in 1 liter water containing
1/2 tsp fresh sodium hypochlorite (chlorox, available market grade = 5.25%).
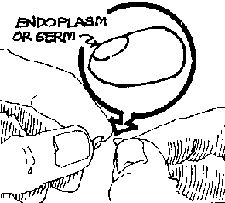
· For a germination test where only a few seeds are used,
manually remove hulls. Be careful not to injure the germ or embryo which is the
part where the plant develops. This treatment is not applicable to wild rice.
Soak 1 kg seeds for 24
hrs
Rice seed collection and handling
Seeds used for planning require more careful handling than those
used for grains (i.e., food or feed). Good quality seed spells good field
emergence, seedling stand, crop growth, yields and healthy vigorous seeds. To
obtain and maintain good quality seed, the following should be done:
Careful handling
Harvesting: As much as possible, harvest only during sunny days.
Do not allow seeds to become too mature. Generally, it is best to harvest seeds
3040 days after heading in the wet season or 25-35 days after heading in the dry
season (depending on earliness of cultivar). Grains in, panicles are yellowish
brown at this stage. This allows enough time for the seeds to complete
development but not too long that significant deterioration in the field occurs.
Seed Collection: Collect seeds only from healthy and vigorous
plants (health of mother plants largely determines health of seeds produced).
These mother plants may have already been identified long before maturity and
have been given special care. Avoid plants along borders. Harvest seeds from the
main, primary and secondary tillers together (seeds from the different tillers
were found to have generally similar yields). If many cultivars are grown
together in an area, make sure the seeds from each cultivar are well-identified
and separated.
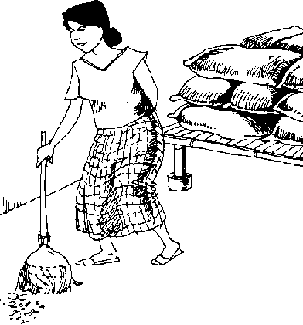
Seed Threshing and Winnowing: The germ or the embryo of the
seeds must be protected from mechanical damage especially during threshing.
Damaged seeds could result in non-germination or in seedlings which are
abnormal. To minimize damage, sundry panicles for a few days before feeding them
into mechanical threshers (if used). Clean threshed seeds by blowing or
winnowing at least twice using native flat trays (bilao) to separate heavier
seeds from light ones and from dust panicles and straw which may contain or
attract insects.
Seed Threshing and Winnowing
Seed Storing and Invigorating: A panicle captains seeds which
are premature (at the base), mature (at the middle) and over-mature (at the
tip). When all the seeds in the panicle are collected, further upgrading is
necessary to obtain only high density grains which are known to perform better
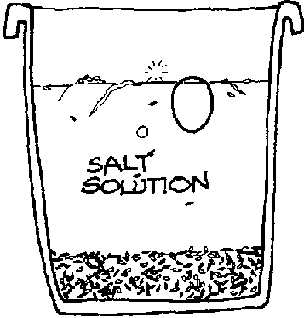
in the field and in storage than those with lower grain density. Immerse and
stir seeds thoroughly in water (1 kg seed/10 liter water). If available, use
6.5% ordinary salt solution (6.5 parts salt to 10 parts clean water, by weight).
Alternatively, use 22% ammonium sulfate solution (2.2 parts salt-to 10 parts
clean water). Ordinary soil/mud may also be used to increase the density of
water. A good approximation of the right mixture (1.08 specific gravity for
traditional tropical varieties) is when the blunt end of a fresh chicken egg
sticks out by half inch above the surface of the solution. Most modern varieties
require only water for effective sorting. Remove all floating seeds and debris
and scoop out seeds that sink to the bottom. The solution may be re-used a few
times. When seeds are meant to be stored, rinse the seeds with clean water.
Dry-soaked seeds back to original moisture content before planting or storing.
Salt solution
For seeds that have been for quite some time (4-8 months) under
ordinary room conditions, treatments may be-done to revitalize already partially
deteriorated seeds to extend their storability or to improve performance of
seeds to be planted immediately (seeds will germinate faster and more uniformly;
plant growth and even yields are also perceptibly improved by approximately
10-20% with invigoration). Soak seeds for 2-8 hours in water (Or in the same
salt solution used for storing, then rinse). Dry seeds properly (back to
original moisture) before further storage or planting. Fresh seeds or heavily
deteriorated ones (less than 60% germination) will not show improvements.
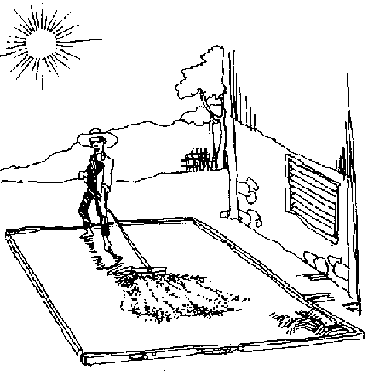
Seed Drying: Spread seeds thinly over a mat, sack or
light-colored sheets laid on concrete floors or elevated surfaces. Airdry seeds
for a day if moisture is relatively high (e.g., seeds wet from soaking or seeds
from early harvest). Dry seeds under the sun for 3-5 days (avoid the 10 am - 2
pm heat) and stir constantly. Well-dried seeds (8-10% moisture) split with a
cracking sound when bitten between teeth.
Seed Drying
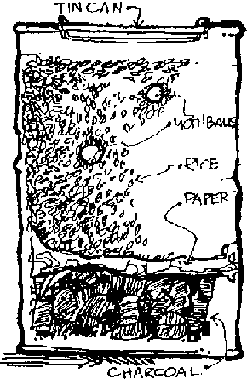
Seed Storage: The three common enemies of a seed in storage are
high moisture (or humidity), high temperature and insect pests. For short-term
storage (i.e., seeds kept for next planting season), keep dry, clean, healthy
seeds in paper or plastic bags and store in a cool shady, dry place in the house
or yard away from rodents and birds. Seeds may be kept in the panicles and hung
on top of the kitchen stove. For longer keeping, use sealed tin cans or
air-tight containers, one-third full of dry charcoal, ash or lime (1 part
material/2 parts seeds to completely fill the container). For insect protection,
coat seeds with ash, lime, vegetable oil (1 tsp/kg seed) or incorporate some
botanicals, e.g., Gliricidia (kakawate) or other protectants like napthalene
balls into the container. If sacks are used for storage, they may be treated
with Makabuhay (Tinospora rumphii) or red pepper extract (prepared by cutting
fresh material into small pieces then soaking and thoroughly mixing these in
water). Sacks are then soaked in this for 4-6 hours, then dried. Do not use the
seeds with protectants as food.
Seed Storage
Seed Germination/Sowing:
1. In flooded soil where oxygen is often inadequate for
germination, soaking seeds with 40% calcium peroxide could increase germination,
seedling survival and even yield.
2. In zinc deficient soil, coating of seeds with zinc oxide (or
other forms of zinc) or soaking 2% suspension improves grain yield by 10-20%.
Seedlings may also be dipped in the same solution before transplanting.
3. For treatments to break dormancy, see appropriate section.
Soaking seeds in 50-56°C for 10-15 mins could break dormancy and at the
same time control common pests and
diseases.
Common botanicals and other materials in rice seed protection during storage
Botanicals have been used for centuries in rice storage in Asia.
This information sheet focuses on the use of plants or its products in the
protection of rice seed. Some of the ideas require further testing and
development while others have long been tested by rice farmers.
I. Materials Verified Effective as Rice Seed Protectants
Scientific Name
Common Name
Preparation
1. Azadirachta indica
Neem (margosa)
Mix 10-20 9 powdered neem seed per kg seed
2. Acorus calamus
Sweet flag (lubi-lubi)
Mix 10-20 g powdered rhizome per kg seed
3. Mentha spicata
Spearmint
Mix 5-20 9 powdered leaves per kg seed
4. Capsicum frutescens
Red pepper (siring labuyo)
Mix 10-20 9 chillies, per kg seed
5. Curcuma longa
Turmeric (luyang dilaw)
Mix 20 9 powdered rhizome per kg seed
6. Piper nigrum
Black pepper(paminta)
Mix 5 9 powdered leaves per kg seed
Other Materials:
1. Wood ash or paddy husk ash
Mix 10-40 9 per kg seed
2. Lime
Mix 10 9 per kg seed
3. Fine sand
Mix 0.5 9 per kg seed
Preparation of Powdered Plants:
Sundry the plant parts (fruit seed, rhizome or leaves)
thoroughly. For rhizomes, faster drying can be done if chopped into smaller
pieces. Cut the plant parts into finer pieces after sundrying. Grind into powder
using a grinder or mortar and pestle. If the powder is not used immediately,
store in tightly sealed jars.
II. The following botanicals have been reported effective
against cereal pests that could also infest rice seeds. However, there have been
no direct reports on actual rice seed storage. You may try them and inform us of
your results.
Scientific Name
Common Name
Preparation
Reported Effect on Insect
Acacia concinna
Soap nut
powdered seed
antifeedant
Angelica glauca
Angelica genus
powdered roots
repellent
Annona squamosa
Sugar apple, atis
powdered seeds
anti-insect*
Aphananixis polystachya
Pithraj
dried leaves
anti-insect*
Artemisia maritime
Wormseed
powdered leaves
repellent
Atlantia monophylla
dried stem and leaves
repellent
Atropa acuminata
Indian belladona
powdered rhizomes
repellent
Caesalpinia pucherrina
Peacock flower(caballero)
powdered flowers
insecticidal: contact poison
Calotropis gigantae
Crown plant
powdered flowers
insecticidal
Cassia absus
Four-leaf senna
dried and powdered leaves
anti-insect*
Chrysanthemum cinerariifolium
Pyrethrum
dried and powdered flowers
insecticidal: contact poison
Clerodendron infortunatum
Bhant
dried leaves
anti-insect*
Datura stramonium
Jimson weed
dried and powdered leaves
repellent
Hyptis spicigera
Mint(suob-kabayo)
3 gm dried powdered leaves per kg seeds
repellent
Justicia adhatoda
Malabar nut tree
dried and powdered leaves
antifeedant
Lecothoe grayana
Fetterbush genus
dried leaves, aqueous extraction
anti-insect*
Luffa aegyptiaca
Sponged gourd
powdered leaves
anti-insect*
Mangifera indica
Mango
powdered leaves
repellent
Melia azedarach
China berry
1-2 parts powdered leaves per 100 parts seeds
anti-insect*
Nicotiana sp.
Tobacco
powdered leaves
insecticidal
Pachyrrhizus erosus
Ubas, sinkamas
5-10 parts powdered seeds per 100 parts stored seeds
insecticidal
Pongamia pinnate
Poonga oil tree
powdered leaves
antifeedant
Sapindus marginatus
Florida soap berry
powdered seeds
antifeedant
Scheichera oelasa
Kesambi
5-10 parts powdered seeds per 100 parts stored seeds
insecticidal
Sterculia foetida
Nitas(Calumpang, Bobog)
1-5 parts dried seeds per 100 parts stored seeds
insecticidal
Swartzia madagascariensis
powdered fruit
repellent
Trigonella foenum-graecum
Fenugreek
leaves and seeds are mixed with seeds
repellent
Vitex negundo
Indian pivet(lagundi)
powdered leaves
insecticidal: contact poison
Xeromphis spinosa
powdered roots and fruits
repellent
REFERENCES:
Handbook of Plants with Pest Control Properties. M. Grainage and
S. Ahmed. 1988. United States: John Wiley and Sons, INc.
Natural Crop Protection in the Tropics. Gaby Stoll. 1986.
Germany: Margraf Publishers Scientific Books, 188 pp.
The Use of Plants and Minerals as Traditional Protectants of
Stored Products. 1980. England: Products Institute, 32 pp.
* Anti-insect is the general effect and the specific action is
not yet
known.
On-farm grain storage
Of the total rice production, an estimated 10-37% is lost in
post-production prom harvesting to marketing). About 12-40% an this overall loss
is attributable to handling and storage losses which may be minimized at the
farm level by observing some simple post-harvest handling practices.
As a general rule, keep storage areas and containers and related
harvesting and post-harvest paraphernalia clean.
The four major areas of concern here are: grain quality before
and during storage, storage conditions, insect control and rodent control during
storage.
1. Grain Conditions
- Store only mature, whole and healthy grain. Broken grain is
prone to insect attack. - Dry and clean the grain well before storing. Some
farmers can determine proper grain dryness by biting a grain sample. If a
moisture meter is available, dry grain to 13% moisture content. Otherwise, dry
it for about 3 days under good sun.
2. Storage Conditions
- Store grain away from wet areas. - Place stored grain
containers where the wind can help cool the containers. - Do not place sacks
of grain near the walls nor place them directly on floors as moisture from the
ground may dampen the grain. - Jute sacks or baskets/bins woven from local
palm or bamboo material are ideal grain storage containers.
Storage Conditions
3. Insect Control
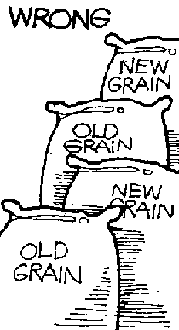
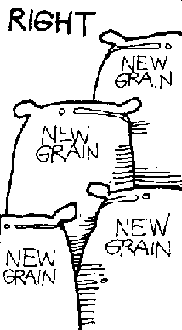
- Do not store grain from a new crop near grain from an older
crop to avoid insects from the old grain from infesting the new crop. - Mix
with the grain dried leaves of neem (Azadirachta indica) and kakawate
(Gliricidia septum), chili, pepper and other local plants that have insecticidal
effects. - Check the grain often especially for insect presence. -
Sunning: Occasionally subjecting stored crop to high temperature, especially
when a large number of insects is present, helps keep insects away (but may not
kill their eggs/larvae). - Keeping grain above the stove (for small
quantities) can help in keeping moisture and insects out.
Wrong
Right
Check the grain
Rodent Control
4. Rodent Control
- Keep the storage area and its surroundings clean to keep
rodents from nesting and hiding in them. - Keep the grass trimmed around the
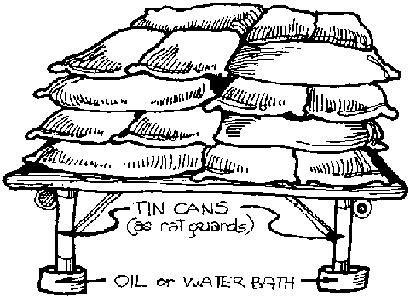
storage/farm building. - Store grain sacks off the floor on bamboo platforms
and place rat guards made of tin cans around the platform legs to keep rats from
climbing. An oil or water bath for the platform legs will keep crawling insects
away from the grain as well. - Keep a cat or a
dog.
Clonal propagation: a method of seed multiplication
What will a farmer who would like to plant a certain rice
cultivar for the coming season do when he or she only has a limited amount of
seeds? Clonal propagation can be resorted to.
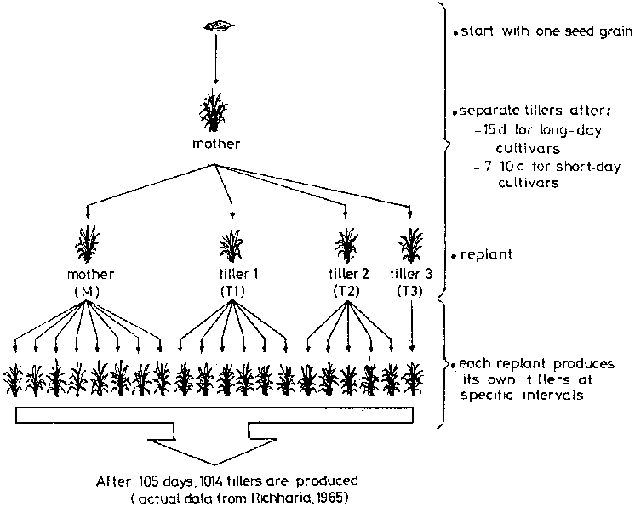
Clonal propagation is a method of multiplying rice plants from a
single grain, an aged seedling or a rice stubble. This method, developed by R.
H. Richharia in India, has several advantages over the conventional seed-crop
multiplication:
- applicable to any rice cultivar - ensures genetic purity
of multiplied material - could be easily adopted by farmers - except for
labor, the system entails minimum costs to farmers.
PROCEDURE:
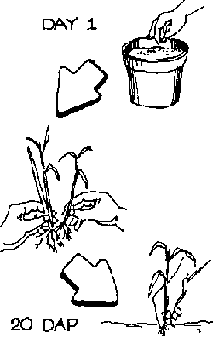
1. Germinate seeds in a pot or en isolated paddy. Initial plant
materials or mother plants are best placed in pots for protection and easier
maintenance.
2. Seeds germinate and grow and form tillers at approximately 12
days after planting (DAP). At 20 DAP, or when tillers possess new roots, tillers
could be separated. Carefully detach these using a razor blade or a thumb's
nail.
3. Plant the separated tillers and the mother plant immediately.
If the procedure is done in the field, use wide-planting distances 0.20 x 0.20 m
to encourage tillering.
4. The individual plants (clones) grow again and produce
tillers. Rooted tillers could again be separated after 15 days. Replant the
tillers after separation. Fifteen days after replanting, all the plants are
uprooted and the tillers are again separated. In the case of short-duration
varieties, the separation of tillers and replanting have to be done earlier
(7-10 days).
Germinate seeds
At 70-80 days after sowing, maximum tillering occurs (or 3-4
primary tillers are formed) for all plants. Separation of tillers can be
continued up to this point. The separated primary tillers thereafter serve as
the new mother plants for subsequent splits. Further separation can be repeated
until a sufficient number of seedlings are produced for field transplanting.
During multiplication, pests should be controlled to prevent losses.
Multiplication
Note: The rate of multiplication is genotype-specific. In
general, medium- and late- maturing cultivars tend to produce tillers longer due
to a time lag between vegetative and reproductive stage. Hence, more tillers are
produced. The number of initial plant material, therefore, has to be adjusted,
i.e., more seeds should be supplied for early-maturing cultivars to compensate
for lesser production of
tillers.
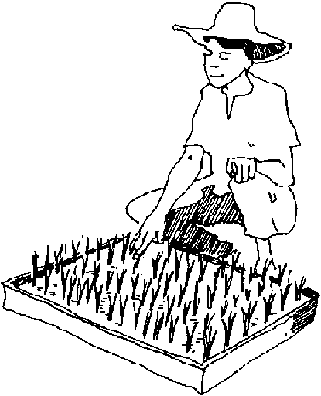
Raising seedlings by the wetbed method
ADVANTAGES:
· Less seeds are required per unit area
transplanted. · Transplanting of seedlings can be delayed. Transplanting
older seedlings shortens the crop's stay in the field, thereby reducing crop
exposure to field risks. · Gives the rice seedlings a headstart over the
weeds after transplanting.
DISADVANTAGES:
· It requires larger areas for the seedbed. ·
Preparation of seedbed, care of seedlings and pulling of seedlings are
laborious. · Seeds are easily carried away by raindrops if heavy rain
occurs shortly after sowing.
PROCEDURE:
1. Locate an area near a water source which is exposed to full
sunlight. A total of 350-500 sq.m of seedbed area is needed to grow enough
seedlings to plant 1 hectare of rice paddy.
2. Prepare the seedbed 30-35 days before the scheduled time of
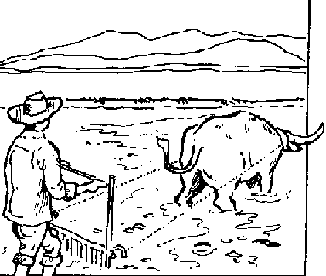
transplanting. Plow and harrow the field thoroughly
Prepare the seedbed
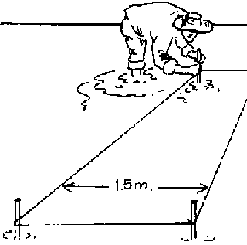
3. Construct raised seedbeds -- 1.5 m wide, 4-5 cm high and of
any convenient length.
Construct raised seedbeds
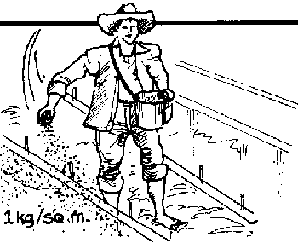
4. Sow the pregerminated seeds uniformly at 1 kg/10 sq.m.
Sow the pregerminated seeds
5. After 4 days, irrigate the seedbed about 23 cm deep end
gradually increase the water level to 5 cm to control weeds and to make pulling
of seedlings easier.
Irrigate the seedbed
6. If you observe nitrogen deficiency (yellowing of the lower
leaves) broadcast 50-100 9 ammonium sulfate/sq.m or 2040 9 urea/sq.m of seedbed
10 days after sowing. Protect the seedlings from carabaos, rats and birds.
Protect the seedlings
7. The seedlings are ready for transplanting at the following
days:
- 16 days for varieties which mature in 115 days - 20 days
for varieties which mature in 116-125 days - 25 days for varieties which
mature in 126 days or more
Increase the water depth to 10 cm the day before pulling the
seedlings. When pulling, hold the seedlings close to the base to avoid injury.
Wash the roots carefully and do not strike the seedlings against hard objects to
remove the mud as this will shock them.
Increase the water depth to 10
cm
The dapog method of raising rice seedlings
ADVANTAGES:
· requires less space for raising seedlings ·
seedlings can be planted early (9-14 days) · labor required for removing
seedlings from seedbed is less than 1/4 compared to the wetbed method ·
easy to transport seedlings from seed bed to the rice paddy
DISADVANTAGES:
· Uses more seeds than the wetbed method. ·
Produces smaller, younger seedlings which - can only be used on farms where
good water management is possible - have a greater chance of being smothered
by Azolla.
PROCEDURE:
1. Locate an area in the field near a water source.
Locate an area
2. Irrigate the field. Plow and harrow it twice to puddle the
soil and bury the weeds.
Irrigate the field
3. Flood the area 2 cm above the soil surface to facilitate
levelling.
Flood the area
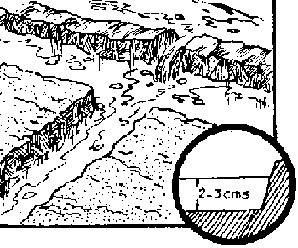
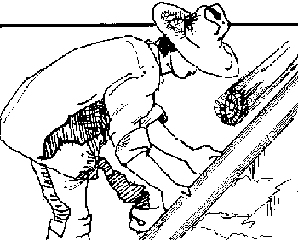
4. Prepare puddled seedbeds 1 m wide end of any convenient
length. The seedbeds are raised 3 cm by taking some soil from the footpath.
Prepare puddled
5. Carefully level the seedbed and allow the soil to settle for
a day.
Carefully level the seedbed
6. Cover the seedbed with plastic sheets or banana leaves. These
materials are used to prevent the roots of the seedlings from penetrating into
the soil.
Cover the seedbed with plastic
sheets
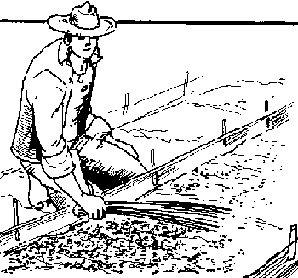
7. Peg sliced banana bracts along the sides of the seedbeds to
prevent the soil and the seeds from being washed away.
Peg sliced banana bracts
8. Sow the pregerminated seeds directly onto the plastic sheet
or banana leaves. Use 1 kg seeds/sq.m. Seedlings from 60 kg seeds will be enough
to plant 1 hectare.
Sow the pregerminated seeds
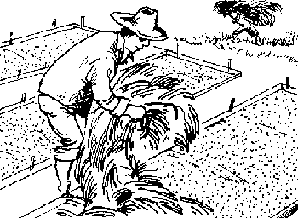
9. Cover the seedbeds lightly with dry rice strew to protect the
seedlings from birds. The straw should be disease -- and insectfree. (Remove the
straw on the sixth day when the seedlings are large enough that birds will no
longer eat them.)
Cover the seedbeds lightly with dry
rice
10. Water the seedbeds three times daily to keep them moist.
Water the seedbeds three times daily
11. Tap the seedlings lightly with a broom at least two times a
day to make sure that all the rice seeds come in contact with the base of the
seedbed.
Tap the seedlings lightly with a
broom
12. The seedlings are ready for transplanting 1014 days after
sowing. Simply roll up the seedlings as you would a mat and carry them to the
paddies for planting.
Roll up the
seedlings
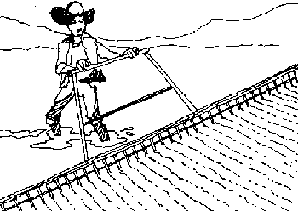
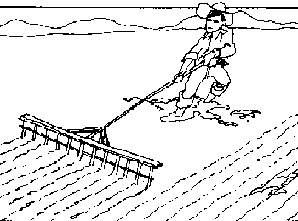
Line markers for rice transplanting
Planting rice in straight lines facilitates rotary weeding,
reduces time needed for other management practices and assures optimum plant
populations. Labor costs for transplanting are higher when using straight-line
planting. However, due to lower weeding costs and higher yields, straight-line
planting is more profitable than not planting in straight lines.
Line marking tools make it much easier to plant in straight
lines. Below are two common markers used by farmers. A farmer can choose from
among them, based on materials available and the size of paddies to be lined.
Harrow type
Rake type
A. Harrow-type Marker
· Used in wide paddies · Can be constructed with
bamboo or wood to look like a harrow · Paddies are lined by first
pulling the marker in an East-West direction (being sure to keep the lines
straight), and then pulling the marker in the North-South direction, making
small squares throughout the paddies (1 man-day needed to mark 1 hectare of
land).
B. Rake-type Marker
· Used in narrow paddies where the harrow type marker,
being wider, would not fit · Can be constructed with either wood or
bamboo · Marking is done in the same way as for the harrow-type marker
(1-1.5
man-days/ha).
Straight-row planting using the square and triple-row spacing
ADVANTAGES OF STRAIGHT-ROW PLANTING:
1. Easier to apply production inputs and implement management
practices 2. Possible to use rotary weeder 3. Promotes optimum plant
population and uniform nutrient uptake
The most common straight-row planting method used by farmers is
the square method ranging from 20 cm to 30 cm, planting 2-3 wet bed grown
seedlings or 4-6 dapog seedlings.
Square
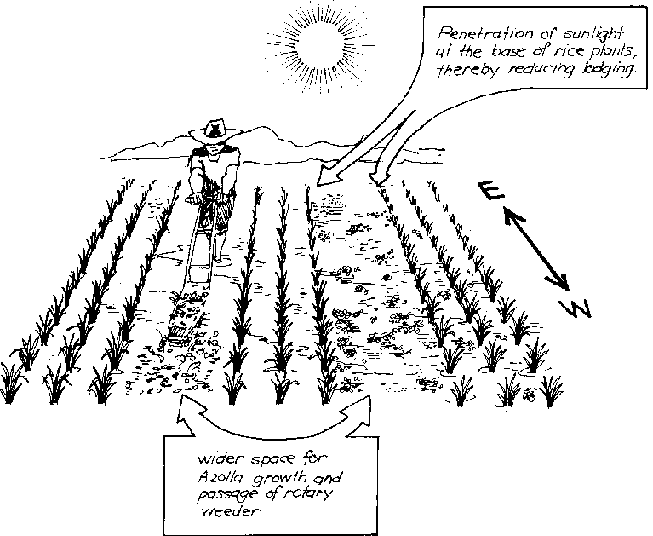
Triple rows
Another planting system which has increased yields above those
using the square method i the triple-row system.
Trials conducted in Navarro, General Trias, Cavite, using IR70
rice variety, gave the following figures (average of 2 cropping seasons):
Spacing Method
Amount of Seeds(kg/ha)
Transplanting(manhours/ha)
Grain Yield(T/ha)
Square Method (20 x 20 cm)
60
120
4.1
Triple-row Spacing
180
300
5.0
Advantages of the triple-row spacing
system
Note: Rows are oriented in an East-West direction so that leaves
can receive the maximum amount of
sunlight.
A manually operated rice transplanter
A manually operated rice
transplanter
The transplanter is applicable where:
1. Farm labor is becoming insufficient to:
· urban migration · simultaneous planting time
among many farmers in an area.
2. Farmers wish to cut down on transplanting costs
BASIC INFORMATION ON THE TRANSPLANTER:
1. Two people can transplant 1 hectare in about 3 days. (The two
will alternately operate the machine and replace seedlings onto the tray.)
2. The rice seedlings are planted in rows (to facilitate other
cultural management practices like weeding) and, therefore, there is no need to
hire line markers.
3. The transplanter is relatively simple to operate and maintain
and is made from locally available materials.
4. A unit costs about P4,500 (as of June 1990).
5. For efficient and effective use of the transplanter, minor
modifications on the dapog or wetbed method of seedling preparation have to be
made.
6. The transplanter owner can earn additional income by
custom-hiring the machine.
A simplified cost comparison between manual transplanting and
using the transplanter is shown below:
Manual Transplanting
Transplanter
Labor requirement to transplant x 1 hectare
25 mandays (ma)
6 mandays (ma)
Estimated transplanting cost/ha/yr for 2 croppings*
(25 ma/cropping x 2 croppings x P50/md) + (P100 for line
marking) = P2,600.00
(6 ma/cropping x 2croppings x P75/md) + (P900 depreciation cost)
= P1800.00**
* Assuming P50/md for manual transplanting and P75/md for
operator of transplanter. ** Assuming P4500 cost of transplanter and a
lifespan of five (5) years. Note: Aside from the P800 savings on transplanting
costs, the owner can custom-hire the unit to earn additional income.
For details and technical assistance, contact:
1. Agricultural Engineering Department IRRI, Los Ba�os Laguna,
Philippines
2. Agricultural Mechanization Development Program CEAT, UP at
Los Ba�os College, Laguna,
Philippines
A drum seeder for direct seeding
In areas where broadcast seeding is practiced, the drum seeder
offers several advantages:
· reduces seeding rate to about 50-100 kg/ha without
compromising yield (broadcast seeding rate requires 100150 kg/ha). Savings in
seed costs are realized.
· uses pregerminated seeds as traditionally practiced by
farmers.
· increases yields due to:
- better weed control (i.e., facilitates use of mechanical
weeders) - better fertilizer and sunlight distribution due to less crowded
pants - in general, labor requirements for the following farm operations may
be decreased. weeding, fertilizer application and harvesting.
A drum seeder for direct seeding
SOME TRADE-OFFS IN THE USE OF THE DRUM SEEDER:
· increase in labor requirement for land preparation
(especially in soil levelling to ensure uniform seed distribution) and planting
operations · cannot adapt well to wet season planting as heavy rains
will destroy the planting line · water depth control during seeding
operation is essential · a drum seeder unit costs approximately P1750
(as of December 1989) and has an expected life span of about 5 years.
The drum seeder is being adapted in some areas of the province
of Oriental Mindoro and the following tables present a comparative study
conducted by UPLB, IRRI and the government of Oriental Mindoro with 11
farmer-users.
Table 1: Effect of drum seeding on some farm operations as
compared to broadcast seeding (1987 Dry Season, Oriental Mindoro).
Farm Operations
Increase ( + ) or Decrease (-) in Labor Requirement
Number of Farmer-Respondents (Total of 11 Farmers)
Land preparation
+ 0.7
2
Planting
+ 11.9
11
Weeding
- 61.5
9
Fertilizer application
- 1.0
3
Chemical control
- 2.3
4
Harvesting
- 7.6
3
Table 2. Effect of drum seeding on seed input and yield
compared to broadcast seeding (1987 Dry Season, Oriental Mindoro).
Input
Increase ( + ) or Decrease (-) in Amount (kg/ha)
Number of Farmer-Respondents (Total of 11 Farmers)
Seed requirement
- 62
11
Yield
+ 824
10
For more technical assistance (drawings and fabrication
techniques), contact:
1. Agricultural Engineering Division International Rice Research
Institute (IRRI) Los Ba�os, Laguna, Philippines
2. Agricultural Mechanization Development Program (AMDP) College
of Engineering and Agro-lndustrial Technology (CEAT) University of the
Philippines at Los Ba�os (UPLB) College, Laguna,
Philippines
Inoculating rice seedlings with Azospirillum
Azospirilla are a genus of bacteria which live and can colonize
the roots of forage and grain grasses and exert beneficial effects on their
growth. This grass-bacteria symbiosis differs from the legume-rhizobium
symbiosis in that the former does not have root nodulation as a manifestation of
the association. These organisms reside mainly at the zone of root elongation,
bases of root hairs and root interior.
Some work has been done in rice particularly in India and now in
the Philippines. One recent test in India yielded 6.5 T/ha with Azospirilla vs.
4.4 T/ha without it. In experiments in Cavite and Negros provinces, the use of
Azospirilla in combination with 40 kg N increased rice yields by 24% and 55%,
respectively, while Cavite experiments using only Azospirilla increased rice
yields by 18%.
The exact cause for the yield increases is not yet clear.
However, it is known that a higher percentage increase in yield occurs under
conditions where lower amounts of fertilizer N is used.
Aside from the nitrogen fixation, several benefits can be
derived from azospirillum inoculation: it promotes root hair development and
branching -- increasing the uptake of NPK and microelements; improves water
status of plants; and increases dry matter accumulation and grain yield.
Inoculating plants with azospirillum can reduce the required nitrogen fertilizer
from 1/3 up to 213.
HOW TO INOCULATE RICE SEEDLINGS:
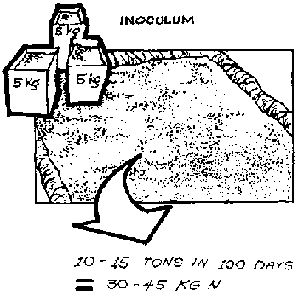
1. Mix the inoculant with water. About 750-1000 9 inoculant is
required to treat seedlings needed to plant 1 hectare.
2. Put the mixed inoculant in a container for dipping the
seedlings. If a big container is not available, prepare a bunded piece of land
and line this with plastic
3. Soak the seedlings into the mixture for at least 3 hours. If
possible, inoculate/soak the seedlings overnight before transplanting.
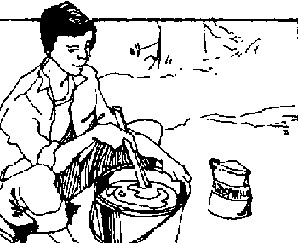
Mix the inoculant with water
Put the mixed inoculant in a
container
Low-external Input Rice Production (IIRR, 292 p.)
Integrated nutrient cycling
(introduction...)
Integrated nutrient cycling in lowland rice production: an ecosystem approach
Nutrient cycling on a basic irrigated or rainfed rice farm
Using soil test values to determine fertilizer needs for rice
Fertilizer placement in wetland rice
Using limited nitrogen fertilizer with HYVs
Treatment for zinc deficiency in lowland rice
Fertilizer from livestock and farm wastes
Chicken manure for lowland rice
Food, fodder, fertilizer and fuel from paddy dikes
Using rice straw for lowland rice farming
Azolla: green manure profile
Using azolla as fertilizer for lowland rice
Multiplying the azolla
Troubleshooting common problems in azolla production
Green leaf manuring in lowland rice
Green manure utilization in lowland rice
Sesbania aculeata: a bio-fertilizer source for lowland rice
Indigofera: green manure profile
Crotalaria: green manure profile
Lablab bean: cover crop/green manure profile
Rice bean: green manure profile
Sesbania spp.: green manure profile
Animal and green manure practices among the Mangyans (Alangan tribe in Mindoro)
Waste management practices (Tuwal and Ayangan tribes in Ifugao)
Low-external Input Rice Production (IIRR, 292 p.)
Integrated nutrient cycling
Integrated nutrient cycling in lowland rice production: an ecosystem approach
Basic features
OTHER FEATURES:
· Each component introduced into the system should
contribute toward the goals of regenerating the land and sustaining the farming
system.
· The system exhibits redundancy: each function meets more
than one need, each need is met by more than one function.
· It starts simply and through careful observation and
analysis of the area's resources, it evolves into a more complex, stable system.
TECHNICAL PROFILE:
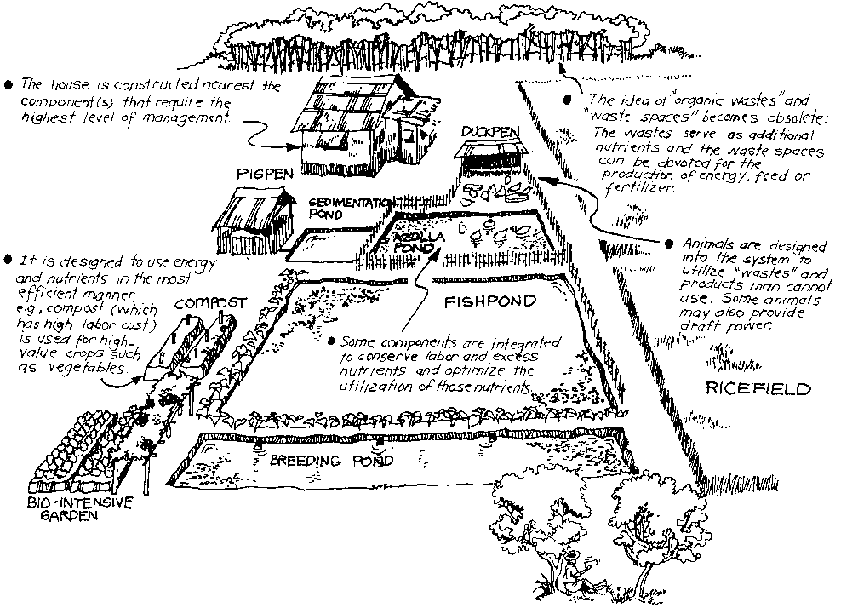
As an example, a small area of marginal land near a water source
(irrigation canal, creek or spring) can be used for the components below:
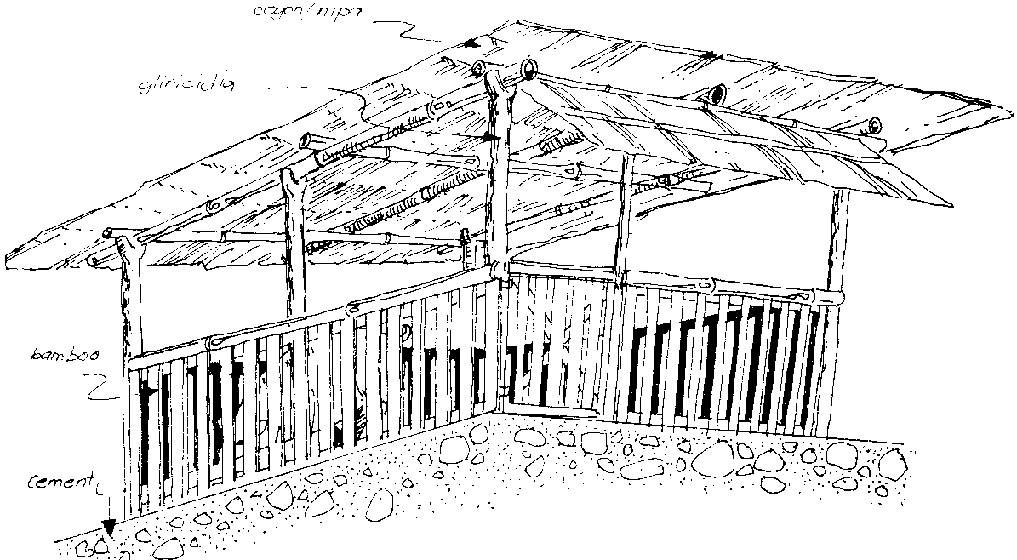
· Pig pen (2m x 4m) -- Good for 2-3 heads of upgraded
breed. Use local materials like bamboo for pen enclosure, cogon or nipa for
roofing. Cement the flooring.
· Sedimentation pond (2m x 4m) -- One meter deep. Install
spill pipe in the dike 30 cm above pond floor for excess water going to the
Azolla pond.
· Azolla pond (3m x 4m) -- Maintain 30-40 cm water depth.
Install another spill pipe in the dike for excess water going to the fish pond
and to control water depth in the Azolla pond to 40 cm above floor level.
· Duck pen (1.5m x 3m) -- Constructed near the Azolla pond
for 1 male and 8-10 female ducks.
· Fish pond (10m x 3m) -- Maintain 100 cm water depth for
600 Tilapia nilotica or other fish species fingerlings.
· Fish breeding pond (2m x 10m) -- Maintain 65-70 cm water
depth for 8-10 female and 2 male Tilapia or other fish species breeders.
· B.l.G. plots (1.5m x 3m) -- For production of various
indigenous vegetables.
POTENTIAL PRODUCTION:
· Pig pen -- Gross sales in the amount of P6,000.00 for 3
upgraded (75%) pigs in 6-7 months using low-cost feed combinations. ·
Sedimentation pond -- Ready source of sludge for the garden and material for
composting. · Azolla -- Provides fresh or cooked feed for swine, ducks
and fish or can be used as green manure or composting material. · Ducks
-- Regular source of meat and eggs for the family after 6 months. · Fish
pond -- 50-55 kg of Tilapia can be harvested within 6 months. · Garden
-- 1-1/2 kg of various vegetables can be produced daily throughout the
year. · Compost --1.5-2.5 tons of compost can be produced
annually. · Woodlot -- Fast-growing shrubs or trees can provide the fuel
needs of the household. When planted along the paddy dikes and other waste
spaces, the woodlot can also be a good source of wood for fence posts,
trellises, etc.
EXERCISE TO INCREASE FARMER AWARENESS OF INTEGRATED NUTRIENT
CYCLING:
While rice-based lowland farm systems are principally devoted to
rice production, they also can involve a variety of production components and
complex integrated systems. Small farmers have traditionally managed these
complex farming systems and have an acute awareness of the cycles and flows of
nutrients which occur on their farm within a cropping season or throughout the
year.
However, resources can oftentimes be more intensely optimized by
allowing farmers to critically analyze their farm nutrient flows in a systematic
manner. This process can be implemented using a simple exercise with farmers.
This exercise also helps field workers improve their skill in eliciting
indigenous knowledge from farmers through the use of farmer's diagrams.
1. Explain the entire process to the farmers or ask them to help
you (the technician) understand their systems -- an important reversal for those
who are usually telling farmers what to do.
2. Farmers are asked to list the individual components which
make up their farm, i.e., paddy, fishpond, carabao, etc.
3. Farmers discuss the concept of nutrient flows within the
farm. Linkages between the different components should be emphasized. The
technician or farmer-leader can facilitate the discussion with leading
questions.
4. Farmers are shown a design of the nutrient flows of an actual
farm and asked if they could produce a similar design for the conditions found
on their farm. Many may answer negatively, stating that they cannot draw such a
"professional" design ("I can't draw like that.").
5. The farmer-leader or technician should then begin drawing a
design using newsprint and pens.
6. The farmers are then provided with sheets of newsprint and
pens and are asked to attempt to diagram the components of their farm and the
nutrient flows which integrate those components. Exhaust all enterprises for
possible inputs and outputs. Include all plots and land types that farmers have
access to, even community resources.
7. The farmer-leader or technician should then assist the
farmers and guide them in mapping out their individual farm design. All attempts
at drawing should be validated -- anyone can draw to some extent.
8. Upon completion, the farmers are asked to present their
designs for peer review and discussion by their farmer colleagues.
9. Finally, if desired, an artist can draw the design, based on
the farmer-drawn diagram, to give the reproductions a "professional" touch.
This exercise provides a valuable methodology for farmer
interaction. It is a learning process for farmers showing alternative uses of
farm wastes and by-products being used by other farmers. The visual presentation
reinforces what a farmer learns long after the exercise is completed. It is a
learning process for technicians and field workers who learn about traditional
knowledge. It helps to build a more equal relationship between farmers,
extensionists and researchers. It helps to build self-reliance and confidence
among farmers to make changes and adaptations of their farming systems, as well
as validating farmer knowledge among farmers.
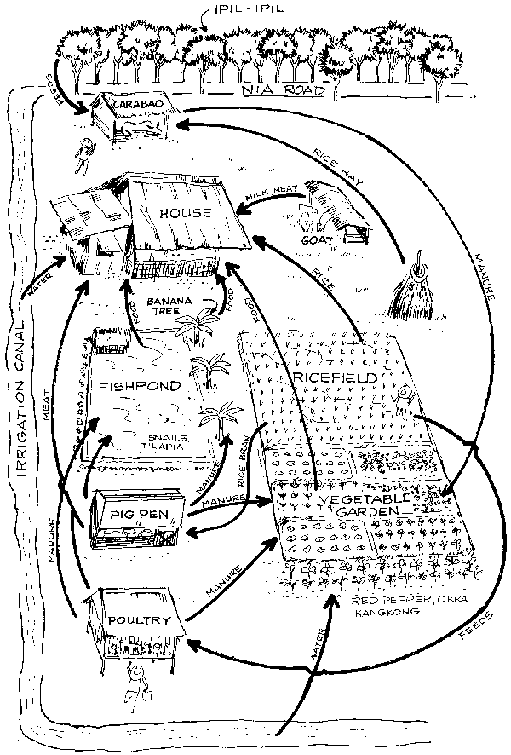
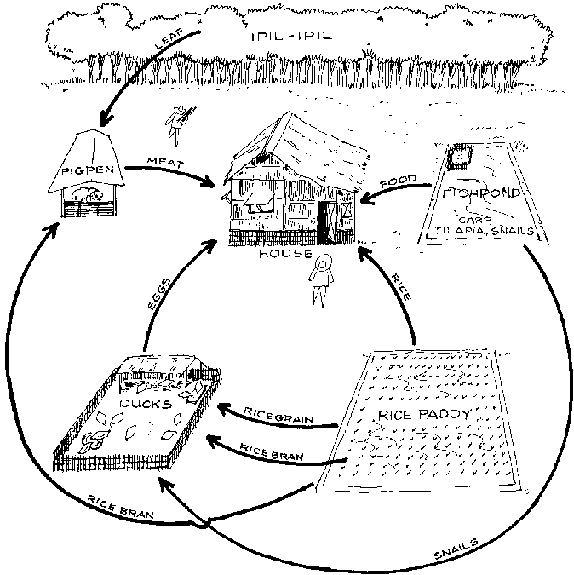
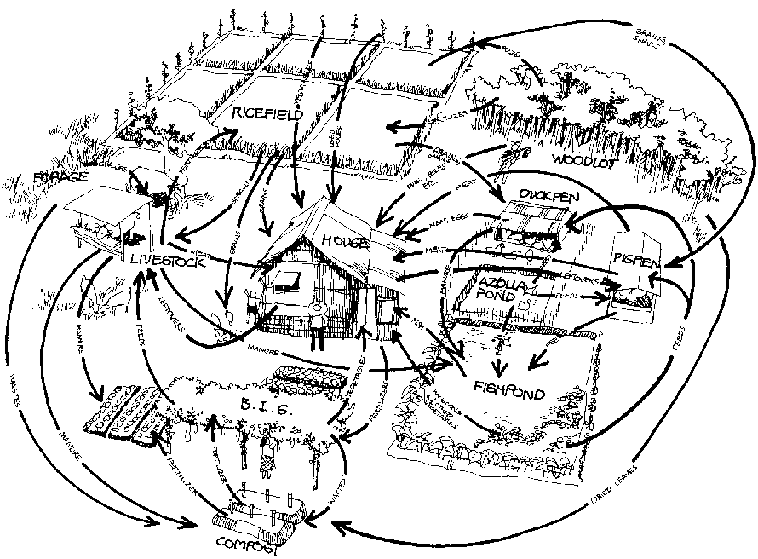
The following pages present artist reproductions of rice-based
farming systems. The first design depicts a "typical" rice farm with little
integration, under-utilized resources and costly offfarm resources. The other
four are actual farmer designs of rice-based farming systems from the
Philippines. All of these designs were developed using the exercise outlined
above and have helped farmers to increase their own awareness of nutrient flows
within their
farm.
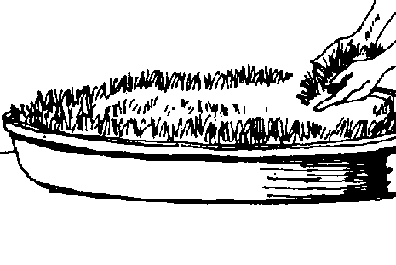
Nutrient cycling on a basic irrigated or rainfed rice farm
Nutrient cycling on a basic
irrigated or rainfed rice farm
R. Primero, Novarro, Gen.Trias
Cavite, Philippines
V Pakingan, Niuqan, Sn. Francisco
Cavite, Philippines
D. Martinez, Aglipay, Quirino
Philippines
L. Ignacio, Sn. Francisco Cavite,
PhiIippines
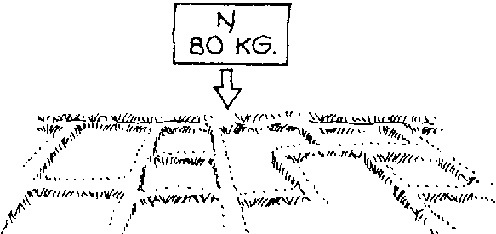
SOME POTENTIAL NITROGEN SOURCES FOR LOWLAND RICE THAT COULD
SUPPLY 80 KG N/HA.
One hectare lowland
Chemical fertilizer
Green manure
Animal
manure
Using soil test values to determine fertilizer needs for rice
Soil test values are a good guide to determining plant nutrients
to be added in the form of organic and inorganic fertilizers. Many nutrients
when limited can be major factors in reducing crop yields -- even when they are
needed in very small quantities.
Observing deficiency symptoms in the standing crop itself is
another useful method of determining plant nutrients which might be lacking.
1. Nitrogen Deficiency
· yellow to yellowish-green color, appearing first on older
leaves · stunted and spindly growth · reduced
tillering · if deficiency persists until maturity, the number of grains
per head is reduced.
2. Phosphorous Deficiency
· reduced tillering · stunted growth ·
decreased grain formation · older leaves show orange or purplish
discoloration.
3. Potassium Deficiency
· low tillering and stunting · in severe cases,
includes a yellowish-orange to yellowish-brown discoloration starting at the tip
of older leaf blades and gradually moving toward the base · necrotic
spots may appear on the leaf blades · short, droopy and dark green
leaves.
4. Zinc Deficiency
· brown spots appear on older leaves · the spots
enlarge and coalesce, giving the leaf a brown color · low tillering and
stunted growth · the midribs of the younger leaves, especially the base,
become
chlorotic.
Fertilizer placement in wetland rice
Paddy soils are characterized by two distinct layers: 1 ) a
surface oxidized layer a few millimeters to a centimeter present at the soil
interface; and 2) an underlying reduced layer (anaerobic) which is the principal
zone of root development. The fate of applied N and its efficient use depend on
where it is placed.
Paddy soils
Broadcasting ammonium-based fertilizer in the oxidized layer is
an inefficient method of fertilizer application. In this method, nitrogen is
lost by a combination of nitrification-denitrification, ammonium volatilization,
leaching and surface run-off. As a consequence, a maximum of only 28% of the
total applied nitrogen is eventually taken up by the plant.
Broadcasting ammonium-based
fertilizer
DECREASING N-FERTILIZER LOSSES IN PADDY SOILS:
N-availability could be increased by applying fertilizer in
soils without standing water or by deep placement into the reduced zone. The
following are methods by which this could be accomplished:
1. Apply N in split. Broadcast the first split to a puddled
field without standing water, thoroughly incorporating it into the soil and
introducing water 4 days after transplanting. The final top-dressing of N should
be made at 5-7 days before panicle initiation into floodwater not exceeding 5
cm. Thorough incorporation could also be done by using a rotary weeder.
Apply N in split
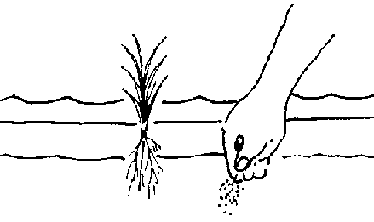
2. Another method is deep placement or applying fertilizers into
the reduced zone. This method limits N losses and assures longer availability of
nitrogen for the plant. A maximum of 68% of the total N applied can be obtained
by the plant.
Applying fertilizers
Deep placement could be accomplished by manually placing
fertilizer 10-15 cm deep from the soil surface and between alternate rows and
hills after transplanting or just before or at panicle initiation. Prilled urea
or a pinchful of urea may be used for this method. However, no data are
available for urea. The mudball could also be used. This technique, developed by
the Japanese, consists of covering a certain amount of urea with mud and then
placing it 10-15 cm from the soil surface. Although the mudball technique is
known to increase plant recovery of N. this has not been widely adapted because
it is too labor-intensive.
A less laborious procedure is applying N fertilizer between rows
right after transplanting or at panicle initiation and then incorporating it
using a rotary
weeder.
Using limited nitrogen fertilizer with HYVs
Even when using biofertilizers, farmers often use small amounts
of chemical nitrogen (N) fertilizer to obtain increased yields. One of the
simplest, lowest-cost ways to increase the effectiveness of these small amounts
of fertilizers is by applying them at the right time and in the right manner.
With good fertilizer management, yields can be increased by 0.50.8 ton/ha over
poor management practices even when using small amounts (15-30 kg N/ha) of
fertilizer.
Using limited nitrogen fertilizer
· Best split method.
The best method of fertilizer application for lowland rice is
still the best Split where 2/3 of the nitrogen and all the phosphorous and
potassium fertilizers are broadcast and incorporated thoroughly into the soil
without standing water during final harrowing. The remaining 1/3 is top-dressed
5-7 days before panicle initiation (DBPI) of the crop. This should be practiced
if the rate of application is 60 kg N/ha or more.
· Time of application if less than 60 kg N/ha is available.
Considering the limited availability of fertilizers due to high
costs, the rates of application may be as low as 13 kg N/ha. The table on the
other page shows how to use limited N fertilizer with the commonly grown
high-yielding rice varieties.
· Procedure when basal application of nitrogen fertilizer
is missed.
Topdress one half of the total N requirement at 10-15 days after
transplanting for early-maturing varieties (100-1 15 days) and 20-25 days for
medium-maturing varieties (116-135). The remaining half should be applied 5-7
DBPI.
· Use of green manure in combination with chemical
fertilizers.
Research has indicated that in addition to supplying the green
manure N. using green manure can also increase the efficiency of chemical
fertilizers used. When using minimal amounts of chemical N (30 kg/ha N or less)
with a green manure, all chemical N should be applied 5-7 DBPI.
REFERENCE: Rice Production at Cost-Reduced Technology. Compiled
by: Damaso Callo, Jr., Rizalino Dilag, Jr., Jesus Sumangil and Rustica Bautista.
FERTILIZER MANAGEMENT:
Amount of Nitrogen
Method of Application
If only 30 kg/ha N (or less) is available (1 1/2 bags 45-0-0 or
3 bags 21-0-0)
No basal application should be made. The entire amount should be
applied into 5 cm of water at 5-7 days before panicle initiation(5-7 DBPI).*
If only 40 kg/ha N is available(2 bags 45-0-0 or 4 bags 21-0-0)
20 kg N/ha (1 bag 454-0 or 2 bags 21-04) should be applied to a
puddled field with or without any standing water and thoroughly incorporated
into the soil and water is introduced 4 days after transplanting (DAT). The
remaining 20 kg N/ha is to be applied into 5 cm of water at 5-7 DBPI.
If only 50 kg/ha N is available (2 1/2 bags 45-0-0 or 4 bags
21-0-0)
30 kg/ha (1 1/2 bags 45-0-0 or 3 bags 21-0-0) should be applied
to a puddled field without any standing water and thoroughly incorporated into
the soil and water is introduced 4 DAT. The remaining 20 kg N/ha is to be
applied into 5 cm of water at 5-7 DBPI.
If only 60 kg/ha N is available(3 bags 45-0-0 or 6 bags 21-0-0)
40 kg N/ha (2 bags 45-04 or 4 bags 21-0-0) should be applied to
a puddled field without any standing water and thoroughly incorporated into the
soil and water is introduced 4 DAT. The remaining 20 kg N/ha is to be applied
into 5 cm of water 5-7 DBPI.
Note: Beyond 40 kg N/ha, always split the application of
fertilizer.
Treatment for zinc deficiency in lowland rice
Many farmers in lowland areas mistakenly identify zinc
deficiency symptoms (yellowing of rice plant during vegetative stage, stunted
growth and reduced tillering) as tungro disease resulting in heavy usage of
pesticides and serious damage to ecological systems.
Zinc deficiency generally only occurs in those ricelands where
water is present year-round or where soil pH is above 7.0. Locations in the
Philippines where zinc deficiency has been reported include Agusan del Norte and
del Sur, the Bicol region, Cebu, Davao, Ifugao, Laguna, Leyte, Misamis Oriental,
Negros, Quezon and Pangasinan. It causes a significant reduction in yield where
it occurs and is easily and inexpensively remedied.
By familiarizing themselves with the symptoms of rice tungro
virus and zinc deficiency, farmers can quickly determine if tungro-like symptoms
appearing in their fields are due to zinc deficiency. This will help aid them in
correcting the problem accordingly.
When tungro-like symptoms appear in the farmers' fields in the
locations listed above, farmers can compare the symptoms of zinc deficiency and
rice tungro virus to aid them in correcting the problem.
ZINC DEFICIENCY
TUNGRO
1. First symptoms appear 2-4 weeks after transplanting.
Symptoms occur at any stage of rice growth including seedling
stage.
2. No presence of green leafhopper or zigzag leafhopper.
Presence of green leafhopper and zigzag Ieafhopper.
3. In each stage patches of affected plants are found throughout
the ricefield.
In early stages, individual infected plants are scattered
throughout the rice seedbed or field.
4. Rusty brown discoloration on the old leaves and chlorosis at
the base of the younger leaves. Interveinal chlorosis or stripping at the base
of the emerging leaf.
Leaf color changes from green to light yellow to orange-yellow
to brown-yellow, starting from the tips of older leaves young leaves are often
mottled or have pale green to white strips of dfflerent lengths running parallel
to the veins.
5. When zinc deficiency is severe, NP fertilization
significantly lower yields or even kills plants.
No negative response to NP fertilization.
Since zinc deficiency is caused by prolonged submergence, the
problem can often be reduced by simply draining the field for several days.
However, this is only effective in soils with pH below 7.
For succeeding crops, zinc deficiency should be treated directly
by applying zinc to the soil or by dipping rice seedlings in a zinc oxide
solution.
HOW TO TREAT ZINC DEFICIENCY:
Option No. 1
1. Evenly broadcast zinc sulfate at 3-5 kg/ha just before the
final harrowing. The zinc sulfate can be mixed with other basally applied
fertilizers (if being used). 2. Harrow/level the rice field and transplant
rice seedlings the next day.
Option No. 2
1. If zinc sulfate is not available or if zinc oxide is cheaper,
zinc oxide can be used. Mix 1 kg of zinc oxide with sufficient water to make a
solution of large enough volume to soak the seedlings needed to plant 1
hectare. 2. Put the mixed solution in a container for dipping the seedlings,
or if no available container is large enough, the seedlings can be soaked in the
field by preparing a shallow dipping pond lined with plastic. 3. Soak the
rice seedlings in the mixture for at least 3 hours (or overnight) before
transplanting.
Note: For safety reasons, read the label before using zinc
oxide.
Fertilizer from livestock and farm wastes
The usual method of handling livestock wastes results in the
loss of most of the nutrients found in the urine. The use of bedding materials
helps minimize the loss by absorbing the urine and capturing those nutrients.
Moreover, these materials contain residual plant food, adding to the overall
nutrient value of the compost.
Fertilizer from livestock and farm
wastes
PROCEDURE:
1. Chop or shred the materials (dried rice straw/rice stubbles,
grass clippings, uneaten green feeds, etc.) so that they are easier to spread
and will decompose faster. Coffee hulls and saw dust can also be used.
2. Spread a six-inch layer of litter bedding over the floor
space. Allow manure and urine to accumulate.
3. After 34 days, the bedding materials will have been fully
soaked with urine. Mix them so as to incorporate the manure. Put the bedding in
a pit or a pile fully covered to conserve the nutrients. The compost is ready
for use in one and a half months or less.
4. Provide fresh bedding materials as in #2.
TECHNOLOGICAL PROFILE:
· Cattle with an average initial weight of about 150 kg can
produce a total of 2.23 tons of fresh manure over a fattening period of 180
days. · On the average, a cattle or carabao excretes fresh manure
equivalent to about 7.5% of its body weight. · By wise management,
animal manure can return to the soil 70% of N. 75% of P and 80% of K. ·
Excess nitrogen from the digested protein is excreted in the urine as urea in
cattle and goats.
- Fifty percent of the value of the waste is contained in the
urine. - Urine contains 2/3 of the N and 4/5 of the K discharged by an
animal. - Elements in urine are more quickly available because they are in
solution. - Urine is also an especially good activator for converting crop
residues to humus.
REFERENCES:
P.S. Faylon and M.R. Deriquito. Livestock Manure as Fertilizer:
Waste Not, Want Not.
J.F. Rodale. The Complete Book of
Compost.
Chicken manure for lowland rice
The prohibitive costs of inorganic fertilizers have led farmers
to look into less expensive substitutes. Among those with good potential,
chicken manure is preferred because it is readily available and has a higher
nutrient composition. A fresh litter can contain as high as 3.17, 3.05, and 2.35
percent of N. P and K, respectively. In addition, chicken manure slowly builds
up the organic maker of the soil and supplies trace amounts of some
micronutrients (Cayton et. al, IRRI).
Chicken manure for lowland rice
Micronutrients
Contribution in kilogram per 100 kg. dry chicken manure
Mg Magnesium
1.08
Fe Iron
1.17
Zn Zinc
0.055
Mn Manganese
0.175
Ca Calcium
0.25
Cu Copper
0.010
1. Studies show that raising chickens year-round can assure the
farmer a steady supply of fertilizer for his farm. One hundred (100) birds
reared in 42 days (6 batches/yr) is expected to reduce requirement for urea by
27.4 %/ha/yr (2 croppings).
2. The birds are raised following the all-in-all-out method,
with two weeks interval between batches to allow for thorough cleaning of the
poultry house. This also prevents possible pest outbreaks.
3. The birds fed with commercial feeds are known to produce
0.045 kg./bird/day with 3.17, 3.25, 2.35% of N. P. K, respectively.
4. Two batches with 100 birds per batch (3% mortality) could
provide 366.66 kgs. chicken manure equivalent to 11.62 kg N, 11.92 kg P and 8.61
kg K.
Savings from substituting urea (45-0-0) with chicken manure from
two batches of broiler chicken at 100 birds per batch.*
First Cropping**
· Average kg urea (45-0-0) applied/ha
127.50
· Multiplied by N content of urea
x 0.45
· Computed kg N applied/ha
57.38
· Less kg N from chicken manure
11.62
· Kg N required from urea
45.76
· Divide by N content of urea
- 0.45
· Kg urea that still needs to be applied
101.69
· Total kg urea substituted by chicken manure
25.81
· Savings using chicken manure (total kg x price of urea
P4.00)
103.24
Note: To avoid possible negative effects on the rice crop,
chicken manure should be incorporated in the field during land preparation.
* Savings can be increased as the amount of chicken manure
applied to the field is increased. ** All cost data were taken from the
baseline survey on Navarro farmers conducted by the Research Division, llRR (2
croppings) in Navarro, General Trias,
Cavite.
Food, fodder, fertilizer and fuel from paddy dikes
Throughout Asia, trees, shrubs and grasses have been grown on
dikes to supply the needs of many families. Using paddy dikes or bunds to
produce food, fodder, fertilizer and fuel saves both time and labor. Space is
used that would otherwise be wasted.
Food, fodder, fertilizer and fuel
from paddy dikes
· Time and Labor Saving. Instead of having to go long
distances to get firewood or fodder for livestock, the farmer can harvest these
right on the farm and eliminate problems of transporting them. Fertilizer also
can be grown right where it is needed. · Space Saving. Production on
dikes and marginal areas allows more productive land for crop use. For tenant
farmers, the produce from the dikes may be theirs without sharing with the
landowners.
1. FOOD
· Bananas. Commonly planted along borders and canals, they
provide food for humans, feed for pigs and cattle and windbreaks for crops
growing in the paddies. · Pigeon Pea or Kadios (Cajanus cajan). Pigeon
pea can yield more than 1 kg of dry beans in 4 months for every 10 linear meters
of dike planted (using no fertilizers or insecticides). This crop, when cut back
and allowed to regrow, can provide 1 kg fodder (fresh weight/linear meter) plus
a second crop of dry beans. It can be grown throughout the dry season to provide
high protein fodder for livestock. (Data from trials in Cavite using
highyielding varieties from ICRISAT in India.) · Pole Sitao (Vigna
unguiculata). Can produce as much as 1 kg green pods/linear meter.
2. FODDER
On days that draft animals are used for plowing, they oftentimes
do not have enough grazing time to eat all they need. Night-feeding with grasses
from dikes supplements this. In the dry season when grasses have died and rice
straw is the main feed available for cattle and carabaos, leguminous trees grown
on the dikes can provide high- protein fodder.
· Trees and Shrubs. The following species of shrubs and
trees have exhibited excellent growth on paddy dikes: kskawati (Gliricidia
septum), kadios (Cajanus cajan), Sesbania sesban, katurai (Sesbania
grandiflora), kupang (Enterolobium cyclocarpum), acacia (Samanea saman) and
Flamengia macrophyllum. Other species with good- fodder production which have
been reported to do well include: acacia hapon (Acacia auriculiformis),
Arundinaria ciliate, karikut-ritkut (Codariocalyx gyrans), Erythrina
poeppigiana, ipil-ipil (Leucaena leucocephala), Sesbania bispinosa (Desmodium
species) and pongam (Derris indica).
· Grasses. Fast-growing grasses planted on dikes have
excellent potential for supplying topquality fodder for livestock. Napier or
elephant grass (Pennisetum purpureum) has shown yields of more than 3 kg dry
matter production/10 linear meters every 30 days during the rainy season. Seven
hundred and fifty (750) linear meters planted to grasses would be enough to meet
the entire fodder needs of one draft animal.
3. FERTILIZER
Asian countries have a strong tradition of growing trees,
particularly nitrogen-fixing trees on dikes or in waste areas to provide
fertilizer to the rice crop. The nitrogen they provide can supply more than half
the fertilizer requirements of one rice crop.
· Four-year old Gliricidia septum in India produced more
than 18 kg leaves/shrub/year. Based on the nitrogen content in those leaves (1/2
kg N), 100 shrubs would produce more than 50 kg N/yr. which is equivalent to two
sacks of urea. Recent trials with Derris indica on paddy dikes in Negros have
also borne promising results.
· All the trees grown for fodder can supply fertilizer as
well. In addition, other trees which tolerate poor drainage can be grown to
provide green leaf manure.
· In an adaptation of the above practice,seeds of green
manures (which will later be grown directly in the paddies) can be produced on
the dikes.
4. FUEL
All the trees planted for fertilizer and fodder provide wood for
fuel as well: the leaves provide the first two products, the stems and branches
provide the fuel. In one farmlot in Cavite, 5 Samanea saman, 1 Pithecellobium
dulce and 1 Tamarindus indicus harvested on a two-year cycle produced enough
wood to meet the fuel needs of two households.
5. OTHER PRODUCTS
Trees and shrubs planted on dikes also provide fence posts. Neem
(Azadirachta indica) and Pongam (Derris indica) may be used as botanical
pesticides and Sesbania grandiflora has been used as a wood substrate for
mushroom growing in Thailand.
When planting on dikes, certain practices should be followed:
· Keep trees pruned when crops are growing in the paddies
to minimize shading of the crop. · Periodically check dikes for
potential seepage caused by tree roots. Do not plant trees on fish pond or
rice/fish paddy dikes. · Practice good weed management around the trees
to discourage rats from colonizing the
dikes.
Using rice straw for lowland rice farming
The increased cost of energy-dependent fertilizer and the need
to conserve plant nutrients by recycling them have focused attention to organic
material sources of fertilizers. One of the cheapest and most available organic
substances is rice straw.
In the tropics, the straw mass corresponding to 1 ton of
sundried paddy rice is 1.5 tons which contains about 9 kg Nitrogen (N), 2 kg
each of Phosporous (P) and Sulphur (S), 25 kg Potassium (K), 70 kg Silicon (Si),
6 kg Calcium (Ca) and 2 kg Magnesium (Mg) . (F. N. Ponnamperuma, IRRI, 1984).
Because straw yields are usually not available, this is a rough guide to the
nutrient content of the straw of a paddy crop. Rice straw is thus a good source
of those macronutrients.
Burning straw
Burning straw, a usual practice in most farms in the
Philippines, destroys most of the nitrogen and sulfur and some of the potassium
and makes silicon less available.
MAKE USE OF RICE STRAW
· To return the nutrients of straw to the soil, cut rice
stalks higher during harvest time. More stubbles are then incorporated into the
soil during land preparation.
· Threshed straw can be fed to animals or can be conserved
for feeding livestock (mandala) during fodder shortage. Some of the straw
nutrients are subsequently returned to the soil as animal excrete.
Cut rice stalks higher during
harvest time
· Pile straw in mounds in successive quadrants in the field
each cropping season to even out nutrient distribution. The straw will decompose
slowly when incorporated into the soil during land preparation. The practice of
piling and spreading straw saves labor but reduces the area planted to rice.
Incorporating the straw produced in situ achieves fertilizer savings and aids
nutrient recycling.
Pile straw in mounds in successive
quadrants
· The effect of time of straw incorporation on grain yield
depends on temperature, cultivar and amount of straw. In warm regions, one month
after straw incorporation, all the rice straw produced in a field could be
plowed in immediately before transplanting without adverse effects. The
application of chemical N and P enhances the benefit of straw incorporation.
· The initial yellowing of leaves of the rice seedlings
caused by the decomposition of straw can be checked by the addition of chemical
N and P. Fertilizer N is used by the rice at the early stage of growth. The peak
of N absorption from straw comes in the middle growth stage, coinciding with
peak crop demands.
· The incorporation of straw reduces the incidence of
tungro, rice blast and blight.
· The benefit of straw incorporation on rice yield appears
during the season of application and increases with subsequent incorporations of
straw.
REFERENCES:
1. Principles and Practices of Rice Production, IRRI, Los Ba�os,
Laguna.
2. Rice Production Manual, Philippines. UPLB. Rev. Edition,
1983.
3. F.N. Ponnamperuma. Straw as a Source of Nutrients for Wetland
Rice. IRRI, Los Ba�os, Laguna.
1984.
Azolla: green manure profile
Azolla: green manure profile
CHARACTERISTICS:
· Azolla is a small aquatic fern (usually 1-5 cm large)
which can also grow on saturated or moist soils. It is capable of doubling its
weight in 3-5 days.
· A blue-green alga (Anabaena azollae) lives in the
cavities of Azolla leaves and fixes nitrogen from the atmosphere. The daily
nitrogen-fixing rate of the Azolla-algae complex is 3-7 kg N/ha.
Azolla contains 4% nitrogen on a dry-weight basis (dry weight is
5% of fresh weight); 0.5-0.9% phosphorous; and 24.5% potassium.
· Azolla is not really new. It has been used as a green
manure for rice in Northern Vietnam and Southern China as early as the 11th
century. Use of Azolla is an Asian, indigenous technology.
IMPORTANCE AS FERTILIZER:
· Azolla is an excellent source of nitrogen fertilizer for
rice which can cut down or even eliminate the use of chemicals. It can increase
yield equivalent to that produced by 30-60 kg. nitrogen (N) fertilizer/ha.
Residual soil N is increased. Protein content of the grain is also increased.
· Azolla increases available potassium (K) by absorbing
water- soluble K from the irrigation water and returning it into the soil upon
incorporation.
· The large amount of biomass produced (10-15
tons/ha/incorporation) increases soil organic matter (OM) content dramatically,
improving soil physical structure and increasing phosphorous availability.
· The OM from Azolla also contains micronutrients.
HOW TO USE AZOLLA AS FERTILIZER:
Under optimum conditions, a 15 kg
inoculum can multiply to become 10-15 tons
· Ideally, Azolla multiplication must be initiated 1 month
before transplanting.
· Under optimum conditions, a 15 kg inoculum can multiply
to become 10-15 tons of biomass in 100 days. (When incorporated, this should
provide 3045 kg N/ha). About half of the total N is available in 3 weeks and 80%
in 6 weeks.
· Incorporate the Azolla into the soil before
transplanting. Subsequent incorporations can be timed with the regular weeding
operations.
· At any time, only 75% of the Azolla is turned under. The
remaining 25% is allowed to multiply again for the following incorporation.
REQUISITES FOR GOOD AZOLLA GROWTH:
· Azolla is a fern, thus water is the most critical
requirement for its survival. The water situation in which Azolla can grow
ranges from nearly saturated soils to deep standing waters.
· The soil should have at least 30 ppm phosphorous. If soil
test indicates a lower level, apply 16-200 or 0-18-0 at kg/ha/wk.
· Optimum temperature is 25°C or less. Temperatures
above 30°C can cause slow growth rate and insect problems.
· Conduct site suitability test to determine the Azolla
species or strains most tolerant to local constrainsts.
OTHER BENEFITS FROM AZOLLA:
· An optimum Azolla cover between the rice plants reduces
weed growth by 50% or more. · Azolla can be a good compost
material.
Using azolla as fertilizer for lowland rice
The agronomic importance of azolla arises from its capability to
fix nitrogen through its symbiotic relationship with the blue-green algae,
Anabaena azollae. The azolla-anabaena association can fix nitrogen proportional
to the biomass produced. Chemical analysis showed that azolla contains 4-5% N.
1-1.5% and 2-3% K on a dry weight basis.
When azolla is grown in paddies and then incorporated into the
soil as green manure, its nitrogen content is released upon decomposition and
can be used by the crop. Azolla can replace at least 50% of the inorganic
nitrogen requirement of rice.
There are three methods of producing and utilizing azolla on a
one hectare lowland rice farm: the tatluhan, dalawahan and isahan methods. The
choice of which method to use depends on the water supply, drainability of
paddies, doubling time of azolla and cultural practices on the farm.
TATLUHAN METHOD:
If the ricefield has a steady supply of water, good drainage,
enough phosphorous and the farmer adapts the transplanted, straight-row method,
the best way of producing and utilizing azolla is the tatluhan method. The
azolla is grown with the rice crop and incorporated into the soil three times --
during the first and second weedings and during land preparation for the next
crop.
1. Make sure that the paddies are flooded and then plowed and
harrowed once every 3 weeks before transplanting.
Tatluhan
2. Twenty days before transplanting of rice seedlings, gather
the azolla from the inoculum pond and broadcast it evenly on the one hectare
area. Leave at least 10 kg in the pond for future use.
Gather the azolla
3. One day before transplanting (DBT), drain most of the water
from the paddies and apply basal fertilizer. (Note: Half of the nitrogen
requirement of the crop will be supplied from urea or other inorganic nitrogen
fertilizer.)
Drain most of the water
4. Make sure the paddies are flooded about 1 cm deep to float
some of the azolla and prevent all of them from being turned under during
harrowing. The azolla will have increased to about 1,600 kg.
Make sure the paddies are flooded
about 1 cm deep
5. Transplant the seedlings in straight rows.
Transplant the seedlings
6. Let the azolla grow. Twenty days after transplanting,
incorporate the azolla in the soil with a rosary weeder. The incorporation
should coincide with the first weeding. Allow the remaining azolla plants to
grow and if necessary, re-seed the field with azolla from the inoculum pond.
Let the azolla grow
7. Forty days after transplanting, drain the paddies and
incorporate the azolla in the soil with a rotary weeder during the second
weeding. Let the surviving azolla plants multiply further until harvest time.
Turn them under during land preparation for the next cropping.
Forty days after transplanting
DALAWAHAN METHOD:
The dalawahan method is best used when only one weeding of the
field is needed and/or when the growth of azolla is below normal because of
insufficient phosphorous. The azolla is grown with rice and incorporated during
weeding 20 days after transplanting and then again during land preparation for
the next crop.
1. Follow steps 1-5 in the tatluhan method.
2. Allow the remaining azolla to multiply further and re-seed
the field with azolla from the inoculum pond to increase biomass production.
Allow the remaining azolla to
multiply
3. Incorporate azolla into the soil during the land preparation
for the next cropping.
Incorporate azolla into the soil
ISAHAN METHOD:
In the isahan method, the azolla is grown with the rice crop but
it is not incorporated during cropping. It is best used where doubling time of
azolla is slow, where paddies cannot be drained, where water supply is
inadequate or where direct seeding is practiced. The biomass is incorporated
only once -- during land preparation for the following crop. It is this next
crop that will directly benefit from the azolla.
1. Prepare the land, apply basal fertilizer end transplant the
seedlings.
2. Seven days after transplanting, gather azolla from the
inoculum pond and broadcast it uniformly over the one hectare area. Leave at
least 10 kg in the pond to multiply for future use.
Seven days after transplanting
3. If the doubling time of azolla is 7 days, after 56 days the
50 kg azolla will have increased to about 13 tons. Maintain the rice crop and
control the weeds with rotary weeder or handweeding. Do not drain to prevent
dehydration and death of azolla.
4. Allow the azolla to proliferate until harvest time or as long
as there is moisture. Incorporate it during land preparation for the next
cropping.
Allow the azolla to proliferate
Isahan Method for direct seeded rice
1. Prepare the land according to the approved cultural practices
in lowland rice culture. 2. Drain most of the water, leaving at least 1 cm
deep to facilitate levelling of the soil. 3. Apply basal fertilizer and
broadcast the rice seeds uniformly. 4. Two weeks after germination, broadcast
azolla evenly into the field. Leave at least 10 kg in the pond for future
use. 5. Allow azolla to proliferate until harvest time and incorporate it
during the land preparation for the next cropping.
Table 1. Environmental Factors Affecting Growth of Azolla
(Summary).
FACTORS
RANGE
Temperature
20°C - 25°C
Light
50% full sunlight
Relative Humidity
85 - 90%
Water
5 - 12 cm
pH
4-7
Salinity
90 -1 50 mg/li
Table 2. Guide in Using the Isahan, Dalawahan or Tatluhan
Methods.
CONDITION IN FIELD
METHOD
Water Supply
Drainage
Azolla DT
1st Choice
2nd Choice
3rd Choice
Good
Good
Fast1
Tatluhan
Dalawahan
Isahan
Good
Good
Moderate2
Dalawahan
Isahan
-
to Slow3
Good
Poor
Fast to Slow
Isahan
-
-
Poor
Good or
Fast to Slow
Isahan
-
-
Poor
1 Fast -- 4 to 6 days 2 Moderate -- 7
to 9 days 3 Slow -- more than 9 days
SOURCE: National Azolla Action Program, UPLB, Los Ba�os, Laguna,
Philippines.
Multiplying the azolla
Azolla grows best under conditions of 50% full sunlight and
slowly flowing water. Therefore, the multiplication pond should be located near
the water source (but in a paddy which is protected from potential flooding)
where partial shade can be provided. The pond should be protected from wind to
minimize the piling up of Azolla.
FIRST WEEK:
1. Construct a 200 sq.m (10m x 20m) pond. The dike surrounding
the pond should be at least 15cm high end screens placed in the wafer inlet and
outlet. The screens will prevent both the entry of snails which eat Azolla and
the escape of Azolla with the exiting water. Plow the land and harrow it twice.
Any pond size can be used depending upon the amount of Azolla
needed. A 200 m pond will produce enough Azolla for 1 hectare of rice paddy when
the Isahan method of Azolla utilization will be used.
2. Divide the pond into four plots with the following
dimensions:
Divide the pond into four plots
The pond is subdivided to reduce the amount of water and
fertilizer needed in the first week of multiplication, as well as the time
needed to manage the pond.
3. Flood plot A with 5-7 cm of water. This is about midway
between the second and third lines of the middle finger.
4. Broadcast 40 g (or 3 level tbsp) phosphorous* fertilizer on
the standing wafer of plot A. Then broadcast 5 kg (or 1 kerosene can, 20 liter)
Azolla evenly on the water. The Azolla should be weed, disease- and insect-free
and should be of the type that is adapted to local conditions. (Please see the
separate sheet on selecting Azolla varieties.)
5. For insect control, use only those insecticides recommended
for Azolla and only if necessary. Based on IlRR's experience, once a variety
which has been selected locally is well-established, it tolerates higher levels
of pest populations and usually does not require insecticides. Occasionally, in
the early stage of multiplication, insecticides may be needed. If insect pests
remain a problem, another variety or species should be selected.
SECOND WEEK:
6. At this time, the surface of plot A will be fully covered
with Azolla. Broadcast the phosphorous Fertilizer (40g) on plot B.
Second week
7. Remove the dike separating plots A and B to allow the Azolla
to spread evenly on the two plots. After one week, plots A and B will be fully
covered with Azolla.
Remove the dike separating plots
THIRD WEEK:
8. Broadcast the phosphorous (150g or 3-4 handsful) on plots A,
B and C.
9. Remove the dike separating plot C from plots A and B to allow
the Azolla to spread evenly on plots A, B and C combined. After 1 week, plots A,
B and C will be fully covered. (Illustration next page.)
Third week
FOURTH WEEK:
10. Broadcast the phosphorous (150 g) on plot D.
11. Remove the dike separating plot D from plots A, B and C to
allow the even spread of the Azolla. After one week, plots A, B. C and D will be
covered fully with Azolla weighing approximately 200250 kg (fresh weight).
Fourth week
FIFTH WEEK ONWARDS:
12. Apply 5 kg (or 1 liter) superphosphate or 16-20-0 once a
week for 1 hectare of land (or 500 9/1,000 sq.m).
13. Remove one-half of the Azolla biomass each week and tap the
remaining Azolla with a broom to stimulate vegetative growth.
14. If the Azolla is to be used for rice, introduce (inoculate)
it to the paddies after the first plowing (land preparation) when the land is
still rough and maintain a low water level to keep them from piling up.
Note: This material was adapted from a publication of the
National Azolla Action Program (NAAP) in Los Ba�os. Modifications relate to some
technical content and the presentation
format.
Troubleshooting common problems in azolla production
1. Slow growth
Slow growth of Azolla is usually due to phosphorous deficiency,
insect/snail damage, high temperature, intense sunlight or herbicide use.
a. Phosphorous deficiency
· Concentrate the Azolla into one or two paddies for better
management. · Apply 5 kg/ha monoammonium phosphate (16-20-0) or
superphosphate (0-18-0) weekly. Mudpress or other locally available substitutes
can be used.
Slow growth
b. Insect/snail damage -- Symptoms are the presence of snails,
caterpillars, or moths. Other symptoms include a purplish or brownish color
(caused by Azolla snout beetle); silken threads (Azolla moth); or segregated
rootless plants (snails).
· Use varieties that are relatively resistant to prevailing
major pests. Conduct tests for your location. · Use insect/snail-free
inoculum. (One way to clean Azolla of insect pests which the Chinese and
Vietnamese use is to pile the Azolla seed material into a heap and plaster it
with mud. This treatment will suffocate the insects. After 2-3 days, the Azolla
can be used in the seedbed or in the field.) · Do not allow the Azolla
to overlayer as this increases the chances of insect infestation and
damage. · Use appropriate insecticide if there are plenty of
caterpillars, but only if it is absolutely necessary.
c. High temperature/intense sunlight -- A brick red color of the
Azolla indicates high light intensity. Too much heat will cause the Azolla to
turn brown/reddish pink. The loss of the plant's green pigment (chlorophyll )
will retard photosynthesis, consequently causing slow growth and multiplication.
· Select a heat-tolerant variety.
· A slight flow of water through the pond is essential in
summer. · Partially shade the Azolla by growing Sesbania or gabi in the
multiplication pond. Growing a trellised crop over the pond will also
help. · Allow the Azolla to grow on saturated mud which is cooler than
the water
Allow the Azolla to grow on
saturated mud
Partially shade the Azolla
d. Herbicide contamination of water -- Symptoms are slow or no
growth Azolla is extremely sensitive to herbicides Drainage water from
neighboring farms where herbicide have been used can stunt or kill the Azolla
2. Piling up of Azolla at one end of the paddy/smothering of
rice plants
· Introduce Azolla into the paddies 2-3 weeks after
transplanting · Begin initial Azolla multiplication in paddies that are
relatively protected from the wind. · Maintain only a minimal water
level to allow the Azolla to partially anchor itself to the soil. ·
Using small-leafed species such as A microphylla and A. caroliniana also helps
prevent smothering (esp when dapog seedlings are used)
3 "Escape" of Azolla during flooding
· Double screen "gates" placed at the water outlets coupled
with good dike maintenance The circular screen increases surface area for water
to pass through, at the same time prevents clogging of the outlet pipes.
Double screen
4. Weeds in Azolla
· Allow the Azolla to grow thick as this can cover and
shade out small grasses and sedges. (Caution: Extreme crowding of Azolla is
conducive to insect infestation.) Uproot broadleaf weeds. Never use herbicides
because Azolla is sensitive to them.
5. Oxygen deficiency in the roots of rice plants
· If Azolla (in dual culture with rice) becomes too thick,
the Azolla mat cuts off the oxygen supply from the atmosphere, thereby
suffocating the rice roots. Incorporate the Azolla as needed, or use for other
purposes, e.g. Animal Feeds, compost, etc.
CREDITS: AZOLLA PRIMER by Manzoor
Khan.
Green leaf manuring in lowland rice
INTRODUCTION:
Green leaf manuring (using the leaves of leguminous trees for
lowland rice) has been used in South Asia for centuries with yield increases of
up to 2 T/ha compared to unfertilized rice fields. Recent work with farmers in
Negros and Cavite has shown that green leaf manuring works in the Philippines as
well.
Advantages of using green leaf manures (GLM) include:
· Up to 4 tons dry leaf matter (equivalent to 120 kg N) can
be produced from 400 trees spaced 2 m apart on the bund. · No need to
replant green manure crops. The trees are perennial and provide leaves for GLM
2-3 times/year. · Woody branches can be used for firewood. ·
Easy to use. No complicated cultural practices for production or use are needed.
GLM trees can be integrated into almost any rice farm. Three
options are described here based on planting systems used in Negros and Cavite
with Gliricidia septum (kakawate or madre de cacao).
Option No. 1 -- Gliricidia is planted along the paddy bunds.
Spacing is 50 cm-2 m between plants.
Option No. 2 -- Gliricidia is planted around field boundaries.
Distance is 2 m between plants. Dikes should be 50-75 cm wide and 40-50 cm high.
Option No. 3 -- Cut-and-carry system: Gliricidia is planted in
areas away from the field. The major disadvantage of this system is the
transport of biomass from the growing area to the field.
Green leaf manures
HOW TO USE GREEN LEAF MANURE:
The practice of GLM is very simple. Any fast-growing leguminous
tree species which tolerates poor drainage can be used. The leaves are lopped
regularly (every 6 mos) and applied to the rice paddies during final land
preparation as green leaf fertilizer. In order to reduce the labor requirements,
the trees should be established at or near the rice production site.
1. One day before transplanting, cut branches of Gliricidia
(with leaves). Chop the tender stems. The woody ones can be used as firewood.
2. Scatter the leaves evenly throughout the field. There should
be no standing wafer in the paddy in order to fully incorporate the leaves.
3. Incorporate the leaves into the soil during the last
harrowing/leveling of the field.
4. Transplant rice seedlings immediately after incorporation.
NOTES ON THE USE OF GLIRICIDIA:
· Two loppings are recommended per year. If there will be
no second crop to put the GLM on, the second cutting should be done 1-2 mos
before the onset of the dry season. This stimulates new growth which can survive
a 6-month dry season without dropping its leaves. The loppings could be used as
fodder.
· Gliricidia may have pesticidal properties against major
pests of rice.
· Gliricidia can serve as living stakes for climbing plants
like pole beans. It is also an excellent source of firewood, building materials
for livestock pens and fence materials.
Two methods of establishing trees for GLM are used: seeds and
cuttings. Recent work at IIRR has shown that the method of planting cuttings
greatly affects the establishment and growth rates of trees. The recommended
method of planting cuttings of Gliricidia is described below:
OTHER SPECIES RECOMMENDED FOR GLM FOR RICE
Species
Local Names
Quantity of Leave Recommended/ha.
1. Leucaena leucocephala
Ipil-ipil
1,000-8,000 kg/ha(freshly cut)
2. Samanea saman
Acacia
- do -
3. Acacia auriculiformis
Japanese Acacia
4. Pithecellobium dulce
Kamachile or Kamunsil
- do -
5. Derris indica* Pongamia indica
Bani or Balok-balok or ponggam
- do -
* Please note that this is not Derris elliptica or Tubli.
Gliricidia septum (kskawate) has the same quantity of leaves recommended/ha as
the GLM species given
above.
Green manure utilization in lowland rice
With the range of green manures and short-duration grain legumes
available today, it is possible to grow or substitute at least one-half of the
chemical nitrogen used by farmers in their rice crops. In irrigated rice-growing
areas, nearly all the crop nutrient requirements could be met by big-fertilizers
with good planning and management.
Even for farms wherein sufficient chemical nitrogen fertilizer
is affordable, green manure (GMs), green leaf manures (GLMs) and grain legumes
(GLs) provide the following benefits that chemical fertilizers cannot:
Green manure utilization in lowland
rice
· GMs and GLs improve the rice crop's performance in
drought as compared to the unmanured crop.
· They have a long-term cumulative effect on soil fertility
in addition to the short-term effect. The long-term effect occurs in small
increments but does result in noticeable yield increases by the third or fourth
year of green manuring.
· Part of their production can be used to provide food for
humans or feed for livestock.
· Weed reproduction is reduced by planting an otherwise
fallow area.
· In soils low in phosphorous (P), rice yields are higher
when P fertilizer is applied to the GM and GL than if the same amount of P
fertilizer is applied directly to the rice crop.
In order to produce his own fertilizer at minimal labor and
capital cost, the farmer needs to know what GMs and GLs are available, their
characteristics and how they might best be used on his farm. He needs to be able
to identify those times of the year when GMs and GLs could be grown.
CHARACTERISTICS DESIRABLE IN LEGUME GREEN MANURE CROPS:
· Multipurpose · Short duration, fast-growing,
high-nutrient accumulation ability · Tolerance for shade, flood, drought
and adverse temperatures · Wide ecological adaptability ·
Efficiency in use of water · Early onset of biological nitrogen
fixation · High N accumulation rates · Timely release of
nutrients · Photoperiod insensitivity · High seed
production · High seed viability · Ease in
incorporation · Ability to cross-inoculate or responsive to
inoculation · Pest and disease resistant · High N sink in
underground plant parts
Information needed includes the approximate dates of the
beginning and ending of the rainy season, maturity times. For all crops being
considered products desired by the farmers, e.g., fodder, grain or sale or
consumption, fertilizer, etc. Additionally, water availability from irrigation,
if any, and soil drainage pattern should be known.
In lowland rice, water availability and soil drainage play major
roles in determining the types of green manures to use. A GM planted at the
beginning of the dry season, for example, needs to be able to withstand drought.
Planted before or with rice, it will need to be flood-tolerant. Soils that drain
well can be planted to desirable crops which are susceptible to flooding or
waterlogging. What is important is to fit the crop to the agro-ecology of the
farm.
A large number of legumes have been tested for their potential
as green manures in rice. Some grow well in waterlogged conditions; some do well
in very dry conditions; and a few, in both. Many serve dual purposes: by
producing food as well as fodder and/or green manure.
Ecology
GM Species
Flooded soil
Aeschynomene afraspera, A. americana Phaseolus semierectus
and all Sesbania sp.
· Sown in standing rice before harvest to be grown
throughout dry season (Drought-tolerant)
Intercropped with grain legume
Dolichos lablab
Indigofera sp.
Cnavalia ensiformis
Crotalaria quinquefolia
Mucuna pruriens
Stylosanthus guayanensis
Pueraria species
Monocropped
Crotalaria juncea
Saline soil
Sesbania serecea and S. aculeata
Low temperature
Astragalus sinicus
(Modified from Vacchani and Murty, 1964)
Lowland rice-based cropping systems can be classified into any
number of types (according to cropping patterns and water availability) but in
the Philippines, the four general ones are:
· Fully irrigated: 2-3 rice crops · Partially
irrigated or rainfed with standing water throughout crop cycle: 2
crops · Rainfed: 2 rice crops · Rainfed: 1 rice crop
Systems vary from country to country but in any location,
determining what GM to use and when to use it would greatly depend on the
cropping pattern and more importantly on water availability (which would include
water source, the amount and length of time water is available and the degree of
regularity of the water supply).
It should be noted that, as the amount of water and the length
of time it is available increases, farmers have more options regarding what GMs
to use; total biomass and N production will be higher; thus, yields will likely
be higher (or the amount of fertilizer N substituted by GM will be higher).
Described below are some options for multiple, relay and
intercroppings under different regimes. They illustrate the possibilities for
intensifying production of food, fodder and fertilizer by using grain legume and
green manures.
FULLY IRRIGATED:
Options 1 and 2 are the most flexible. Sesbania rostrata or
another waterlog-tolerant GM can be grown before rice to supply the basal N to
crop 1. Azolla is multiplied during S. rostrata's growth for incorporation with
rotary weeder at 20-25 days after transplanting (DAT). Nitrogen becomes
available by panicle initiation. Azolla is also incorporated three more times
for the second crop: at post-harvest incorporation of crop l's stubble, 1 day
before transplanting (DBT) of crop 11 and 25 DAT crop 11 (using the rotary
weeder). GL is intercropped with GM in the dry season. The 3-day option is the
same as 1 and 2 but a vegetable or other cash crop is grown during the dry
season.
Fully irrigated
PARTIALLY IRRIGATED (OR RAINFED WITH STANDING WATER):
Azolla can be grown throughout the rainy season but should be
regarded as the N source for the second cropping season only. In this system,
Azolla is multiplied during the first cropping season (and provide some weed
control) and incorporated during post-harvest plowing. Enough Azolla is left to
serve as inoculum for the second incorporation 20-30 DAT of crop 11, which
coincides with the rice weeding operation. Azolla supplies about 60-70 kg N/ha
to the second crop.
Partially irrigated
The N source for the first crop can come from the GLs
intercropped with drought-resistant green manures relay-planted into the second
rice crop from the previous year to grow on residual moisture (1). Where there
is no distinct dry season, a waterlog-tolerant GM like S. rostrata could be
grown (2). In areas where there is a long lag time between the first rain and
the arrival of irrigation water, S. rostrata can be planted. Some small amounts
of chemical N and P for the Azolla may have to be applied.
RAINFED -- TWO RICE CROPS:
Options are fewer here. Azolla is not feasible and usually a
pre-rice GM is not either. In areas with a distinct dry season, a combination of
drought-resistant GM and grain legume can be relayed into the second crop. Rice
straw mulch will help conserve moisture. In areas with no distinct dry season, a
waterlog-tolerant GM can be used. Trees can be planted on paddy dikes or in
waste spaces to provide green leaf manure to supplement chemical fertilizers in
both crops.
Rainfed - two rice crops
RAINFED -- ONE RICE CROP:
Depending upon the topography and soil texture (if a field is
well-drained), GLMs or vegetable legumes plus a GM are possible both before and
after the rice crop. If an upland grain crop such as corn or sorghum is grown
before or after rice, a GM can be intercropped.
GLMs provide an additional fertilizer source for use when
in-situ green manure production is inadequate for the rice crop's needs.
For all but the most fibrous GMs, rice should be transplanted as
soon as possible after incorporation to minimize loss of GM-nitrogen.
Transplanting one day after incorporation is ideal.
Rainfed - one rice
crop
Sesbania aculeata: a bio-fertilizer source for lowland rice
CHARACTERISTICS:
· S. aculeata (Willd.) Poir is referred in some literature
as S. bispinosa (Jacq.) W. F. Wright and S. cannabina (Petz.) Poir. Its common
name is dhaincha or daincha.
· S. aculeata is a leguminous, shrubby annual with thick,
hairy stems and large (35 cm) feather-like leaves.
· Its flowers are yellow. It seeds easily and is
self-pollinated.
· Although it can accumulate a lot of biomass and nitrogen
(N), it has not received much attention as a green manure crop.
ADAPTABILITY:
· It is suitable for wet, waterlogged areas and heavy
soils. It is well adapted to saline soils and has been successfully used to
rehabilitate salt-infected soils.
· Although adapted to dry, arid conditions, its growth and
biomass production are less than S. rostrata.
· Requires 600-650 mm rainfall.
· It can withstand temporary waterlogging. However, its
nodulation and N2 fixation may be impaired.
· It is useful as a short-duration pre-rice green manure.
ADVANTAGES AS BID-FERTILIZER:
· Leaflets degrade rapidly in most soils. About 50% of
accumulated N is released within 4 weeks after incorporation.
· After 75 days of growth, it can provide 20-26 T/ha fresh
biomass with an N concentration of 0.43%.
· Before blooming, the average composition is 28% organic
matter, 0.47% N. 0.05% P and 0.35% K.
· 21.1 tons of fresh biomass is equivalent to the addition
of 133 kg N/ha. Incorporating biomass resulted in a 207% increase in rice grain
yield as compared to no application. Furthermore, under continuous green
manuring using S. aculeata, soil N increased from 0.079% to 0.141%.
HOW TO USE S. ACULEATA AS BID-FERTILIZER:
· N content reaches a peak and starts to decline 45-50 days
after planting. Incorporation at this period is recommended.
· When the field is submerged with enough water for land
preparation, incorporation is better ensured by using an animal-drawn slicer.
The first pass of the slicer flattens the S. aculeata and slices
off its branches. A second pass at a right angle to the first further slices
branches into smaller portions and drives it down to the mud. Subsequent
operations follow without significant additional effort.
SOME DISADVANTAGES IN USING S. ACULEATA:
1. Difficulty in collecting seeds: Dhaincha is small-seeded and
pods easily shatter. 2. Stems are hard and difficult to plow.
OTHER USES:
Leaves of S. aculeata may be utilized as fodder and stems may be
used as poles and as a source of
fiber.
Indigofera: green manure profile
Indigofera tinctoria, commonly called Indigo, Tayum, Tagum or
Tayung, is a shrubby herbaceous plant, 1-2 m tall with erect and copiously
branched stems. Leaves are pinnate and 8-15 cm long. The small rose, purple or
white flowers are borne in spikes or clusters. The seeds, usually 6-12/pod, are
much longer than broad. Pods are 1.5-2.5 cm long.
In Northern Luzon, Indigo has been integrated in farmers'
systems since the late 19th century. It has been used as a green manure and
grown as a post-rice crop, cultivated in combination with other crops.
Indigofera
ROLE OF INDIGO IN RICE FARMING:
· The Indigo can be planted as a monocrop after rice
harvest. When planted as a sole crop, a seed rate of 6-8 kg/ha is needed.
· It can also be planted in between the standing crop after
the last interrow cultivation at 30-50 days after planting (DAP). The seed is
dibbled in the furrows created during the hilling-up operation. (This is the
most common method used by farmers in the llocos region.)
· It is not suited as a short-duration pre-rice green
manure due to its slow initial growth. It needs 45 months to accumulate high
amounts of biomass and N.
· It can be grown after rice (Oct-Nov) as a companion crop
to upland crops, such as corn, mung bean and tobacco. As an intercrop, it has
not been observed to exert a yield-depressing competitive effect on its
companion crop. It can be grown in combination with any of a number of food
crops like mung bean, cowpea, peanut, corn, etc., because its slow, initial
growth does not allow it to compete for sun or water.
· Indigo is plowed under at the start of the wet season to
serve as a big-fertilizer for the rice crop.
· Under saturated conditions, the Indigo seeds plowed under
were not observed to emerge. Therefore, the plant does not appear to be a
significant weed problem in rice.
· It can withstand a long dry season (6 months or more),
thereby providing soil cover during dry months.
IMPORTANCE AS FERTILIZER:
· At 45 DAP, total N accumulated by Indigo was estimated to
be equivalent to 45 kg N/ha.
· When planted as an intercrop prior to wet season rice, it
can produce a biomass of 4-19 T/ha, equivalent to 84-267 kg N.
· Average amount of N required by rice can be reduced by
one-half to two thirds when preceded by Indigo.
· Only a single application of fertilizer at 45-53 days
after transplanting need be applied to rice when Indigo is incorporated.
Produce a biomass
HOW TO USE INDIGO AS FERTILIZER:
Indigo may be:
· broadcast after fields are drained. The field is then
harrowed to cover seeds. Furrowing to accomodate the intercrop can subsequently
take place. In llocos, an average of 6-8 kg/ha of Indigo seeds are
broadcast. · pre-soaked and dibbled between rows of a standing post-rice
crop after interrow cultivation (3050 DAP). · planted after harvesting
the post-rice crop in the same furrows in which these crops were planted.
The Indigo. is incorporated once the field accumulates enough
water for land preparation for the rice crop. A pegtooth harrow drawn in one
direction is usually used to flatten the stand. Then the Indigo is plowed under
in the same direction as it was flattened. Harrowing and transplanting follow
very soon after in order to avoid loss of nitrogen from the decomposing biomass.
SEED PRODUCTION:
For a dependable harvest of good quality seeds, planting of
seeds should be done in October-November so that pods mature in March or April,
ahead of the early rains. In areas where there is still some soil moisture,
January or February is also a good time to plant for seeds. Harvesting is done
by clipping the clusters of pods. For high-quality seed, individual pod picking
is recommended. Seeds can be stored without using special equipment. Eight
months after storage, seeds are still capable of good germination (70-80%).
OTHER USES:
Indigo can be used as fuelwood and the leaves can be processed
into
dyes.
Crotalaria: green manure profile
CHARACTERISTICS:
· There are eight species of Crotalaria which are
considered potential green manures. · Most of these species are
short-lived, hollow stemmed, fast-growing and produce dense foliage. ·
Species differ in leaf form (simple, trifoliate), flower color, growth rate,
plant height and other morphological characteristics. · Pods contain 5-8
seeds.
Crotalaria
ADAPTABILITY:
· More adapted in dry areas which are not waterlogged, C.
juncea is more adapted to areas with low rainfall than S. aculeata. ·
Requires full sun for maximum growth and cannot tolerate partial
shading. · Adapted as a short-duration pre-rice green manure.
IMPORTANCE AS FERTILIZER:
· Crotalaria leaves decompose within 1-3 weeks after
incorporation.
· It ranks next to Sesbania in N yield and green matter
production. It is capable of supplying up to 100 kg N/ha.
· Among the Crotalaria species, C. juncea and C.
usaramoensis gave consistently the highest N yields. After 45 days, total N
acculumation was 169 kg N/ha (3.75 kg N/ha/day).
· In India, Crotalaria biomass production was estimated to
be 20-28 T/ha. The biomass had a total N content of 0.43%. This is equivalent to
134 kg N/ha. When incorporated in the soil, rice grain yield was 128% higher
than yields obtained without incorporation.
· Continuous addition of Crotalaria green manure increased
soil N from 0.079% to 0.109%.
HOW TO USE CROTALARIA AS FERTILIZER:
There have been no conclusive results published on the best time
and age for incorporating Crotolaria in wetland rice. However, faster release of
N was observed when 30-day old Crotalaria was incorporated.
· Provided there is enough water, Crotolaria may be planted
30-40 days before plowing wetland rice. Stems should be cut using either manual
or animal labor. These will be incorporated into the soil by plowing and
subsequent tillage operations.
· For upland crops, Crotalaria may be incorporated during
hilling-up by uprooting it, spreading it near the plant base and then covering
it with soil.
DIFFICULTIES OBSERVED IN USING CROTALARIA:
· It is susceptible to insect infestation when planted in
the same area for more than 3 years. · Seed setting could be a problem
in certain areas. However, enough seeds could be obtained despite reports of
insect pests (particularly pod borer).
OTHER USES:
Crotalaria can be processed into fiber. It is very palatable,
hence, a highly acceptable source of
fodder.
Lablab bean: cover crop/green manure profile
CHARACTERISTICS:
The lablab bean, commonly called bataw or jarabilla, is
widespread throughout the tropics. It has so many uses, so many varieties and
wide adaptability.
· There are two botanical types: (a) the garden type which
is viny and has to be grown on support; and (b) the field type which is erect
and bushy.
· There are more than 200 recognized genotypes with pods,
seeds, flowers, leaves differing in size, shape, texture and color. Each variety
has physiological differences like seedling vigor, drought tolerance, day-length
sensitivity, flowering time, maturation time, pest- and disease-resistance and
seed viability.
Lablab bean
· It is remarkably adaptable to diverse conditions like
soil of low pH and is affected by low soil nitrogen content.
· The plant establishes easily. Its dense growth
suffocates/reduces weed growth.
· Dry seeds contain 20-28 percent crude protein. It is one
of the best sources of iron (155 mg/100g of leaves dry weight). Yields of dry
seeds gives as high as 4 t/ha.
USES OF LABLAB BEAN:
Food
· Young pods make an excellent table vegetable. ·
Dried seeds are a wholesome palatable food, either cooked and eaten directly or
processed to bean cake. · Leaves and flowers are cooked and eaten like
spinach. · Sprouts are comparable to soybean or mung bean
sprouts. · Protein concentrate can be made from the seeds.
Forage
· The plant is grazed by different types of
animals. · Bean hay is palatable. It also makes good silage.
Other Uses
· Excellent green manure. · Effective for soil
erosion control and soil protection. · Can be used as a nitrogen-fixing
crop grown alone, interplanted with field crops or grown in rotation with these
crops. · Good cover crops for plantations. · Often planted as a
second crop in ricefields after the harvest of paddy.
ADAPTABILITY:
The lablab bean is remarkably adaptable. Its various strains
thrive in a number of different areas and under diverse conditions. There are
varieties for:
· arid, semi-arid and humid regions (that is, for range of
200 - 2,500 mm of annual precipitation); · warm-temperate, subtropical
and humid rainforest regions where mean summer temperature ranges from 22 to
35°C; · lowlands and highlands (It is grown widely up to 2,100 m
altitude.); · many types of soil, including some of the poorest and most
toxic soils; · both mechanized, large-scale farming and labor-intensive,
small-farm agriculture; · field agriculture and home gardens;
and · resistant to pests and diseases (especially root diseases).
IMPORTANCE OF LABLAB IN RICE FARMING:
· It is best grown as a post-rice harvest crop during
fallow periods in the dry season for marketable pods and nitrogen rice
biomass. · It can be intercropped with rice in dryland areas (with
clippings so as not to depress the rice yield).
HOW TO USE LABLAB AS FERTILIZER:
· Plant lablab seeds either in furrows or broadcast after
the rice harvest (towards the dry season). · Allow the lablab to grow
and cover the ground until the rainy season starts. Allowing the plants to cover
the soil suppresses the growth of weeds and protect the soil from direct
exposure to sunlight. · Before plowing the soil for the next planting,
either chop the plants by passing a slicer or pull every plant then allow to
wilt. · Incorporate the herbage into the soil by
plowing.
Rice bean: green manure profile
The rice bean (Vigna umbellata) is an important crop because of
its potential as a post rice crop.
CHARACTERISTICS:
· It is an annual that bears clusters of 5-20 bright yellow
flowers that produce narrow pods containing 7-10 seeds. · It is adapted
to high temperature and humidity as well as to heavy soils. · Some
varieties are resistant to major insect pests and diseases. · It
produces easy to cook, good tasting seeds. · Seeds are rich in protein
and contain high amounts of calcium, iron and phosphorous. · Immature
pods and seedlings are excellent green vegetables and the plant makes forage
which are eagerly consumed by livestock.
Rice bean
VARIETIES:
Cultivars of rice bean vary from short-stemmed, erect plants to
twining plants that may grow up to 3 meters long and need stakes or other
support for maximum yield. Seeds of these different cultivars have either black,
red-violet, greenish, brownish or mottled seeds.
ROLE OF RICE BEAN IN RICE FARMING:
· Rice bean as a post rice crop can benefit the rice by
improving the nitrogen and humus contents of the paddy soil. · It is
particularly valuable because it provides fodder at a time when other sources of
feeds are scarce. · It can be used as a green manure before the planting
of the first rice crop and can be grown as a cover crop during times when the
ricefield is left idle.
USING RICE BEAN FOR GREEN MANURE/COVER CROP:
· Plant the seeds either in furrows or broadcast them after
the rice harvest towards the dry season. · Allow to grow (take over the
field) until the onset of the rainy season. · Before plowing for the
first planting of rice, either chop the plants by using a slicer or bolo or
uproot the whole plants and allow to wilt. · Incorporate the herbage by
plowing and allowing it to decompose before planting the rice.
LIMITATION:
· Rice bean is sensitive to day length. Flowering and
seeding are initiated only when days are short. When planted at other times, the
crop produces masses of vegetation but little
seed.
Sesbania spp.: green manure profile
Sesbania, such as S. rostrata, S. aculeata or S. sesban, are
green manure crops which are fast-growing even in flooded conditions. Unlike
most other legumes, they fix nitrogen even when the soil contains high amounts
of nitrogen (N). A 45-60 day growth of Sesbania can yield the following:
Sesbania spp.
Field
Condition
Tons/ha Kg N/ha
Flooded
25-30
100
Dry
30-35
115
Sesbania can be incorporated during land preparation. It also
decomposes quickly. Rice can be transplanted the day after incorporation. The
herbage cited above can result in rice yields of 0.52.0 T/ha.
Figure 1. The comparative vegetative
growth of Sesbania at different planting dates.
Sesbania is photoperiod sensitive. Flowering is triggered by
short daylength. Flowering and seed production suppress the plant's vegetative
growth.
To maximize herbage production (and therefore N accumulation),
the best time to plant Sesbania as pre-rice green manure is during longer
photodaylength periods -- from March to July in the Philippines.
The best time to plant for seed production is from November to
mid-January. The short daylength induces early flowering (3-4 wks after
emergence). Seed production during the dry season has less pest problems and
eliminates seed germination in the pod.
Table 1. Seed Production of S. rostrata on the Rice Paddy Bunds
(Navarro, General Trias, Cavite, 1987 DS)
PLANTING DENSITY/ SPACING
Date of Priming and Actual Seed Harvested (kg)
Production Cost*
First Priming
Second Priming
Third Priming
Total
Plant/m row
1.868
2.341
1.968
6.177
52.50
2 Plant/m row
3.001
3.846
2.688
9.535
74.37
3 Plant/m row
5 546
6.0
5.127
16.673
96.25
* Cost of seeds + harvesting costs. Hired labor is P25.00/day.
CULTURAL MANAGEMENT:
For Green Manure
1. Planting Methods:
· Broadcasting or row-seeding after conventional land
preparation (1 plowing and 1-2 harrowings) · Direct seeding under zero
tillage conditions using a suitable seeder · Broadcasting onto weed-free
field (untilled) and covering lightly with straw
2. Sesbania nodulates freely in most soils without inoculation.
However, to ensure root nodulation, apply inoculant to seeds before planting.
3. S. rostrata is the species which nodulates both on its roots
and stems. Stem nodulation can be easily induced if it has not yet started by
doing the following:
· Collect nodules from the stems of any available S.
rostrata plant. · Crush these, mix with water and filter the
mixture. · Spray the filtered water on the stems of the S. rostrata The
tiny light green dots are the locations where the nodules will form.
4. The seeding rate ranges from 20-40 kg/ha. A 45-60 day growth
may provide the N requirement of a wet season rice crop. The larger the amount
of seed planted, the fewer days are needed to produce sufficient green manure.
5. Plants should first be slashed or chopped if the
incorporation will tee done by animal-drawn plow and harrow.
6. With the use of scythe or bolo, the standing plants can be
chopped into short pieces from the top to the base. Plants that were cut and
partially cried are tougher to chop than the fresh plants. Slashing may not be
necessary if a power tiller or hydrotiller will be used in the incorporation.
Transplanting of the rice should be done as soon as possible after the
incorporation of Sesbania to minimize N losses which begin within 2-3 days after
incorporation.
For Seed Production
1. Planting methods:
· Planting Sesbania separately from the rice crop during
rainy season or at early dry season · Relay planting into the last rice
crop (by broadcasting Sesbania seeds before rice harvest) · Planting on
rice paddy dikes either by direct seeding or transplanting during the rice crop
season · Planting and growing it together with the rice crop.
Little is known about the quantity of seed produced using the
last two methods. For the first two methods, during rainy and dry seasons, seed
production of about 12 and 9 kg/100 sq. m respectively can be attained.
2. Seeding rate is 16 kg/ha or about 300,000plants/ha. Seeds
should be planted in rows 40-75 cm apart at 1 5-20/linear m.
3. Some insect pests may attack the pods and seeds; except with
very high infestations, no insecticide is needed.
4. Harvesting and cleaning the seed is time-consuming; one
person can pick and clean approximately 5-7 kg seeds/day. Three or more primings
will be needed to harvest all the seeds.
COMBINING SEED PRODUCTION WITH OTHER USES OF SESBANIA:
1. The woody stem of the mature plant can be used as firewood or
as trellis for climbing vegetables.
2. If water is available, the plant can be ratooned to provide
green manure for the next rice
crop.
Animal and green manure practices among the Mangyans (Alangan tribe in Mindoro)
Pigs and chickens are housed underneath the home over bedding of
cornstalks, straw, etc. Decomposed beddings serve as fertilizer.
Animal and green manure
Decomposed
beddings
Waste management practices (Tuwal and Ayangan tribes in Ifugao)
DUG-OUT PEN SERVES TO RESTRAIN THE PIG.
The following materials are laid on the earth floor:
The old bedding is collected and used as fertilizer to be
incorporated into the rice terraces. New materials are laid on the pit floor.
The old bedding is collected
Bedding is collected and used as
fertilizer
Low-external Input Rice Production (IIRR, 292 p.)
Pest/weed control
Major rice insect pests, their natural enemies and economic threshold levels
Pesticide poisoning
Efficient and safe use of pesticides
Low-cost control methods for golden snails (kuhol)
Easy ''do-it-yourself'' snail collector
Makabuhay, a natural pesticide for lowland rice
Low-cost insect trap
Weed management
Weed control in lowland rice
Water management for weed control in rice
Using ducks for low-cost weed management
Low-external Input Rice Production (IIRR, 292 p.)
Pest/weed control
Major rice insect pests, their natural enemies and economic threshold levels
There are about 800 species of insects in the ricefields. Of
these, about 100 species attack rice and the rest are all friendly insects. Out
of the 100 pest species, only 7 are major pests in Philippine rice farms.
There is a new strategy of controlling these major pests in
rice. This method is based on ecologically sound practices in reducing pest
populations and is called Integrated Pest Management (IPM). IPM is a pest
management system that, in the context of the associated environment and the
population dynamics of the pest species, utilizes all suitable techniques and
methods. This is done in a manner that maintains the pest population at levels
below those causing economic injury.
By thoroughly understanding a given crop, its pests and other
elements of the agroecosystem, IPM tries to maximize natural pest control
factors and minimize the need for outside measures like chemical pesticides. IPM
explicitly means:
· use of chemicals based on need · utilization of
economic threshold levels · use of resistant varieties ·
knowledge of cultural practices · enhancement of biological agents
IPM can help farmers increase profits and reduce health hazards
and pest outbreaks by maintaining the pest-natural enemy relationship in the
field. In maintaining such relationships, insecticide use is "need-based". In
practice, the farmer has to know the Economic Threshold Level (ETL) for a
particular pest. ETL refers to the pest population level where control measures
are needed.
The information in this paper is designed as a quick guide for
identifying major pests of rice and their natural enemies and to help determine
the economic threshold level for each pest.
RICE BUG (L. oratorius)
· ECONOMIC THRESHOLD LEVEL (ETL)
10 bugs in 20 hills
· SAMPLING METHOD
Sample early in the morning or late in the afternoon from 20
randomly chosen hills from flowering to hard dough stage. Sample twice a week.
· INSECTICIDE
Monocrotophos EC Nuvacron USC
· DOSAGE (kg ai/ha)
0.4 each
· METHOD OF APPLICATION
Spray in the morning
NATURAL ENEMIES
Parasites
Predators
Pest
Host plants
Susceptible stage
Symptoms
WHORL MAGGOT (Hydrellia philippina)
· ECONOMIC THRESHOLD LEVEL (ETL)
a. 2 eggs/hill b. 5% whorl maggot - damaged leaves + 5%
leaves damaged by chewing insects at 5 DAT
· SAMPLING METHOD
20 random hills/ricefield at 5 and 8 days after transplanting
· INSECTICIDE
Monocrotophos EC
· DOSAGE (kg ai/ha)
0.4
· METHOD OF APPLICATION
Spray when threshold is reached
NATURAL ENEMIES
Parasites
Predators
Pest
Host plants
Susceptible stage
Symptoms
STEMBORER (Scirpophaga incertulas)
· ECONOMIC THRESHOLD LEVEL (ETL)
75 deadhearts in 20 hills or 2 adults or 2 egg-masses/m²
· SAMPLING METHOD
20 random hills/ricefield from tillering to panicle initiation
stage
· INSECTICIDE
Chlorpyrifos EC
· DOSAGE (kg al/ha)
0.4
· METHOD OF APPLICATION
Spray when larva hatch
· DAMAGE
Larvae feed on leaves and leaf sheaths
NATURAL ENEMIES
Parasites
Predators
Pest
Host plants
Susceptible stage
Symptoms
GREEN LEAFHOPPER (N. Virescens)
· ECONOMIC THRESHOLD LEVEL (ETL)
1 hooper/tiller
· SAMPLING METHOD
20 random hills/ricefield 1 to 10 weeks after transplanting
· INSECTICIDE
BPMC WP
· DOSAGE (kg al/ha)
0.4
· METHOD OF APPLICATION
Spray when older nymphs are present
· DAMAGE
Drief leaf tips and leaf margins orange discoloration
NATURAL ENEMIES
Parasites
Predators
Pest
Host plants
Susceptible stage
Symptoms
CASEWORM (Nymphula depunctalis)
· ECONOMIC THRESHOLD LEVEL (ETL)
50% of the leaves are damaged. Combine the damage caused by
other leaffeeding pests with that of caseworm.
· SAMPLING METHOD
20 random hills/ricefield at 2 to 6 weeks after transplanting
· INSECTICIDE
Carbaryl
· DOSAGE (kg al/ha)
0.5
· METHOD OF APPLICATION
Spot treatment
NATURAL ENEMIES
Parasites
Predators
Pest
Host plants
Susceptible stage
Symptoms
BROWN PLANTHOPPER (N. Lugens)
· ECONOMIC THRESHOLD LEVEL (ETL)
1 hopper/tiller
· SAMPLING METHOD
20 random hills/ricefield 2 to 10 weeks after transplanting
· INSECTICIDE
BPMC WP Buprofesin WP
· DOSAGE (kg al/ha)
0.4 each
· METHOD OF APPLICATION
Spray when other nymphs are present.
NATURAL ENEMIES
Parasites
Predators
Pest
Host plants
Susceptible stage
Symptoms
LEAFFOLDER (Cnaphalocrosis medinalis)
· ECONOMIC THRESHOLD
LEVEL (ETL)
a. 15% of leaves are damaged before Panicle initiation. b. 5%
of leaves are damaged after panicle initiation stage.
· SAMPLING METHOD
20 random hills/ricefield at 2 to 6 weeks after transplanting
watch for months
· INSECTICIDE
Monocrotophos EC
· DOSAGE (kg al/ha)
0.4
· METHOD OF APPLICATION
Spot treatment
Parasites
Predators
Pest
Host plants
Susceptible stage
Symptoms
CULTURAL MANAGEMENT PRACTICES FOR PEST CONTROL IN RICE
A cultural practice is any farm operation that will make the
environment less favorable for pests to develop or multiply but which still
favors rice production.
Rice ecosystems are fundamentally very stable systems but can be
disrupted by inputs such as pesticides and inorganic fertilizers. There are few
key pests in rice. Therefore, cultural practices, when used together with
pest-resistant rice varieties, will provide adequate defense against most rice
insects and diseases.
Cultural practices for rice pest management include the
following:
SYNCHRONIZED PLANTING:
Since the massive introduction of rice intensification programs
in the 1960s when shortduration modern rice varieties were introduced, there was
room for planting rice three times a year or even five times in two years. Due
to socioeconomic factors (labor shortages, market prices), staggered rice
planting (i.e., non-synchronized) became unavoidable. This situation is ideal
for continuous development of pests. Staggered planting with short idle
intervals stimulates the build-up of BPH populations and may result in serious
outbreaks of the rice dwarf virus, BPH, RTV (transmitted by GLH) and WBPH. Rice
gall midge and the rice stink bug also became more serious in Indonesia because
of staggered planting.
In staggered rice patterns, the generations of the pests are
overlapping. There is no clear-cut fallow period (i.e., for soil preparation)
between the two rice seasons. In this situation, any rice pest will build up
continuously. On the other hand, in the synchronized patterns, there is a fallow
period between the two rice seasons for about one month. This is the time for
simultaneous soil preparation (irrigating field, deep plowing under the stubbles
[ratoons] and sanitation). Most rice pests will then be destroyed.
CROP ROTATION AND INTERCROPPING (DIVERSITY):
Rotating rice with non-rice crops helps to break up the life
cycle of both insects and pathogens. Continuous planting with no time for the
soil to rest not only depletes its fertility but also enables pests to survive
better. Intercropping (planting a second crop between rice, as in upland areas)
will also reduce the spread of insects and diseases especially if the crop is
very different in architecture from rice. During the growing of short maturity
non-rice crops, there is no chance for rice pests to develop and they are
gradually brought under control in areas where synchrony and crop rotation are
strictly followed.
SANITATION:
Sanitation aims to remove all breeding or hibernating sites and
sources of food of the insect or survival sites for the pathogen.
The survival stages of the rice stemborer, BPH and GLH in the
ratoons are all destroyed by plowing under or burning stubble, ratoons and
straw. Grasses on the dikes and surrounding areas may also be removed or cut
short to disrupt the life cycles of stink bugs and the green leafhopper. In
rice, intensive cultivation and wet weather do not permit drying and burning of
the straw.
Straw burning is not always advisable because it destroys most
of the arthropod populations that play an important role in decomposing plant
remains. It also eliminates the available nitrogen in the plant remains.
Nutrient loss by leaching is also much higher after burning.
When the rice plant is somewhat older, weed sanitation in the
field is, of course, needed. Weedy fields may make the microclimate more
favorable for insect pests than clean fields. Clean weeding may not be always
advantageous for certain species of natural enemies because there may not be any
shelter left for them. For example, spiders require some shelter to survive
during the period between two rice crops and this may be provided by having
weeds on the bunds. With respect to BPH, the sanitation program may be limited
to only destroying the rice stubbles and ratoons because other grasses are not
real host plants for the insect.
Fish and ducks have been successfully used in several countries
to control sheath blight and insects/weeds, respectively.
FERTILIZER MANAGEMENT:
The population of many pests, such as certain aphid species,
BPH, spider mites, blast, bacterial blight and sheath blight are significantly
more abundant with increased nitrogen levels. The rice stemborer Chilo
suppressalis and the gall midge have also been found to be significantly more
abundant in fields treated with high rates of nitrogen. High nitrogen causes the
rice plant canopy to become very thick. Although high nitrogen generally favors
pests, it is not advisable to use fertilizers at lower than the recommended
dosage, i.e., to sacrifice high yield for expected pest control. BPHresistant
varieties have commonly been selected in high fertilizer environments and
integrating such varieties with synchrony, rotation and other control tactics
should achieve both high yield and BPH control. Unbalanced nutrients favor some
diseases, e.g., low phosphate levels result in higher levels of brown spot
disease.
WATER MANAGEMENT:
Water may influence the abundance of some pest species. BPH
problems are known to increase when irrigated rice cultivation replaced dry rice
cultivation. In Japan, insects are abundant in the humid lowlands and rice
fields with standing water have been found to encourage the multiplication of
BPH. In Indonesia, BPH prefers irrigated rice to upland rice. The problems are
more serious in plots continuously flooded or with standing water. The green
leafhopper Nephotettix virescens also seems to favor fields with stagnant water
and specially those with intermittent rain as well.
Good water management should therefore help control certain rice
pests. Draining the fields for about two days suppressed BPH outbreaks in
Malaysia. In the Philippines, farmers withhold irrigation and plants are spread
apart every few rows to help dry out the fields for BPH control. To effectively
control the rice water weevil, fields are drained at the proper time and
irrigation is stopped for a predetermined period. Draining the water level in
rice fields destroys the eggs of BPH laid in the leaf sheaths. Deep irrigation
in the morning followed by the addition of a certain amount of kerosene to water
gives good control of BPH. In Indonesia, it is a common practice to raise the
irrigation water level to control BPH; sand or sawdust containing 0.25 l
kerosene for every 100 m is then broadcast on the raised water level and the
plants are shaken.
PLANT SPACING:
The spacing of rice plants in a field is believed to influence
the abundance of certain rice pests. Close spacing may rapidly increase the BPH
population. Close spacing results in a more shaded, cooler and more humid
microenvironment, which makes it less favorable for the development of the
natural enemies of BPH. Both GLH and WBPH may also increase in closely spaced
rice plants. In direct-seeded rice where spacing is much closer than
transplanted rice, these pests may become more severe. Close spacing also
intensifies the severity of rice diseases such as sheath blight.
Spacing should be such that it allows some sunshine to penetrate
into the basal portions of the rice plants. Solar and ultraviolet radiation
restrain BPH increase. More air flow also makes the microenvironment less humid
and may also help the natural enemies develop. The distance between rice plants
depends on the variety. Modern rice varieties with high tillering capacity may
be planted further apart than those with less or moderate tillering capacity.
Common spacing between rice plants is 20 x 20 cm or 25 x 20 cm.
KEY:
BPH -- Brown Planthopper GLH -- Green Leafhopper WBPH --
White-backed Planthopper SB -- Stemborer ShB -- Sheath
Blight
Pesticide poisoning
The most common routes of pesticide poisoning are:
Breathing into the lungs
Skin contact
1. Skin contact -- by spilling or splashing pesticides on
clothes or directly on skin. Dry materials can also be absorbed.
Wrists, armpits, neck, groin and feet are areas of the body that
absorb pesticides more quickly than others. Cuts and scrapes also allow more
pesticide to enter more easily.
2. Breathing into the lungs -- Dusts, sprays or fumes can enter
the system by being breathed into the lungs. Poor ventilation indoor allows
greater exposure.
3. Oral/Swallowing -- Pesticides are absorbed well through the
mouth, stomach and intestine. Pesticides can be accidentally taken in by people
who eat or smoke while applying pesticides or when improperly stored in food
containers.
4. Eye contact -- Pesticides absorption and local damage can
occur with eye contamination.
FIRST AID:
In Case of Skin Contact with Pesticide
1. Take off any contaminated clothing. 2. Wash skin with lots
of soap and water.
Do Not Touch the Pesticide Again or Handle Contaminated
Clothing.
In Case of Eye Contact with Pesticide
1. Hold eyelids open and wash with gentle stream of cool, clean,
free-flowing water. 2. If with contact lenses, remove them, 3. Continue
rinsing eyes for at least 15 minutes. 4. See physician.
In Case of Breathing in (Inhalation of) a Pesticide
1. Remove person from exposure to pesticide. 2. If conscious,
place person in a sitting position with head and shoulders elevated. 3. If
unconscious, give artificial respiration and call for medical assistance.
In Case of Oral Contact or Swallowing a Pesticide
A. Induction of vomiting only if
1. patient is conscious 2. pesticide is moderately to
extremely toxic.
Induce vomiting using the following procedure
1. Sit or stand-up patient. 2. Give 1 to 2 glasses of
water. 3. Tickle back of the patient's throat using a bland instrument (spoon
handle). Use 2 fingers of the other hand to force the patient's cheek between
his teeth. 4. Return patient to lying position-turned towards the left, neck
extended.
General Management
1. Keep patient calm and at rest. 2. Keep close observation
of breathing and state of consciousness. 3. Place patient in proper position.
3.1 Place patient on his left side with head lower than the rest
of the body by 15 to 30 degrees. 3.2 Keep patient comfortable but not hot and
sweating or cold and chilly. Maintain a normal temperature.
BREATHING:
If Breathing Stops
1. Pull chin forward to avoid tongue dropping to back of
throat. 2. Roll patient on his back, keeping chin pulled forward and head
back. Remove any vomitus or secretions from the mouth using a clean cloth. 3.
Pinch patient's nose and blow into his mouth through a piece of cloth or
handkerchief following your normal breathing rate. Alternatively, close his
mouth and blow into his nose.
Make sure patient's chest is expanding with each flow. Continue
until normal breathing takes place.
If Convulsion Occurs
· Insert padded gag between the teeth to prevent the
patient from biting his tongue. · Prevent further injury by placing a
cushion or pad under his head and prevent him from falling.
Tips to Induce Vomiting
4 egg whites for children 8 egg whites for
adults.
Efficient and safe use of pesticides
Pesticides are still widely used pest control agents against a
variety of pests in rice. There are specific pesticide groups which control
specific pest problems. There are insecticides to control insects, herbicides
for weeds, fungicides for fungi, rodenticides for rodents, etc.
Despite their popularity, improper and careless usage of
pesticides has resulted to undesirable effects on people, livestock, non-target
organisms and the environment in the rice field. Accidents have also resulted
during their use, transport and storage.
To avoid these adverse effects, the following tips should be
followed in using pesticides:
THINGS TO REMEMBER BEFORE MIXING:
1. Read the label carefully. The label contains necessary
information relevant on how the product must be used and what to do in case of
poisoning.
Read the label carefully
THINGS TO REMEMBER DURING MIXING:
1. Wear gloves, safety glasses and/or masks/respirators and mix
pesticides outside the house.
2. When mixing liquid concentrates with water, it is always
advisable to place pesticide into the sprayer tank first before mixing with
water.
Caution: If acid is used, it must be poured into the water
during the preparation of the solution. Do not pour water into the acid because
an explosion could result.
3. Immediately after mixing, close pesticide container tightly
and keep it in a safe area not easily reached by small children.
THINGS TO REMEMBER DURING APPLICATION:
1. Never smoke or eat during the spraying operation.
2. Wear protective clothing, such as long-sleeved shirts, pants
and respirators when spraying.
Never smoke or eat during the
spraying operation
3. Spray pesticide diagonal to the direction of the wind not
against it.
4. Do not spray during windy days.
5. Limit spray application to 3 to 4 hours only.
Do not spray during windy days
THINGS TO REMEMBER AFTER APPLICATION:
1. Wash all exposed body parts twice with soap and water; a bath
would be more advisable. An alkaline soap (Perla) should be used in taking a
bath, stay away from sources of drinking water.
2. Wash all contaminated clothings thoroughly with soap and
plenty of water. Separate them from ordinary family laundry.
3. Do not dispose excess pesticides nor wash the sprayers in
waterways (irrigation, canals, streams, rivers). Do not burn containers.
4. Dispose empty pesticide containers by burying them in
suitable pits that prevent pesticide leakage into the groundwater or other
bodies of water. Never burn paper packages and plastics.
Wash all exposed body
parts
Low-cost control methods for golden snails (kuhol)
INTRODUCTION:
The golden snail, commonly known as kuhol (Pomacea caniculata),
was originally introduced in the Philippines as a source of protein for the
family. However, it has become one of the most destructive pests of lowland
rice. Kuhol usually feeds on the succulent parts of the rice plant, causing
stunted growth and eventual destruction of the rice plant.
Kuhol belongs to the snail family (Pelidae) that lives only in
or close to fresh water in swamps and rivers in South America. When kuhol was
commercially introduced into the Philippines, its possible escape was not
anticipated. The natural predators of the kuhol in South America do not exist in
the Philippines. Therefore, there has been no natural check against growth and
reproduction.
Between 25-500 eggs, depending on breeder size, are laid in
oval-shaped clusters. Eggs are laid early in the morning and evening on standing
crops, along dikes and on any object sticking up above the water surface. One
kuhol can produce up to 200-300 eggs/week or 1,000-1,200 eggs/month, with 80%
hatchability.
Kuhol can breathe underwater like fish or in the open air. When
ricefields are drained, kuhol burrows into the moist mud, digging deeper as the
dry season progresses. It can sleep hidden in dry soil for over 6 months then
awaken overnight when the soil is flooded.
The kuhol is a voracious plant eater. It feeds on a wide range
of plants such as Azolla, duck weed, water hyacinth, rice seedlings and other
succulent leafy plants and vegetables. In irrigated ricefields, the rice is most
vulnerable to the kuhol during the first 2 weeks of establishment for
transplanted rice and during the first 4 weeks for direct-seeded rice.
To save the rice plant from this pest, farmers tend to use
commercial/chemical snail killers which are not only hazardous to human, fish
and animal health, but also alter the environment and add to the farmers'
expenses. Some of the chemicals used to control snails have recently been
banned. (Integrated Kuhol Management, DA/FAD, 1989).
DIFFERENT CONTROL STRATEGIES FOR KUHOL:
A. BEFORE TRANSPLANTING RICE
1. Several weeks before transplanting, allow ducks to roam
around the paddy field. Ducks will feed on the eggs and smaller snails.
Allow ducks to roam around the paddy
field
2. Hand-pick all the larger snails not eaten by the ducks. Crush
them with a mortar end pestle and feed them to the ducks. The snail meet end
shells are excellent sources of protein and calcium for laying ducks.
Hand-pick all the larger snails
B. AFTER TRANSPLANTING RICE
1. Install a wire mesh screen in the water runways to prevent
the eggs and adult snails from entering the paddy field during irrigation.*
Install a wire mesh screen
2. Maintain shallow water (2-3 cm) during the first 15 days
after transplanting to minimize damage. One month after transplanting, allow
ducks to roam the paddy field and consume the remaining eggs and snails.
Maintain shallow water
3. Construct depressed strips in the paddy where wafer will be
retained when the field is drained. The snails will migrate and collect in these
lateral depressions and can then be collected.
Construct depressed strips
C. PLACEMENT OF STAKES
1. Snails prefer to climb above the water level to lay their
eggs.
2. Collect stakes 0.5-0.75 m long and 2 cm in diameter. Arrange
them 0.5 m from the rice paddy dikes, 2-4 m apart The kuhol will lay their eggs
on these stakes.
Collect stakes 0.5-0.75 m long
3. Gather the eggs, crush them and feed them to ducks, chickens
and pigs.
Gather the eggs and feed them to
ducks, chickens and pigs
D. RICE HULL
1. Separate coarse hulls from the fine ones with a sieve.
2. After a rain, evenly spread a 1-2 cm layer of rice hulls in
the ricefield. The hulls will affect the digestive system of the snails, causing
them to starve and die. Three or four days after spreading the hulls, collect
the dead snails.
Separate hulls
Spread hulls
E. EAT KUHOL
The kuhol first introduced as a high protein food for human
consumption, has a high nutritive value. A bite-size snail contains the
following:
Food energy
83.0 calories
Protein
12.2 gm
Fat
0.4 gm
Carbohydrates
5.5 gm
Ash
3.2
Phosphorous
61.0 mg
Sodium
0.4 mg
Potassium
17.0 mg
Riboflavin
12.0 mg
Niacin
1.8 mg
The kuhol also contains vitamin C, zinc, copper, manganese,
magnesium and iodine. (Integrated Kuhol Management, DA/FAD, 1989).
Put salt on kuhol then saute with garlic, onions and tomatoes.
Remove from pan and mix sauted ingredients with beaten egg. Coat the mixture
with flour and fry. Serve hot.
Saute garlic, ginger, onions and tomatoes in hot cooking oil.
Add cooked kuhol to sauted mixture. Stir in coconut milk and achuete. Boil until
oil comes out. Serve hot.
Note: Snails should not be eaten by humans or livestock
including ducks if collected from rice paddies which have been sprayed with
chemicals.
Easy ''do-it-yourself'' snail collector
Golden snail (Pomacea caniculata), a serious rice pest, can now
be locally controlled at a bargain by using a do-it-yourself method of scoop and
scrape snail collecting device called salaan collector.
Instead of bending or- stooping hundred of times to collect
snails, the multipurpose snail picker, with its long handle, can now reach
distant crawling snails and clusters of eggs, without tiresome bending.
With this simple and inexpensive picker, one can collect and
dispatch snails by the thousands while they are still in egg clusters. This
device, with its scorpion-shaped plate attachment, enables one to scrape eggs
from walls and host plants without damaging them.
A. Snail collecting
B. Scraping eggs on walls
C. Scraping eggs on plants
HOW TO MAKE A "SALAAN" SNAIL COLLECTOR
Materials Needed:
1 pc 1 in x 1 in x 6 ft wood or bamboo pole 1 pc 2 1/2 in x 3
1/2 in gauge 20 or 22 galvanized sheet (This is roof gutter sheet gauge) 1 pc
1-2 mm mesh coconut strainer (salaan) 3 pcs 1/8 in x 3/4 in length self
tapping screw 3 pcs 1/8 in x 1/2 in cap screw
Procedure:
1. Paste the pattern below onto gauge 22 sheet metal. 2. Cut
sheet metal with snip. 3. Drill hole with 1/8 in diameter puncher. 4. Bend
metal to shape. 5. Plane sharp edges of 1 in x 1 in x 6 ft wood to make round
for greater comfort. 6. Screw salaan with wood handle. 7. Assemble
finished scorpion-shaped plate into salaan.
Note: For the scorpion plate, tin can materials may be used
although life span of the plate will be shorter.
How to make a "salaan" snail
collector
Makabuhay, a natural pesticide for lowland rice
RESEARCH FINDINGS SHOW THAT:
· The application of chopped Makabahay is as effective as
the use of chemical pesticides in reducing deadhearts and white heads due to
striped stemborer attack and in reducing the green and brown leafhopper
populations.
· The aqueous extract of Makabuhay (50 9/125 ml water) is
toxic to green leafhopper when applied to rice seedlings by root-soaking 24 hrs
before transplanting or by spraying it to the seedlings. These treatments are
comparable to root-soaking in chemical pesticides.
· The submerged chopped Makabuhay stem is toxic to the rice
green leafhopper.
· The combination of aqueous Makabuhay extract root soaking
and broadcasting of chopped vine is as effective as the recommended chemical
pesticide seedling treatment followed by spraying with chemical pesticides 25
days after transplanting.
· Broadcasting of ground Makabuhay vine (0.25 kg/sq.m) on
rice seedbed 10 days after sowing is as effective as broadcasting with chemical
pesticides.
1. Chop the vine into small pieces and pound it with the use of
a mortar and pestle. 2. Add 1 liter water for every 200 9 crushed Makabuhay
vine. Thoroughly stir the mixture, then soak the rice seedlings overnight before
transplanting.
Ten to 15 kg of chopped vine are sufficient to treat seedlings
needed to plant 1 hectare.
IMMERSION
1. Cut the Makabuhay vines to approximately 1 ft lengths. 2.
Tie both ends of the cut vines onto bamboo stakes as shown in the diagram. 3.
Drive the stakes into the ground along water inlets. 4. You can also put 1
liter chopped Makabuhay vines inside a fish net bag and place the bag along the
wafer inlets. Replace the Makabuhay every 2 weeks. Check the bag regularly for
accumulation of mud or other debris.
Tie both ends of the cut vines
Put 1 liter chopped Makabuhay vines
inside a fish net
bag
Low-cost insect trap
The light trap is an inexpensive tool used in monitoring insect
pest populations and helping reduce their numbers. Light traps were used by many
farmers before the introduction of modern rice varieties when chemical
pesticides were still not generally available. The light trap can also be used
in fishponds or rice- fish paddies to attract insects upon which the fish can
feed. As pesticides became more common and were used to prevent damage to crop,
light traps became less important.
Today, however, chemical pesticides are recommended only as a
last resort because of their high environmental, health and economic costs.
Therefore, pest management practices today require a greater knowledge in pest
identification and a system of monitoring insect populations.
LANTERN DESIGNS:
Lanterns can easily be made from locally available materials
like empty glass jars (mayonnaise jars) as illustrated below. The lantern costs
from P50 (design A) to P15 (design C). It uses about P1 to P2 worth of kerosene
per night and produces a bright white light.
Lantern designs
LOCATING THE INSECT TRAP:
The lantern is attached to a frame (tripod) of either bamboo or
wood and is hanged above the rice crop. The frame has a platform that supports a
basin of water just below the lantern. Adding some cooking oil to the water can
make the insects immobile upon falling into the water.
In rice-fish fields, hang the lantern over the water in the
trench at a height which is just above the dike. At that height, the light is
easily seen by insects flying just above the crop canopy.
Locating the insect trap
USING THE LANTERN:
The lantern should be lit as soon as it gets dark (when insects
are most attracted to light) for 24 hours. In cases where the field is far from
the house, the lantern should be filled with just enough kerosene to burn for 2
hours. The lantern should be visited daily and the insects identified and
counted.
NOTE:
· If the light trap is primarily intended to reduce the
insect population, more than one trap is advisable. · If the light trap
is intended to monitor insect population for forecasting, 1-2 traps/ha. is
enough. Check with the local technician.
Pests
Local Name
Time When Most Attracted
Scarab beetle
Uwang, salagubang, salaginto
New moon
Cricket (Gryllotalpa orientalis)
Subong
Full moon
Caseworm (Nymphula depunctalis)
Paruparong gabi
New moon
Green semliooper (Naranga aenescens)
Paruparong gabi (berdeng uod)
New moon
(Rivula atimeta)
Mabalahibong berdeng uod
New moon
Gallmidge (Orseolia oryzae)
Full moon
Armyworm (Mythimma separate)
New moon
Cutworm (Spodoptera litura)
(Spodoptera mauritia)
Stemborers:
Striped (Chilo suppressalis)
Yellow (Scirpophaga incertulas)
Aksip
New moon
Pink (Sesamia inferers)
White (Scirpophaga innotata)
Brown planthopper (Nilaparvata lugers)
Ngusong kabayo
Full moon
Whitebacked planthopper (Sogatella furcifera)
Green leafhopper (Nephotettix virescens)
(Nephotettix nigropictus)
Berdeng ngusong kabayo
Full moon
(Nephotettix malayanus)
The above is compiled from researches conducted by the
Entomology Department of IRRI, Los Ba�os, Laguna,
Philippines.
Weed management
Weed management
REASONS FOR WEED MANAGEMENT:
1. Weeds reduce yield by competing with the crop for sunlight,
moisture and soil nutrients. 2. Fertilizer application in weedy fields may
prove wasteful because weeds absorb the fertilizer (especially N) more
effectively than the crop. 3. Weeds may serve as alternate hosts for crop
pests.
LOW-COST WEED MANAGEMENT PRACTICES:
There are many ways to manage weeds in ricelands at little cost
without having to resort to the use of herbicides. The key to low-cost weed
management and high yield is prevention. Preventing weeds from growing is
cheaper and easier than removing them. Some simple methods of prevention
include: (1) thorough land preparation; (2) using weed-free seed or seedlings;
(3) employing shade and mulch to slow down weed growth; (4) crop rotation; and
(5) good water management (for lowland rice).
1. Land preparation. Good land preparation gives the crop a
chance to grow ahead of the weeds. This reduces competition during the very
sensitive seedling stage. Moreover, by the time the weeds start to emerge, the
plants have grown tall enough to shade them out, further preventing their
growth.
2. Weed-free seed and seedlings. If planting material is not
kept free of weeds (or weed seeds) then the crop will have a competitor from the
start of growth. In the Philippines, transplanting weeds with rice seedlings is
causing losses of 16-23%. (See technology sheets on Rice Seed Production.)
3. Shading/mulching. "Let plants do the work for you." Keep a
cover of economic plants on the field to shade out weeds.
· Select taller varieties of the crop to be
grown. · Increase the planting density to reduce weed
competition. · Use Azolla to effectively shade out grasses, sedges and
small broadleaf weeds in (lowland rice). Use of Azolla alone can reduce weed dry
matter production by 50-60%. · Residues from the previous crop can be
applied as mulch to deter weed growth (aside from conserving water and improving
soil fertility). · In fallow periods, a good stand of green manure will
shade out most weeds, preventing them from setting seed.
Select taller varieties of the crop
Increase the planting density
4. Crop rotation can considerably reduce weeds. Weed population
is lower when planting rice after an upland crop like mung bean or cowpea rather
than when it is preceded by another rice crop. The radical differences in
cultural practices between upland and lowland crops result in different species
of weeds with each system. By rotating crops, weeds have less chance to
establish, keeping their population down.
With continuous monocropping, weeds associated with the crop
have a chance to establish themselves and increase their populations.
In areas where crop rotation cannot be practiced, levels of weed
control have in the first crop affect weed population in the second. Good weed
control in the first crop means fewer weeds in the second.
Another way to inexpensively control weeds is to have livestock
do it for you. Both ducks and fish consume large numbers of weeds.
Most crops do not have to be kept weed-free for the duration of
their growth, especially so when labor is scarce or expensive. The number of
weedings can be reduced by comparing the recommended weed-free period and the
time that critical competition begins between the crop and the weeds. This
varies with crops and different cultural methods. For example, transplanted rice
is supposed to be kept weed-free for the first 30-days after planting. However,
the period when weed competition will actually reduce yields does not begin
until 25-30 days after transplanting, so weeding can be reduced to one time
only, that time between 20-30 days after transplanting.
Weed free period in rice crop
WEEDS ARE NOT ALWAYS BAD FOR FARMERS:
· Some weeds can be used as additional forage for
livestock. · Other weeds can be returned to the soil to increase
OM. · Allowing weeds to grow in some paddy dikes provides shelter to
many beneficial insects where they stay throughout the dry season and help keep
pest populations down once rice planting begins.
ccccccc
Weed control in lowland rice
With no weed control measures, an average of 34% yield loss is
expected in transplanted lowland rice and 45% in direct-seeded rainfed lowland
rice.
COMMON WEED CONTROL METHODS:
· Land preparation · Hand weeding ·
Mechanical weeding (use of push-type rotary weeders) · Flooding (keeping
the field flooded for a period of time to control most weeds) · Use of
herbicides · Use of azolla
General comparison of selected weed
control measures
MECHANICAL WEEDER VS. PRE-EMERGENCE WEEDICIDES
If on-farm labor is unavailable and must be hired, the use of
mechanical weeders will involved higher costs compared to the use of weedicides.
However, the net returns will be higher if farm family labor is used to utilize
mechanical weeders.
The following case study (based on farm records) compares the
two methods:
Weeder
Pre-Emergence Herbicide
1. Area planted
1/2 ha.
1/2 ha.
2. Variety
IR 42
IR 42
3. Crop period/duration
Aug. 4
Nov. 18,1987
4. # Cavans harvested @50 kg/cay.
42
38
5. Gross Value of harvest @P3.5/kg
P7,350
P6,650
6. Cost
a. Labor for marking rows for transplanting @P40/ha.
20
20
b. Depreciation cost of weeder*
50
-
c. Cost of 1/41iterweedicide (Machete)
-
50
d. Labor for mechanical weeding (5 man days @P35)
175
-
e. Labor for spraying
-
8.75
(1/4 man days @P35)
f. Additional handweeding (2 man days @P35)
70
70
g. Total cost of weed control
P315.00
P148.75
7.Gross returns less cost of weed control
P7,035.00
P6,501.25
Above case also illustrates that a more effective weed control
scheme is one that involves a combination of two or more weed control methods.
* Assuming a weeder costs P300 and can last for six cropping
seasons.
Water management for weed control in rice
Flooding rice paddies was one of the first tools developed by
farmers to control weeds in rice. On farms with reliable irrigation, water.
management is also one of the most effective and lowest cost methods of
controlling weeds. Even for farms in rainfed or semi-irrigated areas where the
need to conserve water limits the ability to manipulate water levels, water
management is still an important tool in weed control.
Water management for weed control in
rice
1. At land preparation
Keep the paddy field flooded after harrowing to kill weeds and
to hasten decomposition. Water level should be high enough to submerge all
weeds.
2. At final levelling
Final levelling eliminates any high spots in the field. Weed
seeds in these high spots would be able to germinate because they would be above
the water level.
In areas with good irrigation, final levelling should be done in
saturated soil but with no standing water.
In rainfed or semi-irrigated areas, conserve water by
maintaining water levels at 3 cm.
Final levelling should be done 1 day before transplanting.
3. At transplanting
Irrigated: The puddled, levelled field should not have standing
water. This facilitates straight-line transplanting because the lines can easily
be seen and assures that the seedlings will establish good root-soil contact and
quickly begin to grow.
Rainfed: Paddies should be drained to facilitate transplanting
unless no rain is expected -- in which case some water should be maintained in
the paddies.
4. Transplanting to tillering
Paddies should be flooded 1-3 days after transplanting to
prevent weed seeds from germinating. The time to flood is determined by presence
or absence of Azolla (Flood 1 day after transplanting if Azolla is being used.)
and establishment of the seedlings.
Water level should be 2 cm initially and increased gradually to
10 cm as the rice plants grow.
5. After maximum tillering to post-flowering
Once maximum tillering stage is over, weeds have no effect on
rice yield. Continuous flooding or submergence of the field is desirable but not
necessary. Water depth may vary from 3-10 cm if there is sufficient irrigation
water. Where irrigation water is scarce, the objective should be to maintain at
least a saturated soil once crop canopy is full enough to shade out
weeds.
Using ducks for low-cost weed management
The use of ducks can complement other weed management practices
in rice paddies where straight row planting is used. When the crop reaches 20 cm
in height (approximately 25 days after transplanting) until the booting stage,
the ducks can be allowed into the rice paddy without damaging the crop. Forty to
fifty (40-50) adult ducks feeding for 3 hours a day for 3 consecutive days can
weed a 1,000 sq.m area. Any species can be used but Mallard ducks (Anas
platyrhynchos) are most recommended because they are more active and have light
and narrow bodies.
PROCEDURE
1. Irrigate the field to a depth of 3 cm (ducks will not enter
the rice paddy field without water). To encourage them to enter, broadcast a
handful of rough rice into the paddy.
Irrigate the field
2. The constant dabbling or feeding and trampling by the
web-footed ducks make the soil soft and muddy and inhibit the growth of weeds
and at the same time incorporate weeds growing in between the rows of rice.
Dabbling
3. Broadleaf weeds and sedges are eaten by the ducks. Insects
(e.g. moths or stemborers, hoppers, mole crickets, etc.) and golden snails which
are found at the base of the rice crop are also eaten, thereby reducing pest
populations.
Low-external Input Rice Production (IIRR, 292 p.)
Water management/cropping patterns
(introduction...)
Water management for rice in drought-prone locations
Legume crop rotation with rice
Rice ratooning
Sorjan: towards rice-based integrated cropping systems
Maximizing the dry season for post-rice alternatives
Watermelons in rice paddies
Low-external Input Rice Production (IIRR, 292 p.)
Water management/cropping patterns
Water management for rice in drought-prone locations
A number of strategies exist for farmers to minimize risks and
reduce losses in drought-prone and rainfed rice-producing areas. These
strategies focus mainly on the following: varietal selection, timing of planting
to minimize drought damage, maintenance of water level, cultural practices aimed
at conserving water or improving drought resistance and altering the physical
farm environment.
1. Varietal selection
· Select drought-tolerant varieties if drought is likely to
occur. In general, IRRI found droughttolerant rice varieties to have long, dense
and thick roots. Traditional varieties like BE-3, Peta and Intan tolerate some
drought but yields are lower than modern varieties. The IRRI varieties IR6, IR46
and IR64 also withstand mild drought although IR36 and IR64 are prone to tungro
disease.
· Plant very short-duration varieties to avoid the drought
period entirely.
2. Timing of-planting
· Plant the rice such that the vulnerable reproductive
stage does not fall during the drought season. This presupposes a regularly
occurring drought in a region which the farmers anticipate and plan around.
· Synchronize planting with neighboring farmers to minimize
irrigation water wastage.
Timing of-planting
3. Maintenance of water level
· It is important to provide the crop enough water to
induce maximum tillering (formation of stalks) for a good cover (canopy) so that
water losses by evaporation would be minimized.
· Water is essential during flowering on from 55-70 days
after transplanting of the shortduration varieties. If simultaneous planting is
done, 800-1,000 mm of water would be minimum requirement.
· Fields need only be kept moist (not flooded) all the time
with a 1-2 mm layer as minimum. Using this strategy gives a 30-50% cut
requirements without yield losses.
4. Other cultural practices
· Maintain rice paddy dikes to minimize seepage and clean
irrigation ditches regularly.
· Establish good weed control. Most weeds are much more
efficient than rice in exploiting soil moisture.
· Supply nitrogen (N) and other fertilizers early. If using
less than 30 kg N/ha, apply all of it basally. If applying more than 30 kg N/ha,
use the best split (2/3 basal and 1/3 topdress 5-7. days after panicle
initiation [DAP]). This improves the plant's drought resistance by encouraging
faster root growth and, thus, more soil area can be exploited for soil moisture.
· Increase soil organic maker (OM) content. OM improves the
soil's water absorption and retention capacity.
· Minimum tillage (one plowing and one harrowing) reduces
the water requirement for land preparation and speeds crop establishment,
lowering the risks of an end-of-season drought. Minimum tillage is possible in
fields where perennial weeds are few.
· Direct seedling of pregerminated seed can be used where
there is not enough water to thoroughly prepare the land for transplanting.
Direct seeding also results in a stronger root system. This gives the crop
batter capacity to survive during short drought.
· Farmers should use the early rains of May for land
preparation since this water largely goes to waste.
5. Altering the physical farm environment
· If feasible, impound water in one-fifth of the land area.
A 200 sq.m structure will be enough to supply the water for a half hectare of
rice crop and could also be used for fish production.
· Reduce the area planted to rice to increase the amount of
irrigation or residual rainfall water available. The Sorjan system developed by
farmers in Indonesia is one such method of water management. Tests done in
Indonesia show that this system nearly doubled the amount of available water for
rice production. Devote low-lying areas of the farm to rice and plant the upper
areas with dryland crops. The rice crop can take advantage of the higher water
table in the lower areas and can utilize runoff from the upper areas. (See the
technology sheet on Sorjan: Towards Rice-based Integrated Cropping System.)
· Plant windbreaks to reduce evapotranspiration of the rice
crop.
· At the national level, deforestation is the main cause of
irrigated water shortages for rice production. For long-term sustainability, the
nation's mountainous area must be
reforested.
Legume crop rotation with rice
INTRODUCTION:
In rainfed lowland areas which are traditionally planted to only
one crop of rice per year, land use can be optimized by using the pre- and/or
post-rice wet period to grow-legume crops. Legumes are suitable rotational crops
with rice because they:
· can mature in 55-90 days. · can be grown as
pre-rice crop when rainfall accumulation reaches 100 mm/mo or as postrice crop
using the receding rain and residual soil moisture. · are acceptable
crops because they are easy to prepare for consumption or to sell at the
market. · are drought-tolerant. · are capable of using
atmospheric nitrogen and contribute nitrogen to the soil.
IMPORTANCE:
1. Intensifies land use and increases crop production per area
per year. 2. Provides an additional source of food and income to farmers.
Legumes can also provide biomass for green manure and fodder. 3. Sustains
soil productivity through nitrogen cycling with legumes. 4. Weed production
is reduced by planting an otherwise fallow area.
DESIGNING THE CROP ROTATION PATTERN: (Refer to the figure on
theoretical rainfall occurrence and proposed legume-rice sequences)
1. Based on knowledge from past years or from rainfall data,
determine the onset and the end of the rainy season. 2. Choose short-maturing
varieties of both rice and legume crop to accomodate a three-crop sequence or to
avoid water stress. 3. Estimate the planting and harvesting dates of each
crop in the cropping sequence. 4. If, based on the rainfall occurrence and
drainage system, only a two-crop sequence is possible, there is a flexibility to
choose a longer duration crop variety which has other desired characteristics.
Theoretical rainfall occurrence and
the proposed legume-rice sequence
ADDITIONAL POINTERS:
1. The field should be well-drained. This minimizes flood damage
if heavy rains occur during the legume cropping season and it facilitates
post-rice land preparation for legumes.
2. If no legume crop will be grown after the rice crop, the
field should still be plowed after rice harvest so that land preparation for the
following pre-rice legume could be done quickly and easily using the early
rains.
3. For the post-rice legume, a variety high in both grain and
biomass yield (usually indeterminate or late-maturing) such as indeterminate
cowpea, Indigofera, etc., is desirable so that more residues will be produced
for use as fodder during summer or as green manure for the next crop. The crop
should be tolerant to drought.
4. Other criteria in choosing crop varieties/species to be used
are: adaptability to the site; marketability; tolerance to crop hazards -- like
excess moisture (for pre-rice crop), drought (for post-rice crop), wind and
short-term floods.
The ideal legume species are mung bean and cowpea. They are
planted with 50 cm row spacing at a population of 300-350 and 350-400 thousand
plants/ha as pre-rice and post-rice crop, respectively.
5. If the available time for pre-rice legume is less than 60
days, green manures, such as Sesbania, could be planted instead of grain
legumes.
Rice ratooning
Ratooning, the ability of rice plants to regenerate new tillers
after harvest, may be one practical way to increase rice production per unit
area and per unit time. Because ratooned rice has shorter duration than a new
crop, it may increase productivity in areas where cropping intensity is limited
by inadequate irrigation facilities or by a second crop where the rice season is
less than 180 days. Besides short duration, it costs less to grow a ratoon crop
than a new crop. The major advantages of rice ratooning are:
· Lower production costs because of savings in land
preparation and plant care during early growth; · Short
duration; · Efficient use of the growing seasons, especially in
monsoonal climates; · Higher yield per unit area in less time; ·
Possible maintenance of the genetic purity of a variety or hybrid rice through
several seasons; · Low irrigation water requirements; · 60%
reduction in the amount of water needed to compare to a second crop of
transplanted rice; and · 50-60% reduction in the amount of labor needed
especially important considering the shortage of labor when the first rice crop
is harvested and the second is planted.
Yields are generally lower in a ratoon crop than in a
transplanted second crop. However, the capital and labor savings are often
enough to make a ratoon crop more profitable. The lower yield potential outputs
of 3-4 T/ha have been frequently reported.
HOW TO HAVE RATOON CROP PRODUCTION:
Selecting the right variety is one of the most important and
critical steps in obtaining high crop yields from ratoons. An ideal cultivar for
rice ratoon cropping should have the following traits:
· Produces ratoon tillers after and not before
harvest; · Tillering from basal, not upper, nodes; · Sixteen
ratoon tillers/hill at 20 x 20 cm spacing; · At least 3
leaves/tiller; · Resistance to major disease and insects; ·
Synchronized flowering and maturity; · More than 60 growth duration from
cutting to maturity; and · High grain yield.
Recommended land preparation practices for the main rice crop
are undertaken only once because the ratoon crop does not require another round
of land preparation. Deep plowing (25 cm depth) increases yield of the ratoon
crop but under Philippine conditions, this is not practical.
Crop establishment in the main crop may either be by
transplanting or direct seeding. Planting density is a more important factor in
determining yield: the more plant/sq.m. the higher the yield (if no lodging
occurs). Direct seeding usually results in a higher plant density than does
transplanting at 20 cm x 20 cm distances but if the triple row transplanting
method is used, plant density is about the same and less lodging occurs.
Fertilization of the main crop is essential for good yields in
the ratoon crop. Deep placement of N fertilizer, if feasible, should be
practiced as yields in the ratoon crop are increased by this practice. Green
manuring practices and Nitrogen rates recommended for the first crop should be
followed. N should be applied immediately at the harvest of the main crop to
stimulate tillering of the ratoon crop. Suggested rate is 15-45 kg. N/ha.
Ratooning is a viable option for those farms where a second rice
crop is not profitable and upland crops are either not profitable or cannot be
grown due to poor drainage or other.
factors.
Sorjan: towards rice-based integrated cropping systems
Sorjan, an indigenous technology of Indonesia, is a series of
sinks or canals alternating with raised beds. Rice is usually planted in the
sinks and a wide variety of upland crops is grown in the raised beds. The use of
Sorjan (on 1000 sq.m) as one component of an integrated rice farming system
results in higher and more regular income for the farmer due to the following:
1. Increased production per unit of land area 2. Crop
Diversification
· Growing of high-value, off-season crops ·
Simultaneous growing of a wide variety of lowland and upland crops assures
farmers a good harvest from at least one of the crops. · Increased
fodder production for livestock.
3. Earlier rice crops and higher yields in partially irrigated
or rainfed areas 4. Other Benefits
· Increase in quantity and variety of food available for
home consumption · Increased fertility of sinks · More even use
of labor throughout the year · Practical and ideal for farmers whose
land area is less than 1 hectare · Could be adopted in a wide range of
agro-ecological conditions.
Note: This technology has a high labor requirement during the
initial development of the plots.
1. INCREASED PRODUCTION AND LAND UTILIZATION
Production increases in Sorjan because water is used more
efficiently, weed control is easier and both upland and lowland crops are grown
in environments more closely tailored to their needs.
Water collects and stays in the sinks -- where it is needed
most. The standing water aids rice growth and keeps weed populations to a
minimum. The upland crops have a stable water supply (the standing water in the
sinks which is available to them through wicking action), combined with good
drainage and air circulation.
Along the sink portion (as well as in lateral canals) fish could
also be introduced while, at the top portion of the sink, trellises for
vegetable production are also recommended.
Under these Ideal conditions, production is very high. In work
done by a Masteral student at U.P. Los Ba�os, yields of grains and fodder from
the Sorjan were 21 T/ha/yr of grains and 14 T/ha/yr of fodder for continuous
cropping of rice.
2. DIVERSIFIED PRODUCTION
The growing of upland and lowland crops at the same time in the
same field practically assures the farmer a good harvest of at least one of the
crops. High-value crops, such as tomatoes and onions, fetch very high price when
grown in the rainy season -- which is possible in Sorjan. The most profitable
cropping pattern tested by IRRI was tomatoes -- onions -- bush sitao with a net
income of more then P40,000/ha.
The quantity and quality of fodder production are also greatly
increased. The addition of grain legumes, such as mung bean, provides high
protein fodder for livestock. Intensive production of fodder grasses and trees
to supplement livestock feeds is possible in this system. Napier planted in the
side of the beds prevents the erosion of the beds (reducing maintenance) and
produces more than 2 kg of high quality fodder grass/linear meter every month.
In the UPLB study, fodder produced was enough to meet the feed needs of 11
carabao heifers or 29. cattle fatteners.
In the study conducted by IIRR in 1988 (dry season), data showed
that the net income of rice planted on the sink portion yielded P9,471 on a
hectarage basis, while on the elevated plot, cowpea had P10,773 and napier grass
with P2,706.
Rice-fish also has very good potential in Sorjan due to the
greater degree of water control. IRRI has recorded yields of nearly 200 kg of
fish/ha/crop in addition to rice and upland crop yields. Yields could be tripled
according to data from India.
3. EARLIER RICE CROPS WITH HIGHER YIELDS
In rainfed or partially irrigated areas, farmers must wait for
enough water to accumulate before plowing and puddling the soil (land
preparation). In Sorjan sinks where the rice is grown, water accumulation is
faster because of runoff from the beds. Tests in India indicate that 46% of the
rain falling on the beds is collected in the sinks. Fields can be puddled up to
three weeks sooner. The same trials in India compared rice yields from Sorjan
and normal rainfed rice over three years. Yields were 70% higher per unit area
in Sorjan. This means that even by taking half the land out of rice production
(i.e., the raised beds), yields were almost the same (1.5 T/ha for rainfed rice
production and 1.3 T/ha in Sorjan).
BED CONSTRUCTION:
The construction of the beds can be done in several ways:
plowing with an upland plow and shovelling the soil to form the beds; or plowing
a flooded field, harrowing to move the soil into a rough bed and then shovelling
to straighten the edges.
The method chosen will depend greatly on labor availability. An
area of about 1,000 sq.m. requires anywhere from 300-600 man hours -- which can
vary upon the number of beds to be constructed, their width and height.
DETERMINING BED HEIGHT AND WIDTH:
A number of factors need to be taken into consideration when
deciding on bed height and width:
Height:
- Terrain. If field is sloping, a lower height is needed because
there is less problem with drainage (for the upland crop planted on the
beds). - Chance of flooding/height of floodwater. If flooding occurs, the bed
must be high enough so that the upland crops will not be flooded. - Rate of
soil erosion from bed to sinks. Original heights of bed should be higher under
high erosity conditions. - Soil fertility/depth of topsoil. Sinks should not
be dug so deep that subsoil is exposed.
Width (and/or number of beds):
- Water needs. If the land is rainfed, the width will be
determined by how much runoff from the beds is needed for the rice in the
sinks. - Convenience of the farmer. If the farmer plans to plow the beds,
these need to be wide enough to facilitate the plowing operation. On the other
hand, making many narrower beds is faster than making fewer but wider beds.
INCREASING FERTILITY OF SINKS:
Removing topsoil from the sink area reduces soil fertility which
will affect lowland crop yields. The farmer should therefore focus efforts on
increasing soil fertility with large amounts of organic matter. Some
possibilities include:
· planting green manure or grain legume in the sinks as
soon as possible after formation · mulching the crops with straw during
the dry season · moving livestock housing to sink areas during the dry
season fallow period · using Azolla if feasible (might be possible even
in rainfed areas due to increased moisture availability and better water
control).
If moisture is present in the raised beds plant soybean, cowpea,
or mung bean. Mung bean, in particular, does very well in newly constructed
beds. Mulch the crop as well. Some upland crops are better suited than others to
new Sorjan beds including sweet pepper, cucurbits (cucumber, squash and
ampalaya) and grain and vegetable legumes.
SOURCE: PCARRD Monitor
A. for waterlogged areas
B. for predominantly rice-based
areas
Maximizing the dry season for post-rice alternatives
RATIONALE:
There is a need to maximize the use of residual moisture an/or
land area in rice-based farming systems, through crop-intensification by raising
alternative crops after rice. This also contributes to the diversification of
the farm.
Diversification of crops in a rice-based system, particularly
with the use of vegetable crops, improves overall farm income, reduces the
degree of deterioration of fertility, increases the uses of residual moisture
and cropping intensity and improves daily cash flows. Such multiple cropping
systems also help reduce insect populations.
CONSIDERATIONS:
· Is land efficiently used? · Are all land areas
utilized? · Does the present use conserve the land? · Is
available water efficiently used? · Are the crops grown when they are
best suited? · Is farm work designed to employ/utilize the labor of
other family members? · What capital resources are available?
Figure
IN THE SELECTION OF CROPS, CONSIDER THE FOLLOWING:
· market potential/demand · price · family
benefit · knowledge/skill in growing · maturity of
varieties · time of planting · method of planting
TRADITIONAL SYSTEMS:
1. Immediately before harvesting, mung bean seeds are
broadcasted into the rice paddies. During harvesting, the mung beans are
trampled thus establishing a mung bean crop stand.
Mung bean seeds are broadcasted
2. The rice stubble is cut to the ground and used as a mulch (in
addition-to the rice straw from threshing). After mulching the field, the area
is flooded for about 1/2 day or until it is saturated. The area is then planted
with onion or garlic. (Nueva Ecija)
The rice stubble is cut to the
ground
3. The field is plowed and harrowed and planted with various
vegetables. (Nueva Ecija)
The field is plowed and harrowed
4. The paddies are cleaned of rice stubble, flooded until
saturated and holes are dug at a 2 m x 2 m distance. Watermelon and musk melon
are then planted. (Nueva Ecija and Cavite)
The paddies are cleaned of rice
stubble
CROPPING PATTERN FOR A RAINFED LOWLAND RICE-BASED AREA:
Rice is grown from July to October when water is available and
the supply is adequate. Then, using residual soil moisture and available rain
water, vegetable production can be feasible during the dry season.
CROPPING PATTERN FOR AN IRRIGATED LOWLAND RICE-BASED AREA:
Two crops of rice can be grown between May and January. The
first with rain and the second with supplemental irrigation. Vegetable crops can
then be grown during the dry months using available residual soil
moisture.
Watermelons in rice paddies
RATIONALE:
Scarce land resources can be optimized and farm income can be
increased by planting high value crops in rice paddies during the months
following the rice harvest. Farmers in Cavite, Philippines, have demonstrated
that planting watermelons can be a profitable venture if the activity is
properly timed. Demand for watermelon is high, especially during the hot, summer
months when it is a popular fruit used as dessert. The practice can also help
farmers to recover any losses they might have suffered in their rice crop
resulting from unforeseen circumstances like typhoons, pests and diseases,
fluctuations in price and other causes. Labor inputs for crop establishment are
low because minimum tillage is used, thus requiring little land preparation.
CONSIDERATIONS:
· Recommended Varieties
Cultivar
Maturity
Seed Rate/ha.
Sugar Baby
65 days
3-4 kgs.
La Mallorca
80 days
-do-
· Cropping Pattern
In order to receive the best price, watermelons should be
planted from September to late October. Therefore, they should be planted 14-25
days before the rice crop is harvested. Planting during this period enables the
farmer to harvest the crop earlier than most farmers, thus he can command a
higher price for his produce. Also, raising watermelons during the cooler
climate helps avoid possible thrips infestation which usually occurs during the
hot, drier months of the year. Once the watermelons are harvested, batao
(Dolichos lablab) can be sown as a cover crop and green manure for the remainder
of the dry season.
Cropping Pattern
· Land Preparation -- Direct seeding is a common practice
in planting watermelons.
a. Identify the rows where the watermelons will be
planted. b. Using a stick or planting board, push the rice plants to one side
-- creating a space in which the planting can be done. c. Dig the hole 20-25
cm deep and 20-25 cm wide. Place the topsoil one side of the hole and the
subsoil on the other side. The holes are spaced 1.25 m between rows and 1 m
between hills.
Push the rice plants to one side
The holes are spaced
· Planting
Mix equal amounts of compost or decomposed manure with the
topsoil set aside earlier. Return the mixture to the hole. Sow 4-5 seeds. After
the rice is harvested, thin out the unhealthy plants, leaving only three to
mature. Place mulch around the base of the plant.
Place mulch around the base of the
plant
Low-external Input Rice Production (IIRR, 292 p.)
Use of rice plant by-products
(introduction...)
Improving the taste and nutrient availability of rice straw
Briquettes: fuel from farm wastes
Making charcoal from rice hulls
Rice-hull stoves
Low-external Input Rice Production (IIRR, 292 p.)
Use of rice plant by-products
Improving the taste and nutrient availability of rice straw
Enriching the rice straw
Livestock raising can be an efficient way of converting edible
but relatively undigestible and unmarketable nutrients produced on the farm
(like rice straw) into valuable animal products. Even though their feed value is
low, the crop residues are plentiful and low cost. By using simple methods,
these residues can be improved to become important components of livestock
feeds.
Rice straw has a low feed value -- not only because of its small
amount of nutrients, but also because the nutrients that exist are not readily
available to the livestock. Enriching the rice straw with nitrogen or
high-quality fodder (such as leaves from leguminous trees) makes the nutrients
in the rice straw more available. The bacteria in the rumen of cattle, goats or
carabaos use the nitrogen to multiply quickly and they, in turn, break down rice
straw nutrients into forms that can be utilized by the livestock.
Rice straw can be enriched directly by mixing it with the
nutrients before feeding or indirectly by feeding the improved fodder/feeds
separately and allowing the mixing of the straw and the improved feeds to take
place in the rumen of the animal. Some simple methods are described below:
A. Mixing dry rice straw with fresh grasses or legume fodder in
equal amounts.
B. Sprinkling salt solution (a handful of salt to 1 gallon of
water) or molasses on a portion of rice straw to be given in a single feeding.
C. Treating straw with urea
1. Dissolve 400 9 (roughly 1/2 li) urea in 10 liter water (half
a kerosene can). Urea increases the nutrient content of the straw.
2. Sprinkle the solution over 10 kg dry rice straw (about 2
sacks, tightly packed).
3. Mix thoroughly.
4. Tightly pack the mixture in an airtight container (concrete
or clay container, barrel or drum, or pit lined with plastic or clay).
5. Seal the top with plastic so the ingredients will ferment in
10-21 days.
6. Once the container is opened, the treated rice straw should
be consumed within 14-21 days.
D. Providing urea, molasses and water as a healthful drink to
ruminants above 6 months old.
When animals are stall-fed with rice straw, they must be
provided with this drink at least twice a day, in addition to tap water. Prepare
the drink at least two hours before it is given to the animals.
2. Mix the solution until the urea is dissolved. Allow the
solution to stand for 2 hours so the ammonia is released.
3. Add 4 tbsp molasses before giving the drink to the animal.
(NOTE: Be careful not to put more urea than is required. Harmful effects of urea
toxicity range from drowsiness, excessive salivation or going off feed. The most
severe reaction is death.)
E. Salting Hay
Sprinkle 10-20 Ibs (5-10 kg) salt on each ton of damp rice
straw. This can help prevent mold and undue heating. Salting makes poor quality
hay more palatable. However, it does not ensure against spoilage (Morrison,
1961).
F. Providing low-cost molasses-urea block.
Ingredients
FORMULA
Original %
Current %
I
II
Molasses
50
45
50
Urea
10
10
10
Salt
5
5
5
Agricultural Lime
10
-
5
Cement*
-
-
15
Wheat bran/Rice bran
25
25
25
Water (liters)
5.6
5.6
5.6
100
100
100
* Contains calcium carbonate, adds nutrients and serves to bind
the formula ingredients.
1. In one container, mix half of the salt (2.5%) in 5.6 liter
water, then incorporate the cement (or lime). Add more water if necessary.
2. In a separate container, mix the wheat bran or rice bran, the
remaining half of the salt (2.5%) and the urea thoroughly. Add the molasses
until they are evenly mixed.
3. Combine the two mixtures and mix into a fine slop.
4. Line a mould or receptacle with plastic sheets to facilitate
removal of the block. (Plastic pails or empty biscuit cans will do.) Another
cheap method is to arrange 4 wooden boards on the ground in a 2 m x 3 m x 20 cm
high rectangular mould. Pour the mixture into the mould without compressing and
let it set for 24 hours.
5. The following day, cut the mass with a flat spade into 20 cm
x 20 cm blocks, each one weighing about 10 kg.
6. The molasses-urea block can be given to the animals on a
self-feeding box when they return from pasture or when stall-fed. The average
consumption is about 250-700 g/day for an adult animal weighing 250 kg or
more.
Briquettes: fuel from farm wastes
1. To make good use of rice hulls and cow dung (if
available). 2. Briquettes are convenient to store in homes than loose rice
hulls. 3. Saves on wood fuel and other fuel resources.
Mix one part rice hull to five parts
fresh cow dung.
Mould the mix in tin cans opened
both ends.
Sundry for three days
Push one end of the briquette when
dry
It may then be used for
cooking
Making charcoal from rice hulls
1. Char the rice hulls in a carbonizer (or a rice hull stove,
but make sure that the rice hulls are not turned to ashes). Soak in water
immediately to prevent char from turning to ashes.
Char the rice hulls in a carbonizer
2. Mix with as little binding material as possible, just enough
to hold the charred hulls together when moulded. Paddy soil or fresh cow dung
may be used as binder.
Mix with as little binding material
as possible
3. Mould the mixture by hand, or by using a briquettor.
Mould the mixture by hand
4. Dry under the sun for about three days
Dry under the sun
5. When dried, the briquettes are reedy for cooking or drying
grain crops.
The briquettes are reedy
(Adapted from IRRI and UPLB
brochures)
Rice-hull stoves
The unmindful cutting of trees for firewood, poles and other
uses has depleted available resources in most villages. Lowland areas are
particularly affected as areas are cleared for paddy rice and/or vegetable
production.
The increasing price of firewood demands the need to search for
fuelwood substitutes. Rice hull, often regarded as a waste product of rice
processing, can be the answer to such a quest. Rice hulls can be obtained free
or at very minimal costs. This sheet discusses stove designs based on rice hulls
as the energy source. Promoting their use will conserve valuable tree resources.
RICE HULL STOVE MODELS:
Packed Stoves. The rice hulls are packed tightly into the stove,
leaving empty channels through the fuel mass for air, smoke, flames and hot
grasses to pass. There are one to three vents at the base of the stove and cook
pots are placed on an opening at the top.
1. Position 2 thick pieces of wood
in the stove as shown.
2. Pour rice hulls in and pack them
with piece of wood and mallet.
5. When the chamber is filled up to
1-2 inches from the top, carefully remove the pieces of wood, leaving on air
vent and a chimney.
4. Dip a narrow stick in kerosene,
light it, and push it into the hole as shown.
Packed Stoves
Natural Draft Stove The husks are fed into the stove above
the fire and fall down a slanted grate as they burn. The air intake is located
under this grate, forcing all air drawn into the stove to pass through the
burning fuel. The stove ash is raked out from below the grate. The Thailand and
Philippine models below are widely used in the provinces of Bulacan, Laguna and
Cavite. The Philippine model comes in different sizes and is widely available in
local markets.
Perspective view
Front view
Cross sectional side-view
Rear view
Perspective view
Top view
Cross sectional side-view
Adapted from Rice Hulls as Fuel by Craig Thorbum,
1982.
Low-external Input Rice Production (IIRR, 292 p.)
Farm implement
(introduction...)
Thresher options for the farmers
Dryers: investment for the rainy days
Slicer for sesbania and other green manures
Low-external Input Rice Production (IIRR, 292 p.)
Farm implement
Thresher options for the farmers
With the rise in popularity of the axial flow threshers in the
70's, various sectors of society have since benefitted -- from the small farmer
to the big farmer to the non-farmer-worker-turned-thresher-operator to the farm
machine manufacturer to the money-lender-businessman. Currently, farmers have a
wide range of threshing system options from which to choose depending on the
volume of palay to be threshed, available capital and labor resources,
availability of threshers for rent and the existing socioeconomic structures and
systems. The threshing can be done by the farmer using the reliable and almost
zero-cost hampas method, by paying for the threshing service or by pooling
resources of a farmer group to purchase a thresher unit.
Basic data or, existing thresher models are presented on the
other side of this sheet. This information may be helpful to farmers or groups
of farmers in their initial assessment of existing threshers (as taken from IRRI
and UPLB handouts). As of 1989, prices of threshers range from P2,000 to P6,000
depending on size and model.
Thresher options for the farmers
SOME BASIC INFORMATION ON EXISTING PALAY THRESHERS
MODELS
THRESHER MODEL
RATED CAPACITY (kg/hr)
POWER REQUIREMENT
LABOR REQUIREMENT
TRANSPORT ABILITY
OTHER FEATURES
Pedal thresher
120
foot-powered
2 persons
carried by 2 men
hold-on threshing
Portable thresher
300-600
5 hp engine
2-3 persons
carried by 2 men
throw-in or hold on threshing with air winnowing
Axial flow thresher
- TH7
500
7 hp engine
3-4 persons
carried by 4 men
throw-in threshing with an air and screen cleaning mechanism
- TH8
1000
10 hp engine
3-4 persons
pulled by power tiller, light truck or animal
throw-in threshing with an air and double-screen cleaning system
Thresher/ Sheller
1000-1500 (palay) 500 (corn)
16 hp engine
3-4 persons
pulled by power tiller, light truck or animal
modification of axial flow threshers to make applicable to both
palay threshing and corn shelling
For details contact:
1. Agricultural Engineering Department International Rice
Research Institute Los Ba�os, Laguna 2. Agricultural Mechanization
Development Program College of Engineering and Agro-lndustrial Technology
University of the Philippines Los Ba�os, Laguna 3. Agricultural Engineering
Division Bureau of Plant Industry San Andres, Malate,
Manila
Dryers: investment for the rainy days
WHY DRYERS (especially for the rainy season)?
1. Farmers can avoid selling wet palay (unmilled rice) at low
prices.
2. Higher milling recoveries are obtained from properly dried
grain.
3. Farmers can better save their seeds for the next planting
(common practices of using electric fans and frying pans to dry seeds on rainy
days are costly and inefficient).
4. Dryers require less space compared to sundrying.
5. Most dryer designs make use of farm wastes for fuel.
Dryers
As far as small farmers are concerned, dryers are for rainy
season use. However, if they are paying for the use of the drying pavement and
hiring workers to mix and haul the grains, dryers may still prove more
economical even in the dry season.
LIMITATIONS TO USING DRYERS AND WHAT MAY BE DONE:
1. Entails higher operational and investment cost compared to
sundrying.
Dryers cost from P2000 - P40,0000 per unit. The investment cost
per farmer may be decreased if a group or cooperative owns the dryer. The dryer
can also be rented out to generate income. A drying cost of about P4.45/cavan (1
cavan = 50 kg) has been calculated for one dryer model (1988 estimates).
2. Limited grain-drying capacity. If there is need for drying
large volumes, the multistage drying technique may be used. This involves first
drying the grain to 18-20% moisture content (MC) and then drying it a second
time to the required13-14%MC. This technique may be used because simply lowering
the grain MC to 18-20% greatly delays grain deterioration.
If the task is to dry only 2-40 cavans of grain per day, then
the existing dryer models may be used without resorting to the multistage drying
technique.
INFORMATION ON SOME EXISTING PALAY DRYER MODELS
MODEL
RATED CAPACITY*
POWER/FUEL REQUIREMENT
FEATURES
DESIGN/ PROMOTED BY
UPLB Multipurpose Dryer
2-12 cavans per batch/day
no motor engine required; uses charcoal rice hulls, wood chips
and other farm wastes for the burner
originally designed for copra drying but adapted for grains
drying
UPLB
CPV Rotary Flash Dryer
3-4 cavans per hour
1.5 kw motor to drive dryer cylinder; 2 kw motor to drive
blower; uses rice hull for the burner
multistage dryer; a smaller, simplified version of MA- IRRI
rotary dryer
Central Philippines University College of Agriculture (CPU-CA)
IRRI Batch Dryer
20 cavans in 4 to 6 hours
3 hp gasoline engine or 2 hp electric motor to drive blower;
uses kerosene or rice hull for the burner
compact and portable; automatic safety device to shut off burner
assembly
IRRI
UPLB Flatbed Dryer
40 cavans in 8 hours
5 hp gasoline engine or 3 hp electric motor to drive blower;
uses kerosene or rice hull for the burner
compact and portable; automatic safety device to shut off burner
assembly
UPLB
*One cavan = 50 kg.
For details on technical design, contact:
1. College of Engineering and Agro-lndustrial Technology
University of the Philippines at Los Ba�os College, Laguna, Philippines
2. Agricultural Engineering Department International Rice
Research Institute (IRRI) Los Ba�os. Laguna, Philippines
3. Central Philippines University College of Agriculture lloilo,
Philippines
Slicer for sesbania and other green manures
The slicer is an indigenous blade-toothed, animal-drawn weed
chopper which has been used by farmers in Northern Luzon for generations. Since
rice was cropped only once a year, the slicer was originally used to cut viny
and tall weeds that grew during the long fallow period after rice harvest. The
slits in the soil made by the slicer also facilitated plowing.
One objection to the use of green manure crops by many farmers
is the difficulty of incorporating the biomass into the soil. The slicer, with
its capability of handling large amounts of biomass produced during long fallow
periods, should help overcome that difficulty. The slicer could help to make
green manuring (the practice of growing and incorporating plant biomass for
fertilizer) more attractive to farmers.
USING THE SLICER:
The slicer, with a weight on the board, is pulled by a carabao.
As the carabao steps forward, the plants are pressed down. The front board of
the slicer further presses the green manure crop to the ground and the blades
then cut the biomass into pieces. The slicer is pulled ever the green manure
several times depending upon the amount and thickness of the biomass. If the
crop growth is dense, a cries-cross passing may be needed to finely chop the
biomass.
Using the slicer
LIMITATIONS:
· If the green manure is too tall, it may be difficult for
the carabao to pass through the field. · If the stalks or stems become
woody, the slicer may not be able to cut the stems very well.
MATERIALS NEEDED FOR SLICER:
Farmers can easily make a slicer with local materials. The
blades can be ordered from blacksmiths at P25 (5 blades are needed). The wooden
board that holds the blade would cost only P50 to P80. The draw bar can be made
from any hard wood like kakawate (Gliricidia septum) or coffee branches.
The slicer design illustrated here is the same as that used by
farmers in Northern Luzon with the exception of one extension hole in each of
the five blades The original design haz only one hole in one end of each blade.
IIRR engineers added the other hole to double the life of the blades. Only one
end of each blade is attached to the slicer. The other end is worn down by
constant contact with the soil. When that end is worn down almost to the hole,
the blade is turned around. The end originally attached to the board now serves
as the slicing end of the blade.
General view
Perspective view
Side view
Top
view
Low-external Input Rice Production (IIRR, 292 p.)
Integrated systems (rice-fish-livestock-trees)
(introduction...)
Rice-clam culture
Rice-fish culture
Rice-pig-fish culture
Vegetable-duck-fish culture (Tinola garden)
Care and management of mini-ponds
Backyard poultry project using compost litter system
Backyard piggery project
Backyard duck raising for meat and eggs
Backyard carabao raising for draft and milk
Azolla meal for layers and broilers
Azolla silage as feed for growing pigs
Multipurpose trees for the lowlands
Additional livestock feed resources
Low-external Input Rice Production (IIRR, 292 p.)
Integrated systems (rice-fish-livestock-trees)
Rice-clam culture
Clams grow naturally in many rice paddies and rural people have
traditionally harvested them. This was true until chemical use in rice paddies
resulted in the elimination of these clams in many areas. Intentional culturing
of clams simply adds one extra step to the traditional clam harvesting -the
seeding of clams.
From work with farmers in Quirino province, it was found that:
· Clam culture in rice serves as a buffer against
unforeseen crop losses due to flooding or diseases like tungro.
· Clam production serves as a source of additional income
(in 1 hectare paddy the average yield was 226 kg marketable clams valued at
P1,800/ha.)
· In addition to extra income, the clams serve as a source
of protein and minerals for the farmer's family.
PROCEDURE:
1. 20-25 days after planting, increase the irrigation water in
the paddies to the maximum tolerable depth proportionate to the rice plant
(approximately 5 cm depth). If the crop needs weeding, the rotary weeder can be
used before irrigation.
Increase the irrigation water in the
paddies
2. Let the water stand for 2 days to soften the soil and to
neutralize sold toxicity or pesticide residues.
Let the water stand for 2 days
3. On the third day, drain the water and replace it with fresh
irrigation water to the depth mentioned above.
Drain the water and replace it with
fresh irrigation water
4. Evenly broadcast baby clams along the rice furrows. Seeding
should be done in every other furrow.
Evenly broadcast baby
5. Harvest the clams as soon as they reach the desired
marketable size (size of the new P50 coin) or just before harvesting the rice.
Harvest the clams
Note:
· Avoid using chemical insecticides; as a substitute, use
botanicals. · Don't introduce carp into the paddies seeded with clams.
Carp eat clams. · Faster growth of clams is attained when fields are
fertilized with organic materials. · Medium- to long-maturing rice
varieties should be used in clam-rice culture. This allows the clams to stay
longer in the paddy field. · Rice-clam system is best suited to areas
where there is a continuous supply of
water.
Rice-fish culture
Before the advent of modern farming practices, freshwater fish,
such as catfish (Clarias sp.) and mudfish (Channa striate) grew abundantly in
rice field paddies in Asia. These fish occurred naturally without being cultured
by farmers. The indiscriminate use of chemicals for protection from pests in
rice has largely reduced their populations.
In rice-fish culture, it is possible to produce freshwater fish
like nile tilapia (Oreochromis niloticus) and carp (Cyprinus carpio) with
catfish and mudfish along with a high rice yield.
Rice-fish culture
1. TRENCH CONSTRUCTION
· Begin construction before the onset of the rainy
season. · For tilapia, mudfish and catfish, the trench is 1 1/2-2 m wide
and 1 m deep or 10% of the rice field area.
Notes on Rice-Fish Trenches:
1. Raise peripheral dikes of the rice-fish field. 2. Locate
the trench at the lower end of the field. 3. The bamboo outlet and inlet
pipes should be at least 3 inches in diameter.
· The water that falls from the inlet pipes provides
aeration to the trench. · The outlet pipes are necessary for drainage to
maintain the desired water level in the rice field.
4. Construct a small trench 30 cm wide and 30 cm deep. This will
guide the fish to go to the trench. 5. For additional sources of income --
plant gabi, string beans and other suitable vegetables on the dikes. However, to
minimize seepage, do not plant gabi where the pipes are installed.
2. FERTILIZATION OF THE TRENCH
· When there is enough water in the trench (from initial
rains or from irrigation canal), apply any of the following organic fertilizers:
Chicken/Hog manure
Carabao/Cow manure
0.3 kg/sq.m fresh
0.5 kg/sq.m fresh
0.5 kg/sq.m dried
1.0 kg/sq.m dried
· Fertilize once a month or when the color of the water is
no longer greenish. Greenish water is indicative that there is sufficient
natural food (plankton) in the trench.
· Method of application
- Broadcast the manure after the construction of the trench
(basal application). - Place the manure in a sack. Submerge it in the trench
15-20 cm below the water level. - You may also dump the manure in one corner
of the trench.
3. STOCKING
· Stock the trench with Tilapia fingerlings (3-5 9) 15 days
after the application of manure at the following rate:
- 1 fingerling/sq.m - no supplemental feeding (10,000/ha) - 2
fingerlings/sq.m - with supplemental feeding (20,000/ha)
· If polyculture is practiced, the stocking rate should be:
· During the onset of the rains, plow and harrow the land
thoroughly. Transplant seedlings 1 day after the last harrowing. ·
Maintain at least 1 inch water depth.
5. FERTILIZATION OF THE RICE FIELD
· Incorporate manure into the soil at the last harrowing.
· At this point, also apply the recommended basal N for the
rice crop.
6. OPENING THE DIKE
· One month after transplanting, make 3 openings in the
dike to allow the fish from the trench to enter the rice field. ·
Maintain the water level at 10-15 cm and increase it to 20-25 cm after the
maximum tillering stage.
7. HARVESTING
· By the time the rice crop is ready for harvesting, so are
some of the fish. · Harvest only the big fish (50-60 9 or heavier).
Extend the culture period of the smaller ones for the next rice cropping.
1. Add a little water to the feed ingredients and ball it. 2.
Place the balled feeds in a feeding tray made of fish net. 3. Tie the feeding
tray to a pole and submerge it in water (see illustration).
Rate and Frequency of Feeding
· Determine the consumption of the fish per feeding by
actual observation. First month 1-2 handfuls for 100 fish per day. Adjust the
amount accordingly. · Feed twice a day, morning and afternoon if
necessary.
Notes:
1. For a single crop of rice, extend the culture of the small
fish after the harvest by utilizing the whole field if water is still available.
2. Establish a tilapia and carp hatchery pond (3 m x 5 m) in
addition to the trench to maintain a breeding stock of quality fingerlings for
future use.
3. Catfish and mudfish are migratory. To keep them in the rice
paddy/trench, they should be provided with a continuous supply of feeds. Tilapia
fingerlings serve as feeds for catfish and mudfish, as do slaughter house
by-products (pieces of skin) and crushed golden snail. Plant kangkong or gabi
(taro) around the trench. This may help to discourage the fish from leaving the
trench.
Rice-pig-fish culture
The traditional Chinese farming practice of pig and fish raising
within the rice field is now spreading throughout the Philippines and Southeast
Asia in general. In addition to supplementing income and improving nutrition
through pig and fish culture within the rice field, rice-pig-fish culture
maximizes land use by integrating three farm enterprises.
Design 1. The pig pen is constructed
on top of the dikes near the trench. The floor should be sloping towards the
trench and preferably be made of a soil-cement mix or concrete. A pipe is
necessary to convey the waste matter into the bench.
Design 2. The entire pig pen is over
the trench. The floor is made of bamboo slats spaced just enough to allow manure
to fall directly into the trench but not too wide for the feet of the pigs to be
injured.
BASIC STEPS IN ESTABLISHING THE SYSTEM:
1. Trench construction
Establish the trench at the lower end of the rice field. The
minimum trench area requirement should range from 70-80 sq.m/pig. The water
depth is 60-100 cm. The rice field area is 500 sq.m. Inlet and outlet pipes
should also be installed.
2. Location of the pig pen
The pig pen should be near or over the trench. Typically, the
pig pen is 1 m x 1.5 m for each pig.
3. Stocking
Fish:
Stock the trench with fish when there is enough water from the
irrigation canal or from other sources.
Stocking rate:
Monoculture: one (1) fish/m² (average weight 3-5g) or
10,000fingerlings/ha.
Construct the dikes after plowing the rice field. The size of
the dikes is 1 m wide at the base and 40-50 cm at the top. The height of the
dikes should be 75-80 cm. Install the inlet and outlet pipes.
5. Land preparation
Plow the rice growing area at the onset of the rainy season to
provide ample time for the construction of dikes.
6. Fertilization of the rice field and transplanting
a. For the first rice crop in a 500 m² rice field apply the
following inorganic fertilizer (depending on the fertility and kind of soil)
Urea --5-10 kg 14-14-14 -- 3- 5 kg
Reduce the rate of fertilizer application for the succeeding
rice crop.
b. Allow some of the manure to flow to the rice field. c.
Transplant after thorough land preparation and fertilization.
7. Opening the dikes
a. One month after transplanting, make 3-4 openings in the dikes
in the trench to allow the fish to move into the rice field and forage for
feed. b. Maintain the water level at 10-15 cm and increase it to 20-25 cm
after the maximum tillering stage.
8. Harvesting
a. Fish
Harvest the bigger-sized fish after 120-150days by draining the
trench. Extend the culture period of the small fish to the next rice crop.
b. Pig
Sell the pig after 4-5 months.
c. Scrape out the decomposed organic waste and use as fertilizer
for the rice crop.
NOTE:
Establish a tilapia and common carp hatchery pond (3m x 5m) to
maintain a breeding stock of quality fingerlings for future
use.
Vegetable-duck-fish culture (Tinola garden)
Tinola garden, as the name implies, is a type of garden where
major ingredients in the preparation of tinola (a kind of poultry or fish soup
with vegetables) are found in a 200 sq.m area.
Vegetable-duck-fish culture
BASIC COMPONENTS:
a. Duck raising for meat and/or eggs b. Mini-fishpond c.
Vegetable growing
This vegetable-duck-fish culture is actually a modification of
the original mini-fishpond operation. This technology, however, optimizes land
use by planting vegetables on the dikes, fence and the construction of trellis
over the mini-pond. Depending on the preferences of the farmer, dikes could be
planted with different vegetables and crops (e.g., leaf, fruit, root or legumes)
and areas along the fence and trellis with any climbing vegetables.
ADVANTAGES:
Some of the advantages of this tinola garden are the following:
· increase in quantity and variety of food for home
consumption · ensures fresh supply of poultry meat and eggs, fish and
vegetables · practical for those farmers whose land area is less than
1.0 hectare and adopting the ricefish culture.
NOTES ON INDIVIDUAL COMPONENTS:
A. Vegetables
· On the trellis and fence -- squash, patola and other
climbing vegetables. · After the construction of pond dikes, the trellis
could be constructed and planting of varieties of crops could immediately
follow.
B. Mini-fishpond
· The dikes should be at least 1 m high, 1/2 m wide on the
top and 1 m wide at the base. · Water inside the pond must not be more
than 1/2 m (to minimize fish losses). · Recommended fish for stocking is
Tilapia (Tilapia nilotica) and common carp (Cyprinus carpio) at the rate of 3
fingerlings/sq.m. · Low-cost feeds may include rice bran, crushed snails
and kitchen refuse.
Note: Refer to technology paper on Rice-Fish Culture for feeding
and other management techniques.
C. Duck-Raising
Shed house (4 m x 1 m) made of low-cost and locally available
materials (e.g., bamboo, ipilipil, madre de cacao, cogon, nipa, etc.) located in
a 25 sq.m area in one section of the pond.
· Feeding troughs and waterers using old jeep or truck
tires, clay pots or old cooking utensils. · Stock: 8-12 heads (any
species, depending on the farmer). · Feeds may consist of rice bran,
crushed banana trunk, crushed snails, kitchen refuse, kangkong, etc. Feeding is
done twice a day.
Note: For more detailed information on duck raising, please see
the technology paper on Backyard Duck Raising for Meat and
Eggs.
Care and management of mini-ponds
The secret of success in growing fish in mini-ponds is proper
care of the fish and management of the pond. Good pond management and care of
the fish means faster growth and more fish for the family. The major points to
remember are the following:
1. POND CONSTRUCTION
· Establish the mini-pond near a water source such as
streams, springs, irrigation canals or manually operated pumps (pitcher pump),
etc., which is free from flooding and with good drainage.
· The soil at the bottom and side of the minipond must be
well packed to minimize seepage. If the soil is sandy or porous, line it with a
mixture of carabao or cow dung, clay soil and cement.
· Plant grasses on the banks to prevent soil erosion.
Grasses that grow fast and spread rapidly are ideal for this purpose.
· Put screens on the inlet and overflow pipes to prevent
the entrance of predators and at the same- time to keep the fish from escaping.
Care and management of mini-ponds
2. WATER—QUALITY, DEPTH AND TEMPERATURE
· Water is of vital importance in raising fish. Always make
sure that it is free from toxic substances, of the right temperature and the
proper volume (depth). However, the warmwater fish do not require a constant
supply of a large volume of fresh water. Most freshwater fish can be raised with
water temperature ranging from 20°C - 40°C.
· The ideal water temperature ranges from 25°C -
30°C. In order to maintain the right temperature, plant leguminous trees
like ipil-ipil (Leucaena leucocephala), katuray (Sesbania grandiflora), madre de
cacao (Gliricidia septum) and Dapdap (Erythina) on two sides of the mini-pond,
about 1.5 m - 2 m from the bank. Orient the planting of trees on the east-west
direction to allow enough sunlight into the pond. The leaf litter also serves to
improve aquatic life.
· Occasionally, the water in the pond becomes turbid and
muddy. To check the turbidity of water apply lime at the rate of 1 tbsp/sq.m.
Dissolve the lime water and sprinkle it over the pond.
· Maintain water depth at 1 m so that the sun's rays can
penetrate the water and induce the growth of plankton (natural fish food).
Production of plankton decreases as water depth increases. In shallow water (.5
m), the water temperature easily gets high during summer. High temperature
retards fish growth.
· Avoid letting the water out from the pond to prevent the
fertilizers and plankton from flowing out.
· Drain the pond once a year. Keep it dry for a period of
2-3 weeks to aerate the soil.
3. POND FERTILIZATION
Fertilize the pond
Any kind of animal manure can be
used
· The production of algae and microorganisms in the
mini-pond is the most important task for the low-cost production of fish.
Fertilize the pond at least twice a month for the water to remain greenish.
Green color indicates that the water has plenty of small plants and
microorganisms which serve as nutritious food for the fish.
· Any kind of animal manure can be used. However, chicken
manure makes a better fertilizer. Apply .5-1 kg chicken manure/m. The manure can
be placed directly in one corner of the pond or put in a burlap sack and
submerged 20 cm below the water surface. Never broadcast the manure on the
surface as this, in turn, will reduce sunlight entry into the water, resulting
in poor plankton growth.
· Dried leaves of leguminous trees can also be used to
fertilize the pond. Put the leaves in porous bags and submerge in water 20 cm
below the surface. One to two sacks of dried leaves can help fertilize the
mini-pond. Dried rice straw can also be dumped directly in one corner of the
pond. Occasional broadcasting of green leaves of leguminous trees (smallleaf
varieties such as Calliandra, Leucaena, etc.) is also very helpful and promotes
aquatic life.
· If a combination of organic and inorganic fertilizer is
desired, 500 9 of organic fertilizer and 10 9 of inorganic fertilizer
(preferably urea or 16-20-0)/m water can be applied to produce good results.
· On soils or water that are acidic, lime must be added. It
can be broadcast on the bottom of the pond or put in a porous bag. Tie the bag
to prevent it from submerging into the bottom of the pond. If lime is not
available, it can be substituted by aged wood ash (not fresh ash or ash from
paper).
4. FINGERLINGS
Stock only high-quality fingerlings. Secure your fingerlings
from reliable hatcheries.
5. FEEDS AND FEEDING
· For faster growth, fish should be given supplemental
feeds. A diet consisting of 20-30% ground ipil-ipil leaves or Azolla and 70-80%
fine rice bran is recommended. · When affordable, supplemental feeding
of 100% fine rice bran is still the most economical (when natural food plankton
in the mini-pond is abundant). · Feed the fish twice a day, morning and
afternoon. · For a more efficient feeding, mash the feeds and place in a
feeding tray made of fish net. · The fish can also be fed with green
leaves of kangkong, sweet potato, Azolla, kitchen leftovers, boiled sweet
potato, cassava, gabi, crushed golden snails and white ants
(termites). · Surplus tilapia fingerlings (fresh) can be crushed and
mixed with fine rice bran. This diet is very nutritious. · Other cheap
methods of feeding fish are:
- Hanging a lighted lamp over the center of the pond. At night,
insects are attracted to the light and hover around it. The insects will fall
into the pond where the fish can eat them. - Feeding the fish with maggots
(small worms). To produce maggots, hang pieces of meat or dead animals on a pole
2-3 ft above the water surface. Flies and other insects will lay their eggs on
the meat or dead animals. After 2-3 days, maggots will come out and fall into
the water.
6. CONTROL OF OVERPOPULATION
Overpopulation of fish is one of the problems in raising fish
(tilapia) in mini-ponds. To obtain good yields of harvestable or marketable size
of fish, population control is necessary. Any of the following methods may be
used:
· Scooping the fry with a fine net early in the morning and
late in the afternoon. The fries swim at the edges of the pond at this time of
the day. · Introducing predators into the pond such as mudfish (dalag)
and catfish (hito) at 2% of the total stocking rate. To prevent predators from
preying on the original stock, the size of the predators must be smaller than
the original stock and should weigh less than one gram.
7. HARVESTING
· After 4-5 months, the bigger fish can already be
harvested. Catch them with a hook and line using earthworms or golden snails as
bait or use a sweep net. · Harvest only enough fish for the family to
consume. · To ensure a continuous supply of fish for the family, replace
the number of fish harvested immediately by collecting fingerlings from the
breeding/hatchery
pond.
Backyard poultry project using compost litter system
Backyard poultry project using
compost litter system
With the high cost of producing imported breeds of birds for
meat and eggs, the current trend for farm households is to revive the
traditional family backyard poultry project using local and upgraded birds.
These local breeds survive the adverse conditions found in the rural areas.
By using improved feeds and management practices, these local
and upgraded birds can provide at least 130-200 eggs and extra poultry meat
throughout the year for the family. These birds can be allowed to search for
feed on the range or in confinement using a low-cost poultry compost litter
system, practiced by some farmers in Cavite, Philippines. This system can
sustain 6 hens and 1 rooster or 3 hens, 30 chicks and 1 rooster for at least 3 -
4 months. The compost litter is then removed and used as organic fertilizer and
a new batch of farmyard manure is added. Production of a small flock in the
backyard can help fill the family food requirements for eggs and meat, provide
extra family income and utilize the manure as an excellent organic fertilizer.
BREEDS AND BREEDING:
The farm family should properly select an upgraded rooster
(Cantonese, New Hampshire, Plymouth Rock breeds) and hens/layers.
Other poultry birds, like Muscovy duck. native or Pateros ducks,
Peking duck, geese and pigeons are hardy and can also be raised under backyard
conditions. They do not require elaborate housing and can subsist on inexpensive
feeds.
HOUSING REQUIREMENTS:
Construct the house using local materials to minimize expenses,
(cogon/nipa for roof, bamboo or used fish nets for siding' end ipil-ipil/madre
de cacao as posts). The house should be located in a dry, well-drained area.
Perch racks, roosts, nests, feed hoppers and waterers made of low-cost materials
should also be provided.
The house should not be less than 2.0 m in height with a floor
area of 3 m x 3 m. The house should be fenced; or if the hens are raised with
chicks, they can be raised in a separate open house.
Before constructing the house, dig a pit in the floor 1/2 m
deep, extending the length of the house (3 m) and 2 m wide. Once the building is
completed, the pit should be filled with fresh manure of cattle, carabao or
goat. Keep the manure moist for one week (to encourage the growth of worms and
maggots as feed for the chickens) and then place the upgraded/native birds in
the poultry house. While scratching the ground, the birds will be eating as well
as hastening the composting process.
FEEDS AND FEEDING:
The family should provide extra feed supplements, like kitchen
refuse, fish entrails, corn/sorghum, ipil-ipil leaves and others. Clean, potable
water should be always available.
Home Made Chicken Ration
· 4 parts yellow corn, broken rice (binlid) or sorghum.
Boiled gabi, fresh ubi, camote or cassava (bitter type should be boiled) can
also be substituted. · 1.5 parts rice bran (darak). Dried azolla or
filter cake (from sugar mills) can replace rice bran. · 1 part dried
fish meal or 2 parts fresh fish/golden snail · 1.5 parts cope/oil
meal · 0.5 part ground sitao/mongo (mung)/patani (lima
bean)/soybean/kadios (pigeon pea) seeds · 0.5 part dried ipil-ipil
leaves · 1 tbsp salt · 1 handful powdered oyster
shell/agricultural lime
Note: Double the recommended amounts if ingredients are not in
dry form.
Other Low-cost Poultry Feeds
Carbohydrate Sources
Protein Sources
- Bananas
- Azolla
- Gabi
- Earthworms
- Ubi
- Filter cake (dried and powdered)
- Cassava
- Kitchen leftovers
- Camote
- Mole crickets
- Spoiled papayas
- Sorghum
- Rice bran
- Fish fingerlings
- Crushed golden snails
- Termites
- Tadpoles
- Fly maggots
HEALTH MANAGEMENT:
Regular immunizations against Avian Pest, Fowl Pox and Fowl
Cholera must be followed. A regular schedule of deworming, according to local
conditions, must also be followed.
OTHER MANAGEMENT PRACTICES:
Other management practices like brooding, rearing the chicks,
culling and selection and record-keeping should be
practiced.
Backyard piggery project
Although demand for pork in many areas is high, the rising cost
of production discourages many small farmers from attempting to raise swine on a
small scale. The use of commercial feeds is one of the main reasons for high
production costs. Purchased feeds can constitute 60-80% of total expenses. Once
an animal is sold, the amount of return received, after paying the feed bill, is
often too low to purchase another animal and sustain the cycle of production.
Therefore, for farmers with little capital to invest, an alternative mode of
production must be advocated. This alternative includes the utilization of
low-cost materials and feeds available within the farm. Of particular importance
is the potential to reduce feed costs.
BREEDS AND BREEDING:
Upgraded cross-breed animals are recommended.
Housing requirement
FEEDS AND FEEDING:
1. Low-cost Feeds
Commercial feeds, while complete and usually available, are
costly, thus driving up the cost of production for a swine project. However, a
variety of non-conventional or traditional foodstuffs can be utilized to provide
low-cost feeds to swine.
Below is a list of common on-farm resources which can be used as
carbohydrate and protein sources and several ration formulas (with Crude Protein
percentage) using some of the following feedstuffs:
Carbohydrate Sources
Protein Sources (% Crude Protein)
Coconut oil meal (sepal)
3
Brewer's spent grain (15.4)
2
Rice middlings
1 or 4
Copra meal (19.42)
2
Rice bran
2
Cowpea (33.89)
4
Banana trunks
3
Fish meal (53.44)
2
Sweet potato (leaves, vine end tuber)
2
Jackbean (25.75)
4
Cassava ([eaves end tuber)
2
Pigeon pea (20.46)
4
Taro (leaves, stem and tuber)
1 or 2
Mung bean (22.66)
4
Kangkong
1
Peanut oil meal (43.65)
2
Ulasiman
2
African snail (45.91)
1
Banana (peers end rice fruit)
2
Soybean meal (soya) (43.70)
2
Banana (raw fruit)
1
Rice bean (tapilan) (17.42)
2
Papaya (green)
1
Velvet bean (24.02)
4
Papaya (ripe)
2
Hyacinth bean (3.6)
1
Muskmelon
2
Leucaena leaves (17.52)
2
Jackfruit
1
Pineapple
2
Elephant yam (pongapong)
1
Yam bean (singkamas)
2
Ubi peelings
1
Leafy vegetables
1 or 2
Water lily
1
1 -- Needs cooking. 2 -- Can be given fresh or as is. 3 --
Should be mixed with rice bran or commercial feeds. 4 -- Needs soaking.
LOW-COST SWINE RATIONS
Ration 1
Parts by Wt.
Rice bran
60 kg
Yellow corn
10
Coconut (bagasse)
10
Leucaena leaf meal
5
Rice middlings
5
---------
100 kg
Crude Protein
12.881%
Ration 2
Parts by Wt.
Rice bran
80 kg
Gabi tuber/Cassava
20
Japanese/Golden Snail
10
Ground yellow corn
10
Leucaena leaf meal
10
---------
100 kg
Crude Protein
14.91%
Ration 3
Parts by Wt.
Rice bran
80 kg
Leucaena leaf meal
15
Rice middlings
5
-----------
100 kg
Crude Protein
14.9175%
Ration 4
Parts by Wt.
Rice bran
60 kg
Swamp cabbage leaves
30
Yellow corn
5
Coconut bagasse
5
---------
100 kg
Crude Protein
9.965%
Ration 5
Parts by Wt.
Rice bran
60 kg
Banana trunks (chopped finely)
30
Leucaena leaf meal
10
----------
100 kg
Crude Protein
10.591%
Ration 6
Parts by Wt.
Dry camote
57 kg
Rice bran
30
Copra meal
4
Fish meal
5
Soybean oil meal
5
----------
100 kg
Crude Protein
10.6%
Ration 7
Parts by Wt.
Cassava or sweet potato
25 kg
Rice bran
50
Copra meal
25
-----------
1 00 kg
Crude Protein
11.45%
2. Proper Feeding
a. Leftover food scraps from the house should be cooked to kill
germs and remove toxin present in the foodstuff. b. Unconsumed feeds in the
troughs should be discarded before giving new feed to the animals.
3. How to Prepare Feeds for Swine
a. Chop all ingredients into small pieces. b. Boil hard
ingredients first (i.e., pongapong, green papaya, water lily, etc.). c. When
soft, add other ingredients (i.e., kangkong, leftover food, etc.). d. Cook
until done. e. Cool. f. Add a pinch of salt before feeding to the animals.
These cooked feeds should be mixed - with rice bran when fed to the animals.
4. Alternative Feeding Management for a Fattener
a. During the first 2 months, feed piglets with commercial feeds
(if the necessary ingredients to make a homemade, nutritious feeds are not
available) to promote and boost growth. b. In the second month, gradually
substitute commercial starter ration with grower ration and begin slowly
incorporating cooked supplemental feeds into the diet. c. In the third month,
one quarter of the ration can be replaced with supplemental, low-cost feeds
previously listed. d. At the fattening stage (4-6 months), one-half or more
of the ration can be supplemental, lowcost feeds.
HEALTH MANAGEMENT:
1. Animals should be purchased from a reliable source in order
to insure their hearth. Newly acquired animals should be isolated and observed
for at least 2 weeks to determine their health status before introducing them
into the pen area with other animals.
2. A regular schedule of vaccination should be followed to
protect animals against swine diseases common in the area (i.e., hog cholera,
etc.).
3. Animals should be regularly dewormed as needed or as local
conditions dictate.
a. Maintain clean pens. b. Animals should be regularly
bathed, especially during hot weather. c. Excreta should be properly
disposed, preferably composted in a pit or
pile.
Backyard duck raising for meat and eggs
Backyard duck raising for meat and
eggs
WHY RAISE DUCKS?
Ducks are one of the most practical, versatile and useful
waterfowls to raise. Duck raising offers several benefits:
· Ducks are efficient producers of animal
protein. · Ducks provide both eggs and meat, for consumption or for
sale. · Ducks require limited space, simple shelter and minimal
care. · Ducks are resistant to diseases and thrive in harsh
conditions. · Ducks control harmful insects, unwanted aquatic weeds and
golden snails. · Duck manure is an excellent organic
fertilizer. · Ducks eat aquatic plants, grasses, vegetable trimmings,
golden snails, insects and farm byproducts. Thus, providing feed is not a
problem.
WHAT BREED TO RAISE FOR MEAT AND EGGS:
The Muscovy is a multipurpose breed for meat and eggs. The most
popular Muscovy ducks raised are the white and black types. They lay from 80-120
eggs/yr and produce an excellent quality meat.
The Khaki Campbell breed is more efficient for egg production as
compared to other breeds. A single duck is capable of producing 250-350 eggs/yr.
HOUSING REQUIREMENTS:
Since ducks are small, a simple shed with one open side can
provide adequate shelter. A 1 1/2 m x 5 m x 1 m high shelter can accommodate
40-50 adult ducks. To prevent the ducks from destroying vegetables and other
crops, they should be confined in a fenced structure made from locally available
materials.
Farm litter (e.g., rice straw) should be placed in the shed for
laying and brooding purposes.
STARTING A BACKYARD PROJECT:
A beginner can start with 7 ducks -- one male (drake) and 6
female (ducklets). It is preferable to acquire ducks that are from 1-2 years of
age.
FEEDS AND FEEDING:
Muscovy ducks are voracious eaters and eat practically anything
they are fed. For maximum growth, ducks should be fed with natural, local feeds
such as empty grains (rice), rice and corn bran, ipil-ipil leaves, golden
snails, duck weed, Azolla, banana trunks, worms, etc. They should be fed three
times a day and provided with fresh water always. Used tires or old cookings
utensils can be used for waterers and feeders. Twenty-five ducks can be raised
in a 1-hectare farm using onfarm feeds without commercial feeds.
HEALTH MANAGEMENT:
To prevent a disease outbreak, animals should be regularly
vaccinated against common diseases (e.g., Newcastle, Fowl Pox or Fowl Cholera).
Deworming and other health care practices, such as proper sanitation, correct
feeding and proper care and management, must be strictly implemented to ensure a
disease-free flock. New birds introduced into a flock should be quarantined to
ensure that they are disease-free. Sick birds should also be isolated from
healthy stock during treatment.
OTHER MANAGEMENT PRACTICES:
Hatching
Ducks start to lay eggs after reaching 6 months of age. One
medium-size duck is capable of hatching 12-15 eggs during the 30-33 day
incubation period. Layers are usually productive from 1218 months. At the end of
that production period, layers should be culled and eaten or sold.
The fertility of eggs can be determined using a simple technique
known as candling. Eggs should be candled (on the 15th day of incubation) in a
dark room using at candle, lamp or flashlight. Fertile eggs reveal a small dark
spot with a network of blood vessels branching out from it or the eggs appear
dark. Infertile eggs are clear with the yolk appearing as a floating shadow. Do
not throw away infertile eggs; they are delicious as well as nutritious and can
be eaten or processed into salted or hard-boiled eggs to be sold for extra
income.
Duckling Rearing
Young ducklings must be kept warm and dry. It is best to keep
them out of water until they are 2 weeks old. However, they must have a constant
supply of fresh drinking water. The ducklings should be fed fine rice bran and
boiled rice. Cracked corn or rice should be fed to them after they are several
weeks old.
It is very important to protect the ducklings from predators
such as cats. dogs; rodents, birds, etc. One method of protecting the ducklings
is to confine the hen and her brood in a covered pen each night until the
ducklings are 6-8 weeks old.
Marketing
Meat-type birds are ready to be slaughtered, dressed and
marketed at 5-6 months of age.
DUCK MANAGEMENT WITHIN A RICE SYSTEM:
Two pen/shelter design options are presented here:
The duck pen and shelter is constructed over the irrigation
canal The floor is made of bamboo slats spaced so as to allow the droppings to
fall into the water below, but not to trap and injure the ducks' feet. The floor
should slope slightly to allow the eggs to collect on one side of the pen, thus
facilitating daily egg collection. This design allows the duck droppings to fall
directly into the water and be carried to the rice paddies through the
irrigation canal. One disadvantage to this design, however, is the possible
danger of housing the ducks directly over the water during colder times of the
year
The duck pen and shelter
The other design places the shelter near, but not over, the
irrigation canal. Cover the floor with 4-6 inches of dry bedding material i.e.,
rice straw. Remove the old bedding materials weekly and place them in a compost
pit for future incorporation into the rice paddies as fertilizer.
The is shelter near, but not over,
the irrigation canal
Ducks should be given adequate time to forage for their food.
The ducks should be released from their house in the morning after they have
laid their eggs (about 7:00 a.m.). The most important consideration is that the
ducks be released at the same time every morning. If they are released at
different times every day, the change can upset them, causing them to stop
laying eggs and even begin to molt. They should be herded back to the pen about
5:30 in the afternoon. Giving them some feeds regularly at this time also trains
them to return to their pen.
Ducks should be released onto the ricefields only at certain
times:
- During plowing and harrowing - After the tillering stage,
but not during the flowering and heading stage of the ricecrop - After the
rice has been harvested and threshed.
When it is not possible to release the ducks into the ricefield,
they should be taken to an area where no crops are grown. If no such area is
available, the ducks can be fed in
confinement.
Backyard carabao raising for draft and milk
Backyard carabao raising for draft
and milk
The carabao (swamp-type buffalo) is a prized symbol of a
farmer's wealth and is an integral component of Philippine agriculture. Millions
of crop farmers rely on this animal as the main source of draft power for almost
all farming operations despite the introduction of small power tillers. The
carabao provides animal protein in the form of meat and milk; as well as hides
and horns (which have many economic uses) and manure, a potential organic
fertilizer for the farm.
Carabaos are also excellent potential sources of milk as they
can produce 300 to 800 kilograms of milk during a lactation period of 180 to 300
days. Murrah crossbreeds can produce 42% more milk than the native caracows.
Carabao milk has a higher nutritive value than cow's milk and can be easily used
in the production of soft white cheese (kesong puti).
MANAGEMENT PRACTICES AT BACKYARD LEVEL:
A. Breeds and Breedings
1. Carabao breeds commonly found in the Philippines:
a. Draft type -- Philippine carabao and Thailand buffalo b.
Dairy type -- Murrah and Nili/ravi
2. Selection of breeding animals
Selection of breeding animals
a. Caracow/caraheifer to be selected should be 3-4 years old,
with well-developed udders, large and uniformly shaped teats, possess a docile
and good dairy temperament, angular form, be more lean than meaty and be an
offspring of a known good milker.
b. Carabull or carasteer to be selected should be 4 to 6 years
old, healthy and vigorous, possess a masculine character, medium to short neck,
massive with a blocky conformation and have a heavy and welldeveloped body.
Additionally, the animal should have well-developed fore and hindquarters, be
powerful, low-set and alert and of good temperament. The male animals are best
used for work purposes.
c. Judicious culling and selection of animals must be practiced
in order to maintain the best animals in a herd.
3. Breeding:
a. Natural breeding is the common practice using the best
carabull available to mate caracow/caraheifer. This is considered the best due
to the silent heat (30-56%) among caracows.
b. Artificial insemination (A.l.), however, is considered the
easiest and cheapest method of improving local animals using prostaglandin
hormone end frozen semen, if Al technician and equipment are accessible in your
area.
4. Reasons to crossbreed native caracow (Philippine carabao)
with selected Indian Murrah buffalo bull (for more comparative information see
Table 1).
a. The offspring is bigger, taller and more active. b.
Crossbreed caracows produce more milk (42% more) than native caracows. c.
Crossbreed offspring have a higher growth rate (30-40%) than native
carabaos. d. Crossbreed animals possess better draft ability in upland
condition.
Note: Based on research studies, crossbreed caracows in the
third generation (5/8 Murrah and 3/8 Philippine carabao), when compared with
pure breed animals, have comparable levels of milk production.
B. Housing Requirements
1. Provide a dry, clean and well-ventilated shed made of nipa,
bamboo and/or wood. It is advisable to cement the floor to facilitate cleaning.
Trees can be grown around the shed, to serve as a windbreak and provide extra
shade during the summer months. Animals should always be kept in dry stalls in
the evening and under the shed during the summer months.
2. Construct a compost or manure pit nearby for disposal of
left-over feed litter and manure. A carabao produces 10.8 kg. manure/day or
6,853 kg. in 360 days (1.22% N. 0.85% P and 0.79% K)
Housing
C. Feeds and Feeding Management
1. Carabaos are usually raised in semi-confinement, which
involves tethering the animal for 810 hours/day on native pasture.
2. Low-cost feeds for carabao
a. For light to medium work (4 to 6 hours/day). b. Before and
after work, carabaos should receive plenty of clean drinking water. When in a
heated condition, however, they should be allowed to cool off before watering.
Work carabaos may lick salt in a box or may receive salt in their feed, (for
example, one handful/head, three times a week.)
3. Supplementation of urea-molasses-mineral block to diet of
rice straw or summer grazing pasture is sufficient to maintain liveweight.
4. Clean feed, water and a source of salt should tee constantly
provided to animals in the pen/stall area.
D. Health Management
1. Immunization against hemorrhagic septicemia and foot and
mouth disease should be administered every six months or at least once a year.
Animals should be dewormed against liver fluke and intestinal worms as a
preventive measure et least once a year using herbal treatments (betel nut &
ipil-ipil) or commercial dewormers.
2. Control lice and other external parasites at least 34 times a
year. During summer the common practice by farmers of shaving the body hair of
their carabao helps to control external parasites.
3. Because carabaos have few sweat glands and little hair, the
animals should be regularly bathed to keep the animal cool during summer months
(especially draft animals).
E. Other Management Practices
1. Carabao as Draft Animal
Farmers use carabao as draft in their farming system for the
following reasons:
a. It is an affordable, low-cost technology and the investment
can pay for itself in a short time period. b. The carabao and harness are
available locally and maintenance can be conducted by the farmers. c. After a
carabao can no longer serve as a draft animal, it can become a source of carabao
meat and meat by-products. Carabao meat (carabeef) has 46% less cholesterol than
beef.
A well-trained carabao works efficiently and will demand a
higher price. Ideally, farmers should raise their own draft carabao or purchase
them while they are still young. Young carabao (about 2 years old) are easier to
tame and train.
The draft capacity of an animal increases with its weight. For
example, a 300 kg. carabull can pull a moldboard plow or harrow with a 30 kg.
draft requirement for 8 hours. But, if the animal is made to pull 130 kg. it
will only work for 3 to 4 hours before tiring. The animal must be allowed to
assume a natural pace to produce an extended, rather than a concentrated effort.
To prevent abortion, a pregnant caracow should only be made to
work on a limited basis. especially during the first 6 months of pregnancy. A
newly calved caracow should not be used for draft until the calf reaches 3 to 4
months of age.
Tips on training carabao for work
Training carabao for work
a. Touch the animal constantly. b. Slowly expose the animal
to crowded places (i.e., along the side of the road) by riding its back. c.
Training can be done from 1 to 3 hours during cool periods of the day (i.e.,
early morning or late afternoon). d. While leading the animal to pasture,
place a well-fitted yoke with a smooth surface on the animal's neck and attach a
sledge to train the animal to pull. e. Then, train the carabao to pull the
harrow on loose ground for an easy start. f. Finally, train the animal to
pull the plow on a plowed field during cod periods until the animal gets used to
pulling heavy loads.
2. Carabao as Source of Milk
Although the carabao is a slow milk producer, its mliking
capacity can be improved through proper management, systematic breeding and
proper milking techniques. Local carabaos and upgrades should be tapped as a
major source of milk and milk byproducts. A caracow can produce 2 to 2.5 liters
of milk daily by hand-milking.
Milking Procedures and Management:
Caracows should be milked in a clean, dry place. The caracow
should be cleaned to remove dirt that may fall into the milking can. The calf is
allowed to stay with the caracow for 2 to 4 weeks after birth and then separated
in the evening to prevent the calf from suckling. After milking, the calf can
stay with the caracow.
The most common milking method is hand-milking.
1. The animal is tied to protect the milker. 2. The milker
should wash his/her hands with soap and water. 3. Prepare a clean milking
bucket, properly covered with a clean cloth. 4. Wash and massage the udder
and teats with a clean cloth soaked in warm water. 5. Strip the teat to check
if the milk is clean (organo/eptic test) and if no abnormalities are
observed. 6. If nothing abnormal is observed, milk the animal until the milk
flow stops. 7. If possible, the animal should be milked at the same time
everyday by the same person. Concentrate should be provided at milking time
(helps to increase milk output). 8. Pasteurize the milk collected from the
caracow. Do not attempt to add wafer or en adulterant as it will spoil the
quality of milk. Heat the milk up to 145 F on a double boiler. When it starts
boiling, continue to stir the milk with a spoon while heating for 30 minutes.
Then cool the milk by replacing the hot water with cool water for 30 minutes at
about 42 F. Place the milk in a bottle. The milk is now ready for market or can
be stored in a refrigerator for 3-4 days.
Comparative Gross Composition of Carabao's Milk, Buffalo's Milk
and Cow's Milk
MILK
Properties
Carabao (%)
Buffalo (%)
Cow (%)
Fat
9.65
7.31
3.80
Protein
5.26
5.74
3.40
Lactose
5.29
4.89
4.85
ASL
0.95
0.81
0.75
LOW-COST FEEDS FOR CARABAOS:
1. For light to medium work (carabao working for 4 to 6
hours/day)
Feeding Ration Recommended for en average-sized Carabao
RATION (Kg)
1
2
3
4
5
Rice bran
3
3
4
2
3
Copra meal
2
2
-
-
-
Napier grass
25
35
25
-
-
Peanut hay
5
-
-
-
-
Ground corn
-
2
-
-
-
Soy bean (soilage)
-
-
15
20
-
Sugar cane tops
-
-
-
25
20
TOTAL
35
42
44
34
43
2. Hard Work -- Carabao employed whole day for plowing/cart
work/pulling heavy logs in the forest with only 2 hours rest at noon.
Feeding Ration Recommended for en average-sized Carabao
RATION (Kg)
1
2
3
4
5
Rice bran
6
4
7
5
5
Copra meal
3
3
-
4
2
Napier grass
35
25
20
-
-
Peanut hay
-
5
-
-
-
Soybean (soilage)
-
-
20
-
25
Sugar cane tops
-
-
-
35
20
TOTAL
44
37
47
44
42
SOME IMPORTANT INFORMATION ABOUT CARABAO AND ITS UPGRADES
Philippine Carabao (PC) (Draft)
Murrah Buffalo(Dairy)
Carabao Buffalo* Philippine Carabao
Body Weight
- at calving
27 kg.
29 kg.
34 kg.
- at six months
110 kg.
134 kg.
130 kg.
-yearling weighs
141 kg.
241 kg.
208 kg.
- two years old
272 kg.
306 kg.
340 kg.
- three years old
480.8 - 515 kg.
525-625 kg.
557.36-609.62 kg.
Milk production - liter per lactation
528 (8 months)
1,149 (10 months)
1,032 (10 months)
Age at first fertile mating
859-885 days (2 years, 4 months-2 years, 6 months)
1,275 days (3-1/2 year) months)
844 days (2 years, 3
Age at 1st calving
1,342 days (3 years, 7 months)
1,582 days (4 years, 4 months)
1,178 days (3 years, 3 months)
Estrus cycle
21 days
21 days
21 days
Estrus period (watch for silent heat)
5 to 36 hours
24 to 72 hours
24 hours
- onset of estrus
dawn/early morning
dawn/early morning
dawn
Ovulation time
15 hours (after end of estrus)
11 hours (after cessation of estrus)
14 hours (after end of estrus)
Gestation period
320 to 325 days
310 days
316 days
Calving intervals
1 1/2 year
1 1/2 year
1 1/2 year
Breeding season*
August to January
August to January
August to January
Calving months
July to September
July to September
July to September
Post-partum breeding
60 days
133.82 ± 78.93
133.82 ± 78.93
Incidence of twinning
2:10,000
-
-
* Breeding occurs any time of the year but more during the rainy
season and cooler
months.
Azolla meal for layers and broilers
Although most people think of Azolla as fertilizer, one way of
beating the high cost of feeds for farm animals is by supplementing the animals'
regular diets with Azolla. Drying, ensiling and other feed treatments using
fresh Azolla are simple and effective ways to ensure that optimum benefits can
be obtained from Azolla by farm animals.
Azolla meal for layers and broilers
MATERIALS NEEDED:
· freshly harvested azolla · commercial layer or
broiler rations · trays with slits or perforated bottoms for drying
Azolla · commercial grinder (gilingan) for grinding Azolla into powder
or feed bag for holding Azolla during manual crushing · empty motor oil
can (1 liter) for measuring the ingredients.
Materials needed
PROCEDURE:
1. Harvest Azolla from the propagation pond. Wash thoroughly to
remove soil and other residues. Do not use Azolla which has been exposed to
pesticides.
Procedure
2. Place the Azolla on trays and sundry it for 3-7 days or until
it-turns brown. Azolla is sufficiently dry when it crumbles when squeezed.
Place the Azolla on trays
3. Grind the dried Azolla to form a powder resembling coffee. If
no grinder is available, place the dried Azolla in a feed bag and step on it
until it is crushed.
Grind the dried Azolla
4. Combine the Azolla meal with commercial layer or broiler
rations at a ratio of 1:9.
Combine the Azolla meal with
commercial layer
Note: For growing native and upgraded chickens like Cantonese,
Azolla meal can be given as a supplement to ordinary low-cost feeds.
SOURCE: UPLB, National Azolla Action
Program
Azolla silage as feed for growing pigs
Aside from being used as green manure by farmers, Azolla can
also be used as feed supplement for growing pigs. It has a crude protein content
of 17-28% and contains amino acids, vitamins and trace minerals. Unlike
ipil-ipil (Leucaena), Azolla has no toxic substance (mimosine).
When Azolla is ensiled, its moisture content is lowered to a
manageable level, improving its nutritional value. When the silage is added to
commercially available concentrate mixes, the resulting mixture easily meets the
nutritional requirements of growing pigs.
Azolla silage as feed for growing
pigs
The following materials are needed in preparing Azolla silage:
· net bags or sacks for drip-drying Azolla · trays
with slits or perforated bottoms for further drying · empty kerosene and
motor oil cans for measuring ingredients · pails for storing the ensiled
Azolla · plastic sheets and rubber strips for sealing the pails.
PROCEDURE:
1. Collect Azolla from the propagation pond. Make sure the
Azolla is free from soil and other debris by thoroughly washing it. Do not use
Azolla which has been exposed to pesticides.
Collect Azolla from the propagation
pond
2. Place the harvested Azolla in net begs or sacks and allow to
drip for 2-3 hours.
Place the harvested Azolla in net
begs
3. Transfer the dried Azolla to the trays to allow further
drying and to provide good ventilation. Spread out the Azolla end turn over 2-3
times a day for even drying.
Transfer the dried Azolla to the
trays
Azolla is dried from a moisture content of 95% to 65-70%*.
Drying takes about 2 days during sunny weather and 3 days in cloudy weather.
TWO AZOLLA SILAGE FORMULATIONS:
Sillage 1
· Sillage 1 - 70% Azolla + 30% corn
Mix 1 kerosene can (balde) of dried Azolla, with 4 1/2 motor oil
cans of corn. Place the mixture in a pail. (If possible, use plastic pails for
storing ensiled Azolla. Pails made of tin will rust.) Use plastic sheets to
cover the pails and rubber strips to tightly seal the container and keep oxygen
out. Let the mixture ferment for at least 1 week.
· Silage 2 - 70% Azolla + 25% corn + 5% molasses
Silage 2
Mix 1 kerosene can of dried Azolla, with 4 motor oil cans of
corn. Add 1/3 motor oil can of molasses. Follow the same succeeding procedures
as in Silage.
Note: If corn is not available, other carbohydrate sources like
rice bran. cassava meal, etc., can be used.
It is recommended that each pail of ensiled Azolla be enough for
one feeding to minimize oxygen combining with the mixture when the cover is
removed. Oxygen must be kept out to prevent the growth of mold and worms
(maggots) in the mixture.
When, the Azolla silage is fed to growing pigs, it may be added
to mixed grower ration (MUIR) or commercial grower mix (CGM)
Ensiled Azolla can be stored up to 2 months without affecting
the nutritive value of the feedstuff, as long as the container is kept sealed.
Once opened, the silage must be consumed within a week.
Amounts needed at 25 percent Azolla silage supplementation
Weight of Growing Pigs (kg)
Amount of Azolla Silage (kg)
Amount of MGR CGM (kg)
20 - 35
1.50 - 1.80
1.00
36 - 50
2.00 - 2.50
1.50
51 - 60
2.50 - 3.00
2.00
Amounts needed at 10 percent Azolla silage supplementation
Weight of Growing Pigs (kg)
Amount of Azolla Silage (kg)
Amount of MGR CGM (kg)
20 - 35
0.50 - 0.80
1.40
36 - 50
1.00
1.80
51 -60
1.00
2.25
SOURCE: National Azolla Action Program c/o Office of the Dean
UPLB College of Agriculture College, Laguna
3720
Multipurpose trees for the lowlands
Trees are an important component of the lowland ecosystem. They
provide readily available firewood, poles and stakes and protect the field from
strong winds. Trees also improve the microclimate of the farm and attract birds
and other beneficial insects, thereby reducing insect infestation.
Multipurpose trees give additional incentive for cultivation.
The leaves are excellent for green manure. They grow fast and coppice easily
thus reducing the need to replant after every harvest.
There are different species of multipurpose trees. For lowland
areas, however, they should be tolerant or moderately tolerant to occasional
water logging.
Species of multipurpose trees for
lowland areas (1)
Species of multipurpose trees for
lowland areas (2)
Species of multipurpose trees for
lowland areas
(3)
Additional livestock feed resources
Additional livestock feed resources
The fact that the best land is devoted to food or cash crop
production should not allow livestock production to be ruled out. Marginal lands
can be used to pasture animals as well as to produce animal fodder in order to
optimize scarce land resources. Farmers view livestock production not in
competition with crops, but rather as a complementary farm operation which can
convert crop residues and farm by-products not fit for human consumption or
market into valuable animal products.
Increasing the supply and quality of livestock fodder has
positive effects for the whole farm system, in addition to improving the health
and productivity of the animals. Livestock are an integral component of the
nutrient cycling system of a farm and directly or indirectly affect three
aspects of nutrient cycling:
1. Nutrients are redistributed on the farm when they are brought
up from deeper soil levels by trees whose leaves are fed to livestock.
2. Nutrient availability to plants is increased when crop
residues and other feeds are converted to manure.
3. An increase in nitrogen supply is brought about when legume
forage are grown and fed to the animals.
Therefore, there is a need to integrate livestock production
into other farming components by harnessing marginal farm areas for the
production of livestock resources.
GRASSES AND LEGUMINOUS TREES ALONG EARTHEN DIKES, IRRIGATION
CANALS AND ROAD BANKS:
These areas often constitute the neglected and waste areas of
the farm and are usually left to grasses and weeds such as cogon (Imperata
cylindrica), talahib (Saccharum spontaneum), aguingay (Rottboella exaltata),
amorseko (Chrysopogon aciculatus). Paddy dikes are usually repaired before
planting the rice and once the rice is planted, they can serve as animal fodder
sources of grasses and tree legumes. Napier grass (Pennisetum purpureum) on
dikes, for example, can produce more than 1.5 kg dry matter (DM)/yr/linear m.
Andropogon yielded 36.7 tons of DM/ha when planted along the dikes. Leguminous
trees and shrubs can provide high protein fodder using species such as madre de
cacao (Gliricidia septum), ipil-ipil (Leucaena leucocephala), Sesbania (Sesbania
sesban) and others. Two-year old Gliricidia, for example, produced 5 kg
DM/tree/yr of top quality fodder when planted 2 m apart.
Along the banks of roads and irrigation canals, Guinea grass
(Panicum maximum) and Napier grow well. In waterlogged areas, Para grass
(Panicum purpurescens) thrives well even when it is cut at 4-6 week intervals.
Grasses and legumes planted along earthen dikes, irrigation
canals and road banks not only provide feed, but also help to control soil
erosion.
INTENSIVE FEED GARDEN ALONG FARM BOUNDARIES:
Other often-neglected areas are farm boundaries. Some farmers
install live fences and barbed wire to control passage of humans and stray
animals. Farmers in Batangas and Cavite (Philippines) maximize the use of farm
boundaries by planting hedgerows of intensive feed gardens (IFG) as potential
sources of fodder for their livestock. They interplant Leucaena and Gliricidia
with Napier grass and/or other grasses. This system provides the livestock with
nutritious fodder throughout the year. During the wet season (June- December),
came feed on fresh grasses and legumes, while during the dry season
(January-May), they eat green fodder from leguminous trees supplemented with hay
(dried rice straw or corn stover).
In Bali, Indonesia, most farmers use a Three-strata Forage
System (TSFS), a technology of planting and harvesting three different strata
(one composed of a grass or ground legume, another of a shrub legume and a third
of a fodder tree) to provide a source of livestock fodder throughout the year.
The first stratum consists of grasses (Cenchrus ciliaris, Urochloa
mosambisensis, Panicum maximum) and ground legumes (Centrosema pubescens,
Stylosanthes hamata, S. scabra) which provide fodder during the wet season. The
second stratum consists of shrub legumes (Gliricidia, Leucaena, Acacia vellosa)
which provide fodder during the wet and dry seasons. The third stratum consists
of fodder trees (Ficus poacellie, Lannea corromandilica, Hibiscus tilliaceus)
which provide fodder during the dry season.
Intensive feed garden along farm
boundaries
Note: Fodder grasses should be cut after leaf dew dries in the
morning (between 9:00 and 10:00) as a precaution against possible liver fluke
infection.
Planting Arrangement of the Grasses Legume Shrubs and Fooder
trees in the TSPS.
The botanical composition of the forage offered to cattle will
vary according to:
Season:
First Stratum
Second Stratum
Third Stratum
Total
During the first 3 years
Wet Season
65 % +
35 % +
0 =
100 %
Dry Season
35%
65 %
0
100 %
During the 4th and succeeding years
Wet Season
65 %
25 %
10 %
100 %
Dry Season
35 %
40 %
25 %
100 %
The TSFS offers many advantages to a small farmer with
livestock. The utilization of small parcels of land is maximized by combining
cash or food crops with animal fodder species. For example, the plot in this
diagram is one-quarter hectare (2500 sq.m) and comprises three distinct areas
and sources of production: a 1,600-sq.m core area planted to traditional cash or
food crops (the crop residues can also be fed to livestock); a 900-sq.m
peripheral area subdivided into 45 sq.m areas planted to improved grasses and
legumes; and the 200 m circumference area planted to fodder trees and shrub
legumes which form a hedgerow fence around the area.
Livestock, an income-generating farm component, are integrated
into the farm using a cut-and carry and stall feeding system. With the increased
supply of higher quality fodder, 12 % increases in growth rates have been
documented and the carrying capacity of a 1 hectare area can be increased to 4
animals/ha. With the combination of the species within the three strata, forage
production can increase by as much as 48%. Through the use of drought-resistant
species, forage is available throughout the year. The grasses, shrubs and trees
also help reduce water run-off, thus reducing soil erosion. Lastly, the legume
shrubs and trees can produce 1 1/2 tons of firewood/yr.
HAY PRODUCTION AND STORAGE:
The mandala or straw stack is a prominent symbol in rice-growing
communities. Rice straw is the by-product of rice after threshing and is a
potential feed source for carabaos during the summer lean months. It is rich in
carbohydrates and is available when pasture grasses are affected by drought or
when all of the farm area are planted to field crops.
Farmers in the rice-producing areas of the Philippines store
large quantities of rice straw after the rice harvest by sundrying and storing
them as bales in a covered barn or as loose hay in the oval-shaped, compact
mandala, supported in the middle by a bamboo pole firmly anchored in the ground.
The mandala is located in an elevated spot of the farm near to where the
livestock are kept. The upper portion should be covered to protect the straw
from the rain. Rice straw can be stored longer if its moisture content (MC) is
between 13-14%. But, if the MC is above 20%, heat may be produced, causing
spontaneous combustion and possible fire or inducing mold growth which reduces
the feed value of the straw. An average-sized mandala contains about 1,200 kg DM
and has 3.3% crude protein (PCARRD, 1978).
Hay production and storage
In India, the straw stack is located in one corner of a field or
on the roof of the animal shed. The posts are made of cut stones and large-
boulders are utilized for the foundation.
Straw stack
In other parts of India, another storage system is used. Large
stones are used to build a foundation. Then, bamboo poles are laid upon the
stones close to each other as a slatted floor. Rice straw, pearl millet and
sorghum straw are tightly pressed and compacted into the space. The materials
must be tightly compacted to prevent exposure to air which can cause spoilage.
The top tapers to the sides and is covered with canvas or plastic sheets to
protect it from the rain.
Plastic sheet
Another dried roughage which can be stored is corn stover, the
portion of the plant left in the field once the ears have been harvested. The
whole plant is left in the field should be stored and protected from rain,
otherwise it mildews disintegrates, making it unfit for feed.
OTHER CROP RESIDUES:
1. Sugarcane (Saccharum officinarum)
In sugarcane plantations which use many carabaos, sugarcane tops
comprise their only source of daily feed during the milling season. Instead of
drying and burning the cane leaves and tops in the field, they should be
collected,' cried and stored for future use. Whether sugarcane tops are dried or
green, they are palatable and relished by carabaos and cattle. They contain a
large amount of digestible carbohydrates in sugar form.
2. Pineapple (Ananas saliva)
In areas where pineapples are grown as a cash crop, the leaves
and damaged fruit can be used as animal fodder. After the plants have borne
fruit for 2 years, they are removed to make way for new crops. The plants are
gathered and the spiny portion removed and cut into 2-3 inch pieces before given
to the animals.
3. Peanut (Arachis hypogaea)
Peanuts not only produce quality, nutritious food legume! but
can yield up to 8-10 T fodder/ha. Once the peanuts have been harvested, the vine
can be fed as peanut hay. The nutritive value is high because of its protein
content (10.8-11.9%), as well as its potassium, vitamin A and calcium contents.
An additional advantage is its high palatability. For best
· results, the vines should be dried well and protected
from rain and dew.
4. "Miramais" (tentatively identified as Sorghum bicolor)
Farmers in Pangasinan province (Philippines) use a portion of
their farm to cultivate this indigenous grass, which is similar in appearance to
corn. It is a hardy plant which grows well in well-drained, fertile soils and
can withstand drought, pests and diseases. It is usually planted before the end
of the dry season (October-November) and is cut 30 cm above the ground before it
develops a tassel. The stems and leaves are fed and are relished by animals. The
plant will develop a tiller and ratoon to produce more forage.
Shelterbelts for rice farms
Shelterbelts are windbreaks, specifically rows of trees planted
to serve as protection from excessively strong winds. Shelterbelts modify a
farm's microclimate and reduce crop damage from the force of wind. Depending
upon the height, placement and orientation of the shelterbelt along a certain
stretch, the shelterbelt can also:
· decrease temperature and relative humidity ·
decrease plant and soil water loss (evapotranspiration) and the entry of hot air
to the farm (advection) · increase the rate of carbon dioxide
replenishment.
The most beneficial effect of shelterbelts is the reduction of
mechanical injury, e.g., leaf defoliation and lodging in areas experiencing high
wind speeds. There are reports showing that shelterbelts increase plant growth
and yield.
The effectiveness of shelterbelts depends essentially on the
interaction of two factors:
1. Height of shelterbelt: Higher shelterbelts protect a longer
stretch of crops on the leeward side (the side protected by the shelterbelt).
2. Porosity: The degree of perforation is usually dependent on
foliage qualities such as leaf arrangements, sizes and shapes. More perforated
barriers allow less turbulent winds to blow and protect an even longer stretch
on the leeward side.
Porosity
2. Orientation. To effectively protect crops, 2-3 rows of
shelterbelts should be oriented perpendicular to the predominant direction of
strong or typhoon winds.
Orientation
3. Placement. Shelterbelts may be placed near farm boundaries,
in areas not used for crop production, or near farm-house boundaries.
Unless rice bunds are widened to accommodate a row of
shelterbelts, it would not be ideal to place shelterbelts in the bunds because:
- of waterlogging problems - there will be competition among
crops for water, light and nutrients - it may be an alternate host to rice
insect pests and diseases - it may hamper field
operations.
Low-external Input Rice Production (IIRR, 292 p.)
Farm management
(introduction...)
A guide to decision-making for technology adoption based on production costs
Simple record-keeping for LIRP
Workshop to develop the low-external input rice production technology information kit
Rice production situationer in the Philippines
Low-external Input Rice Production (IIRR, 292 p.)
Farm management
A guide to decision-making for technology adoption based on production costs
Production costs are those expenses which farmers encounter
while producing a crop. These costs include fixed costs (i.e., irrigation fees,
land rental, etc.) as well as variable costs (i.e., seed, fertilizer, labor,
etc.). Fixed costs are paid by farmers just to begin farm operations; in other
words, you have to rent land and pay for irrigation to be able to begin to sow a
crop. Variable costs, as the name indicates, vary according to the mode and
scale of production. Therefore, variable costs of farm operations provide the
best opportunity to small-scale farmers to modify their mode of production and
thus reduce their cash expenses. If a farmer has high production costs, but has
limited capital he/she can be caught in a cash-flow squeeze, especially during
rice-producing months.
The LIRP technologies outlined in this kit are labor or
knowledge-intensive rather than capitalintensive. increased labor requirements
or the introduction of integrated management techniques are offered as
alternatives to capital-poor farmers who may not have access to capital
resources for investment in farm technologies (i.e., equipment, more land, hired
labor, etc.). The costs of those capital resources, in an informal credit
system, comprise a hidden cost of production and can reach 40-50% in four
months. Any reduction in production costs can be assumed to save an additional
25-30%, at least, since many farmers use informal credit arrangements.
Since the cost of capital is high and may not be available to
small farmers, labor must be substituted to maintain or increase production.
However, the opportunity cost (the peso value of that labor if used in an
alternative activity, i.e., day labor, driving a jeepney, etc.) of that labor
may also be high, as a farmer may value time for leisure or family activities or
may require time for other income-generating activities. If a farmer has an
option to earn income from an off-farm source, even if the income earned is low,
the farmer may opt to earn that income because it is IMMEDIATELY available.
Thus, the opportunity cost to an LIRP technology may be high and this fact must
be considered when making a decision to adopt (or not to adopt) a technology.
For example, if a certain technology requires extra labor at a time when a
farmer needs to earn disposable cash (i.e., to purchase food or medicine, pay
school fess, etc.), then the technology will not be implemented by the farmer in
that situation.
This paper will present actual production cost data from Cavite,
Philippines, farmers. Using these data as an example, areas of rice production
in which costs can be reduced or eliminated and in which potential yield
increases lie will be identified. Pages are included which divide the LIRP
technologies into groupings based on rice production activities. Therefore, if a
farmer decides that he/she is spending too much on weed control, for example,
and would like to reduce those costs, this quick reference can be used to
identify those specific technologies which might be adopted in order to reduce
weed control costs. Once a certain technology has been selected, a farmer can
then use partial budgeting to determine if the introduction of that technology
would be advisable, from a purely economical viewpoint. A partial budget example
on the use of Azolla as a bio-fertilizer will be presented.
Using actual rice production costs of Philippine (Cavite
Province) farmers, the following cost of production framework can be
established:
Fixed Costs
Pesos (P)/Ha.
Irrigation
500.00/harvest
Land Rental
500.00/year
Variable Costs (per cropping)
Seed Bed Preparation
3 days @ P40/day
P120.00
Seed
125 kg.
625.00**
Land Preparation
3 days (with hand tractor @ P340/day
P1,020.00
1,300.00
7 days (with carabao) @ P40/day
280.00
Transplanting
30 days @ P40/day
1,200.00**
Fertilizer Costs
570.00**
Fertilizer
2 1/2 bags @ P220/bag
500.00
Labor
1/2 day @ P40/day
20.00
Weed Control
812.00**
Labor for Manual Weed Control
14 day @ P40/day
560.00
Herbicides
1 liter
232.00
Labor for Spraying
1/2 day @ P40/day
20.00
Pest Control
260.00**
Pesticides
1 liter
240.00
Labor
1/2 day @ P40/day
20.00
Harvesting
(10% of harvest)
1,700.00
Threshing
(10% of harvest)
1,700.00
** Highest variable cost/ha.
Those areas with the highest production cost/ha. (based on the
data presented) are seed, land preparation, transplanting, fertilizer, weed
control and pest control. While the actual figures and relative rankings may
vary (even widely) across regions or countries, these areas of production costs
can be reduced or even eliminated using LIRP technologies. Some cost-reducing
strategies for each of the six areas are presented here as alternatives to
existing high-external input modes of production.
SEED:
Many farmers are currently using about 125 kg. of seeds per
hectare, more than double the recommended seeding rate of 60-75 kg/ha. The
expense for seed in our example is more than P600 for the 125 kg of seeds.
Oftentimes, these seeds may be of poor quality, particularly with a low
germination rate. Farmers can reduce their seed costs in two ways: cut in half
the amount of the poor quality seed they use or buy (savings of more than P300);
or only buy 60-75 kg good quality seed. With the use of a drum seeder, seed
requirements for one hectare can be reduced to 50-100 kg.
LAND PREPARATION:
The land preparation costs of over P1,000 presented in our
example can be reduced by a variety of strategies. Minimum tillage can
potentially cut tillage costs by one-third. Zero-tillage would almost completely
reduce tillage costs and offers the potential for producing an early crop. A
zerotillage test with no fertilizer or pesticide yielded 2.2 T/ha.
TRANSPLANTING:
One of the most labor-intensive activities in rice production is
transplanting. In areas where labor is costly or unavailable, farmers can reduce
production costs by using a manually-operated rice transplanter. In our example,
transplanting costs are equal to P1,200 per cropping or P2,400 for 2 croppings.
Assuming 6 mandays of labor per cropping (6 mandays x 2 croppings x P40/md) and
P900 depreciation, transplanting costs using a manually-operated transplanter
can be reduced to P1,380, almost half the cost of traditional transplanting
methods. In areas where labor is plentiful and/or inexpensive, the introduction
and use of a transplanter could have negative social ramifications.
FERTILIZER:
Savings on fertilizer costs probably hold the most immediate and
promising potential for reducing production costs. In our example, farmers have
spent almost P600 for fertilizer and the cost of labor for application of that
fertilizer. Two-thirds of fertilizer costs (almost P400 for our example) can be
saved through the use of big-fertilizers. Sesbania rostrata as a green manure,
for example, can easily supply more than 75% of the Nitrogen (N) needed by one
rice crop. Many tests show that it can produce all of the necessary N.
Azolla can provide nearly all the Nitrogen needed for a rice
crop when multiplied and complemented with enough phosphorous fertilizer.
Azospirilla has demonstrated fertilizer savings of one-third. Fertilizer costs
can easily be reduced (by 20% or more) without compromising yields by purchasing
less fertilizer, but managing it more efficiently. Integrating legumes into the
farm system can reduce fertilizer costs by as much as 50%, as well as providing
food, fodder and/or fuel.
The LIRP technologies offer a variety of alternatives to reduce
the amount or entirely forego the use of petroleum-based chemical fertilizers.
WEED CONTROL:
Over P800 was spent by the farmers in our example to control
weeds in the rice paddy. Most of this cost accounted for labor (almost P600),
but over P200 was spent in the purchase of herbicides. By using a rotary weeder,
all cash outlays for herbicide can be saved, although the use
of labor will increase. The weeder will also aid in building
soil fertility by incorporating weeds (and azolla, if used) into the soil to
decompose and provide organic matter. However, the non-use of herbicides will
allow the return of aquatic life such as frogs, fish, etc. The artificial
culturing of fish in the rice paddy also becomes possible.
PEST CONTROL:
Pest control costs can be cut in half simply by using the
sequential sampling method of pest control. For the farmers in our example, that
could mean a savings of almost P150. Botanical pesticides, biological control
techniques and soil amendments can almost eliminate the need for costly chemical
pesticides. Selecting the proper chemicals, using them at the minimum required
rate and practicing need-based rather than calendar-based spraying will also
reduce pest control costs.
POTENTIAL YIELD INCREASES:
The potential exists for increased yields using the
interventions described above not only with lowland rice but also with upland
crops following rice. The increase in organic matter plus improved management
practices can double yields over the average (300 kg/ha of mung bean, for
example, increased to 600 kg/ha) with minimal cost.
Additional components of a rice-based farming system also hold
potential for increasing income. Integrating animals such as fish, duck and
milk/draft animals into rice-based systems offers the opportunity for a more
stable income as well as providing a food/income "cushion" in case of crop
failure. Adding a vegetable component can help ease cash flow problems and
improve family nutrition. Additional savings can be realized in the form of
labor and/or time spent collecting fodder and fuelwood. With sample supplies
available from under-utilized areas of the farm, the family will spend less time
in search of those farm inputs. By eliminating the use of inorganic pesticides,
free food for the family can be realized as natural populations of frogs,
mudfish, catfish, etc. return to the rice paddies.
PARTIAL BUDGETING:
Partial budgeting is a simple, useful method used in estimating
the returns received from introducing a new technology which affects only a part
of the overall farm enterprise. The partial budget can show a farmer whether an
increased cost (in capital or labor) will be offset by the value of the expected
increase in yield (or production). A planned change should be implemented only
if the value of the expected increase in yield (or production) is greater than
the expected increase in costs.
For example, a farmer has looked at his cost of production
structure and has determined that his fertilizer costs are too high. He has used
the LIRP kit to identify the use of azolla as a fertilizer alternative and would
now like to calculate the estimated change in his income due to the use of
azolla as a big-fertilizer.
COLUMN I
COLUMN II
Added Costs
Added Returns
1. Multiplication Pond
1. Azolla as hog feed; savings in feed (kg)
P125
Land preparation (1/2 day)
P20
Fertilizer (2 1/2 kg)
5
Fertilizer application (1 /2 day)
20
Seeding azolla (1/2 day)
20
2. Incorporation
Land preparation and rotary weeding (5 days)
200
Sub-total
P265
Reduce Returns
Reduced Costs
1. Decreased yield
1. Fertilizer
P550
80 kg @ P3.50/kg
P280
2. Labor to fertilizer
20
Sub-total
P570
TOTAL
P545
TOTAL
P695
Estimated change in income (if positive, a gain in income; if
negative, a loss in income) = Column II Less Column I
P150 = P695 - P545
This example shows that while a farmer using azolla as a
big-fertilizer would encounter added costs of P265 (almost entirely labor costs)
and a decreased yield of 80 kg, the cost would be offset by additional savings
in chemical fertilizer and hog feed. (It is also worth-mentioning that decreased
yields as a result of using azolla will usually only be experienced in the first
or second croppings. Then, yields will, in fact, surpass those from inorganic
fertilizers.) Therefore, if this farmer is comfortable with increasing his labor
input to the farm, his actual cash outlays can be reduced by over P400.
ALTERNATIVES FOR REDUCING PRODUCTION COSTS OR CAPITAL NEEDS
· Producing Own Seeds/Selecting Varieties - Traditional
vs modern varieties - Seed selection techniques - Clonal
propagation · Improving Storage and Germinability - Seed
dormancy - Seed storage
TRANSPLANTING 1. Manually-operated transplanter 2.
Line markers/straight-row planting
WATER MANAGEMENT
· Conserving Water - Water management for drought-prone
areas - Sorjan· Blue-green Algae - Increase organic matter with green
manures - Water impounding · Obtaining Better Production from
Available Water - Integrated cropping systems - Rice-fish culture -
Crop rotations - Weed control
1. Using carabao for draft 2. Straight-row planting 3.
Sesbania slicer for weedy areas 4. Reducing land preparation time by keeping
land covered with "plants" not "weeds" minimum tillage zero tillage 5.
Rice straw utilization 6 Ratooning
· Cultural Management Practices - Synchronized
planting - Crop rotation/intercropping/relay cropping - Sanitation -
Fertilizer management - Water management - Plant spacing - Botanical
control - Low-cost control of Golden Snail - Planting of resistant
varieties · Major Insect Pests and Their Economic Threshold -
Beneficial insects - Safe usage of pesticides (need base spraying affected
areas only) - Spot treatment (spraying)
Cost-benefit analysis for low-input rice production (LIRP)
technology
Cost-benefit analysis is an important and essential tool in
measuring the net effect of a certain technology. Farmers will adopt a
technology only when the benefits derived from it will compensate for their
labor and other costs. However, environmental and social costs and benefits must
also be considered.
Cost-benefit analysis
A guide for technicians, farmers and other agriculture
enthusiasts to determine the costs as well as the benefits of components that
are included in the technology is presented here.
QUALITATIVE ANALYSIS:
A. COSTS
The costs of the LIRP will perhaps involve slightly decreased
rice harvests at least in the beginning and during the transition period to a
less chemical-dependent farming system. Labor demand at harvest may also decline
slightly .
Another cost will be an increase in labor requirements in crop
establishment and maintenance. This can be seen as both a cost (less leisure or
alternative production or more work days for the farmer/farm family) and as a
benefit (increases in demand for agricultural labor to benefit landless families
in the area).
B. BENEFITS
The benefits we foresee include economic, environmental and
social aspects. The economic benefits are most obvious.
1. Economic benefits
· Increased net incomes to farmers through reduced cost of
production, even in the face of possible slight decreases in crop
yield. · In the long run, improved soil condition and farming practices
should lead to increased gross harvests. · Maximum utilization of scarce
resources through improved farming practices. Use of credit, capital,
fertilizers (both organic and inorganic), labor, herbicides and pesticides as
needed will be maximized. · Savings in expenditures for family health
maintenance and improvement due to reduced potential pollution and improved
incomes. · The development of linkages for small equipment repair,
production of non-chemical inputs within the community, encouraging local
resource use.
2. Environmental Benefits
· Reduction of pollution of streams, ground water and soils
through minimal use of petroleum-based chemical fertilizers, herbicides and
pesticides.
· Improvement in soil conditions due to use of green
manure, crops which improve soil consistency and minimization of soil damage due
to rice monocropping.
· Improvement in the health and nutrition of farm families
due to declines in potential chemical poisoning hazards, increases in healthy
farm produce and increases in net income.
· Presentation and reintroduction of environmentally
important indigenous seed varieties of rice, as well as other crops and
livestock grown as a part of an integrated farming system.
· Optional use of scarce water resources.
3. Social Benefits
· Perpetuation of traditional beneficial farming tradition
encouraging the stewardship of the land among farm family members.
· Encouragement of family participation in farming
activities leading to closer family ties and relationships within the family
unit and across generations -- preserving advantages of extended family
relationships.
· Encouragement of bayanihan (mutual help/sharing) within
the community.
· Greater community self-reliance and less dependency on
outsiders.
· Greater control over own resources can stimulate greater
political awareness and power resulting from improved economic condition and
revival of other community organizations (i.e., marketing cooperative) due to
new organizational relationships.
QUANTITATIVE ANALYSIS:
A. METHODOLOGY
1. Production yield
· Gross production
- Gross yield -- Total harvest or produce in terms of weight or
its equivalent - Gross income -- Cash value of the harvest - Land area
cultivated.
· Production share (For those areas in which harvesting and
threshing costs are paid as a share of total production.)
- Harvester's share - Thresher's share -- Thresher share as
payment for services.
· Farmer's share of production
- Difference between gross income (yield) and production share
[gross income (yield) less production share].
- All farm inputs should be specified and quantified (actual
purchase cost).
· Labor expenses
- List all activities conducted during the production phases of
rice, fish, vegetables, green manures, livestock, fodder, etc. - Labor should
be quantified (days or hours) and costed (actual expense).
· Other expenses
- List all other incurred expenses not grouped under farm inputs
or labor expenses (e.g., rentals, transportation, storage, irrigation fees,
permits, etc.).
· Total farm expenses (farm inputs plus labor expenses plus
other expenses).
3. Net farm income
· Difference between farmer share of production (gross
income less production share) and total farm expenses (farm inputs plus labor
expenses plus other expenses).
B. DATA ANALYSIS AND INTERPRETATION
· Consolidated data should be presented in tabular form
(except for technology profile which should be presented in a separate
sheet). · Two types of analyses should be executed:
a. Financial analysis (see sample format): cost benefit
analysis b. Immediate impact analysis: effect of the technology in terms of
social and environmental benefits.
· Further analysis of economic data can be conducted
through the use of simple formulas to calculate farm returns using the LIRP
technology. Listed below are three basic formulas which show farm returns to
specific farm resources (materials and labor).
· Returns to labor can show a per hour (or per day) value
of labor inputs; in other words how much return is received for every unit of
labor invested.
Returns to labor = (gross production (income) - farm inputs and
other expenses) / labor expenses
· Returns to farm family labor can show the amount of
return received for every unit of family labor invested. This calculation can be
computed only when the amount and cost of family and off-farm labor is
differentiated.
Returns to family labor (hours or days) = (gross production -
farm inputs and expenses - cost of hired labor) / amount of family labor (hours
or days)
· Returns to farm resources can show the amount of return
received for the amount of on-farm resources invested. This calculation can help
a farmer to place special emphasis on the value of on-farm resources used within
the system.
Returns to farm =gross production (income) - Resources /ha
expenses of non-farm resources
SAMPLE FORMAT
COST-BENEFIT ANALYSIS (Technology Title)
PRODUCTION DATA
QUANTIFY
AMOUNT
1. Production Yield
A. Gross Production
1. Gross Yield
2. Gross Income
3. Land Area Cultivated
B. Production Share
1. Harvester's Share
2. Thresher's Share
C. Farmer Share of Production
II. Farm Expenses
A. Farm Inputs
1. Seed/Seedlings
2. Fertilizer
· Inorganic (specify)
· Organic (specify)
3. Pesticides
· Inorganic Pesticide (specify)
· Organic Pesticide (specify)
4. Other Farm Inputs (specify)
B. Labor Expenses
1. Land Preparation
· Plowing
· Harrowing
· Levelling
2. Seed bed/box preparation
3. Seed drying, soaking and incubation
4. Seed broadcasting/direct seeding
5. Pulling of seedlings
6. Transplanting
7. Spreading of green manure
8. Fertilizer application
- top dressing
- side dressing
- basal
9. Pesticide application
10. Weed control
11. Harvesting
12. Threshing
13. Others (specify)
C. Other Expenses
1. Transportation
2. Hauling
3. Irrigation fees
4. Land rental
5. Storage costs
6. Others (specify)
D. Total Farm Expenses
III. Net Farm Income
Simple record-keeping for LIRP
Keeping accurate farm records allows a farmer to monitor
expenses, inputs and labor which are invested into the farm and the production,
yield and income generated from that investment. The importance of keeping
records is emphasized by the need for farmers to have accurate information about
cash expenses and incomes channeled through the farm.
Simple record-keeping for LIRP
Farmers have traditionally kept written farm records by
recording events, activities, income and expenses on large wall calendars. Also,
future farm activities i.e., harvesting, fertilizer applications, etc.. have
been noted by farmers using this method.
Writing
Building on this traditional practice, a simple record book/
calendar can be designed which will allow farmers to more systematically record
fundamental farm information, thus aiding them in decision-making. Two sample
formats are presented here.
The inclusion of important astronomical events, i.e., lunar
phases, solstices, or equinoxes in the calendar can facilitate making farming
decisions for those farmers who use those events as guides. By using one of
these sample formats, a farmer or group of farmers can modify the design in
order to specifically tailor the components/information to be recorded to their
specific production system.
A checklist of LIRP activities to be monitored/recorded in a
record-book may include the following:
· Azolla multiplication · land preparation
(plowing, harrowing, levelling, plot preparation) · seedbed
preparation · use of compost · transplanting seedlings ·
direct seeding · straight row planting · incorporation of green
manures/animal manures/straw · fertilizer application ·
botanical/chemical pesticide application · weed control
practices · vegetable production (bed preparation, planting,
maintenance, weeds, pests, harvesting) · fish culture practices
(rice-fish-clams, rice-duck-fish, rice- pig-fish) · Iivestock/animal
production · harvesting/threshing/storage
Rice production using LIRP technologies will bring about two
major changes in the farming system -- increased savings to the household
(through on-farm production of household consumption items and through decreased
cash outlays for production costs) and increased demand for farm labor (through
the use of labor-intensive technologies). Therefore, to accurately assess the
impact of LIRP technologies, a farmer should take extra effort to record the
variety of farm savings as well as the amount of increased labor requirements.
While at times difficult to quantify or measure, to the extent
possible, materials/resources generated on and derived from the farm, the farm
should be assigned a certain value and recorded. For example, posts produced
from trees on the farm, fertilizer equivalents from green and animal manures,
the amount of fish consumed from a fish pond, or the value of botanical
pesticides used in place of chemical-based pesticides should all, be recorded as
income to the farm, even though they do not actually generate cash.
To compute monthly returns to the farm, total expenses should be
subtracted from gross income (including valuation of the resources saved).
Sample format of simple record book
Sample format of simple record
book
Workshop to develop the low-external input rice production technology information kit
The Low-External Input Rice Production (LIRP) Technology
Information, Kit is the result of an inter-agency collaboration made possible
through the use of an innovative workshop process developed by the International
Institute of Rural Reconstruction (IIRR). During a two-week workshop conducted
on July 15-30, 1990, IIRR brought together at the Silang, Cavite headquarters,
44 individuals from 10 organizations. Organizations represented included
government agencies and institutions, such as the University of the Philippines
at Los Ba�os (UPLB), the Philippine Rice Research Institute (PhilRice) and the
Department of Agriculture (DA); non-governmental organizations, such as AGTALON,
the Quirino Livelihood Center, the Philippine Rural Reconstruction Movement
(PRRM) and IIRR; and research institutions, such as the International Rice
Research Institute (IRRI), Cornell University and the University of California
at Davis. Participants represented a variety of disciplines, including
researchers, agricultural field technicians, rural development managers,
farmers, artists, editors and graphics layout persons. While participation
involved a variety of organizations and individuals, the logistical arrangements
and workshop management was handled by IIRR. The Rockefeller Brothers' Fund
(RBF) and the German Agro-Action provided funding support to IIRR for the field
experiences which were presented in the kit, while RBF provided financial
support for the workshop proper.
This technology kit attempts to accomplish the primary objective
of providing and presenting technological options for rice production systems.
The technologies presented are proven technologies based on a variety of sources
including institutional research, farmer-level field experiences and/or
traditional knowledge practices and systems. The kit is comprised primarily of
single-page concept sheets which present individual topics. These sheets are
designed to stand on their own, i.e., to be reproduced and distributed in a
training session; or can be used as a technical resource package to farmers,
technicians or researchers. A systematic effort has been exerted to use a
science-simplification approach which allows for assessing technical information
and repackaging it in a user-friendly and non-threatening format.
The workshop process involves a number of steps and the
participation of several people from diverse backgrounds and disciplines. This
process allows for participation of several people for review and assessment of
the materials to be included, while allowing for a rapid compilation and
production of the materials.
First, relevant topic areas are identified; resource persons who
would participate in the workshop are identified; and, specific topics are then
matched to the resource persons. Prior to the workshop, they are asked to
prepare an initial working draft (two to four pages maximum) of their topic. The
draft should include graphics and text and should be written to and for farmers
or technicians, not researchers. Care should be taken to ensure that resource
persons understand that a formal "scientific paper" is not being presented, but
rather a "science-simpilfied" paper.
During the workshop, all invited resource technical persons, as
well as editors, artists and layout technicians, attend the presentation
sessions. The text and graphics are presented (using overhead projection) to the
group. Then, all participants critique, provide input and conduct a peer review
of the presentation. Suggestions, changes and revisions are noted and the
materials are revised according to the comments in order to incorporate the
changes. This process involves the
lay-out specialists, the editors, the artists and, of course,
the resource person. The revised draft is again shared with the larger group and
approved for final publication. Camera-ready materials are then produced, using
desk-top publishing capabilities.
The LIRP Technology Kit was the first kit produced by IIRR
involving the heavy use of desk-top publishing capabilities. High-quality,
camera-ready materials were produced by IIRR staff in Silang; thus improving the
quality of the materials while reducing the printing and production costs
normally incurred in materials production.
Once again, the technology kit workshop has enabled IIRR and
other agencies to produce a relevant field technology kit which is available for
wider sharing to farmers, planners and technicians. While this process can be
costly and time-consuming, the workshop method has allowed for cost and time
reduction without sacrificing
quality.
Rice production situationer in the Philippines
INTRODUCTION
Rice is one of the most important food crops of the world. It is
the life blood of more than 90 percent of the people living in Asia who are
dependent on rice as a staple food item. It accounts for over 70 percent of the
daily calorie intake in countries such as Bangladesh, Cambodia, Laos and Myanmar
(table 1).
TABLE 1. THE TOP TEN RICE PRODUCERS.
COUNTRY
RlCE OUTPUTa ('000 T)
POPULATIONb (MILLION)
YlELDb (T/HA)
RICE IN TOTAL CALORIE SUPPLY %c
China
174704
1104
5.3
38
India
92422
835
2.3
31
Indonesia
40525
185
4.1
59
Bangladesh
22710
115
2.2
70
Thailand
19241
56
2.0
55
Vietnam
15435
67
2.7
69
Myanrnar (Burma)
13983
41
3.0
74
Japan
13421
123
6.1
26
Brazil
10868
147
1.9
15
Philippines
8919
65
2.7
41
a 1986-88. b 1989. c 1985.
Source: IRRI Rice Facts, 1989.
Rice is planted on about 145 million hectares - 11 percent of
the world's cultivated land. Wheat covers a slightly larger land area, but a
sizable proportion of the wheat crop is fed to animals. Rice is the only major
cereal crop that is consumed almost exclusively by humans.
By the year 2000, the world will need more than 600 million tons
of rough rice in order to keep pace with the current population growth rates.
(Table 2)
TABLE 2. PROTRACTED INCREASES IN POPULATION AND
NECESSARY RICE PRODUCTION IN SELECTED COUNTRIES, 1985-2020.
COUNTRY
POPULATION (MILLION)
RICE REQUIREMENT ('000T)
1985
1989
2000
2020
1985
1989
2000
2020
Bangladesh
101
115
153
230
20300
23294
32183
51238
China
1060
1104
1292
1523
157127
164672
195807
237794
indict
759
835
1043
1375
74982
84480
112590
167157
Philippines
54
65
86
131
7673
9330
13013
22069
Vietnam
60
67
86
121
13656
15545
20993
32271
WORLD
4837
5234
6323
8330
420000
455169
564012
781354
Source: IRRI Rice Facts, 1989.
Southeast Asian countries, like the Philippines, will have to
intensify rice production within the next 20 years to keep up with rapidly
growing populations. By the year 2000, more than 86 million Filipino will have
to be fed (3 percent yearly increase) and the country must be able to produce
more than 13 millions tons of rice.
The Philippine average rice yield per hectare for the past five
years (1985-1989) was 2.7 tons. From 1985 to 1987 the area planted to rice was
about 3.4 million hectares (43 percent irrigated lowland, 45 percent rainfed and
12 percent upland area respectively). Eighty-seven percent of this area was
planted with modern rice varieties. Meanwhile, expansion of riceland is not
possible, ail land suited for rice is already being cultivated; and, urban
expansion is steadily forcing more land out of production.
TRENDS IN RICE PRODUCTION IN THE PHILIPPINES.
Three distinct phases characterize the trends in the Philippine
rice production, over the postwar period (Fig. 1). Since the 1950s,
self-sufficiency in rice has always been a continuous national program. Rice
production increased annually at 2.2 percent, a rate below that of population
growth. Between 1965 and 1980, after the introduction of the new seed-fertilizer
technology, the annual growth rate doubled to 4.5 percent. This growth was
achieved primarily through greater productivity rather than through area
expansion. With this growth performance, the country turned from being a net
importer of 5 to 10 percent of its annual rice requirements, to being marginal
rice exporter by the late 1970's.
Table 3 shows the yield increases on paddy production, harvest,
areas and yields by crop type, for crop years 1961-1980. The substantial gains
in production from 1974-1979 (Masagana 99 years) and analysis of average annual
growth rates in production, yields and hectarage are summarized in Table 4.
Figure 1. Trends in rice production
and apparent consumption (production + imports - exports) in the Philippines,
1960-1984.
Table 3. Paddy production, area
harvested and yield, 1961-1980.
TABLE 4. GROWTH RATES OF PADDY PRODUCTION, YIELDS, AND HARVEST
AREAS, 1960-1979.
% GROWTH RATE PER ANNUM
1960-66
1967-73
197479
PRODUCTION
1. Total
1.5
1.6
8.8
2. Irrigated
2.8
4.9
9.9
3. Rainfed Lowland
2.7
(0.1)
8.0
4. Upland
(4.2)
(2 7)
5.9
YIELDS
1. All crop type
2.5
1.5
6.8
2. Irrigated
3.9
(0 9)
6.5
3. Rainfed Lowland
2.0
0.7
6.3
4. Upland
(1.3)
2.3
6.2
HARVEST AREAS
1. Total
0.9
0.1
1.9
2. Irrigated
(0.8)
6.4
3.3
3. Rainfed Lowland
0.7
(0.7)
1.7
4. Upland
(3.3)
(3.7)
2.8
Source: Bureau of Agricultural Economics.
Since 1974, rice production increased by 63 percent, with an
average growth rate of 8.8 percent - a record accomplishment compared with 1.6
percent annual growth in total production from 1967-1973. The disparity is due
primarily to the 28 typhoons that occurred within a period of four months in
1971, the disease infestation in 1972 and floods that reduced the production for
the year by 13 percent.
Since 1980, rice production has grown at the negligible rate of
0.1 percent leading to rice imports in 1984 and 1985 (Fig. 1). Strong typhoons
damaged the 1980 crop in Central Luzon and Cagayan. The sharp reduction in
1982-1983 rice production was due to severe drought from November 1982 to June
1983, particularly in the Visayas and Mindanao. Drought also affected the
1983-1984 crop as planting in the 1983 wet season was delayed and the low water
levels in many Luzons reservoirs limited supply of water during the dry season
of 1984.
SOURCE OF YIELD GROWTH
Among the factors accounting for past yield growth were:
adoption of modern varieties, increased use of fertilizer and expansion of
irrigation. Within five years of the introduction of modern varieties in 1966,
50 percent of the rice was already planted to modern varieties. Adoption
continued to increase in the subsequent period.
Irrigated area expanded from 35 to 47 percent from 1965 to 1980.
Growth in irrigation investments was much more rapid because a significant share
of this was for rehabilitation to increase quality of irrigation.
Fertilizer per hectare used in rice increased from about 10 kgs.
of NPK per hectare in 1965 to almost 40 kgs. by the early 1980s. Fertilizer use
rose steeply as modern rice varieties were rapidly adopted and irrigated area
expanded.
Despite the unfavorable weather and problems with irrigation
quality from 1980 to 1984, average yields continue to increase at a high rate
(Table 5). The high growth rate in upland yields in the 1980-1984 may not
represent a true picture since the substantial increase occurred only in one
year, 1984. It is in the rainfed areas where yield performance appears to have
steadily improved as growth in yields rose to 4.5 percent. The yields of rainfed
rice in 1984 are nearly 70 percent higher than those in the late 1960s when the
size of rainfed crop area was about the same.
TABLE 5. GROWTH RATES OF PADDY PRODUCTION, AREA AND YIELD IN
IRRIGATED, RAINFED AND UPLAND AREAS IN THE PHLIPPINES, 1955-1984..
OUTPUT
AREA
YIELD
Irrigated
1955* - 65*
5.4
5.3
0.1
1965* - 80*
7.0
3.5
3 5
1980/84
2.2
1.0
1.2
Rainfed
1955* - 65*
0.8
1.0
-0.2
1965* - 80*
2.9
0.3
2.6
1980/84
-1.4
-5.9
4.5
Upland
1955* - 65*
-1.0
-1.6
0.6
1965* - 80*
-1.8
-3.8
2.0
1980/84
-10.0
-13.0
3.0
* Three-year average centered at year shown.
Source of basic data: Bureau of Agricultural Economics,
Philippines.
GOVERNMENT RESPONSE TO PRODUCTION INSTABILITY
The Agricultural Credit Program
The extension of agricultural credit to farm produce has been a
policy instrument used to stimulate growth of rice farm incomes. Granting
farmers access to institutional sources of credit at liberal terms promotes
adoption of innovative practices and increases farm productivity and income.
Significant to reach Philippine farm producers with
institutional credit commenced in 1952. Due to a threatening political situation
in Central Luzon, the Agricultural Credit and Cooperative Financing
Administration (ACCFA) was established under Republic Act (RA) 821 to extend
unsecured production loans to rice farmers. Low repayment of loans threatened
the existence of the institution. In 1962, it was reorganized into the
Agricultural Credit Administration (ACA), to serve the credit needs of land
reform beneficiaries. Also in 1952, RA 720 was passed in response to the needs
of small farmers.
The Supervised Credit Approach
The approach widely used to reach rice farmers has been
institutional credit. The scheme provides production loans according to a farm
plan and budget and technical guidance and supervision of the borrowers by the
production technicians.
The experience gained in this approach marked the beginning of
wide adoption of the supervised credit in the stimulating agricultural
development, including the national drive for rice self-sufficiency represented
in the Masagana 99 program.
The Masagana 99 Program
In 1973, the Masagana 99 was launched to increase rice farm
productivity and income. It was a government-supported rice production program
involving a package of technology, supervised credit, seed productivity and
distribution, fertilizer allocation and distribution system, intensified
extension services, intensified pest and disease control campaign and massive
information and educational campaign.
Rice farm production increased with the program. In the Masagana
99 years (1974-1979), rice production grew at the rate of 8.8 percent per annum
against the traditional growth rates of 1.5 percent 1.6 percent from 1960-73.
The country achieved self-suffiency in rice during the program years. In
addition, the country reversed its position in the rice market from a
traditional importer to an exporter four years after the inception of the
program. The country exported rice starting in 1977 and reached an export level
of 190,000 metric tons in 1979.
In the 1980's, the world rice market and domestic economic
conditions were entirely different. There was a minor rice production shorfall
in 1980. Total rice consumption remained below total production and average per
capita availability was maintained without importing. To help farmers affected
by the unfavorable weather condition, the National Food Authority distributed
rice on credit by drawing on the large stocks accumulated through the late
1970s. This approach prevented rice prices from rising and prevented farmers
from increasing production.
In 1982-1983, a more serious production shortfall occurred.
Government stocks were already at a low level. More limiting factors were the
serious balance of payments, foreign debt, inflation and public deficit problems
confronting the nation. The country imported rice to maintain per-capita
availability to consumers. Foreign exchange constraints reduced and delayed
fertilizer imports. Expansion of irrigations and other farm support were
affected. The prices of fertilizer, labor, agricultural chemicals and other farm
inputs were much less favorable in 1980-1984 compared to the period 1970-1979.
An intensified Rice Production Program (RPEP) was launched in
1984 followed by the Rice Action Program (RAP) to provide cheap credit but
disbursed only 15 percent in real terms of what was disbursed at the peak of the
Masagana 99 program in 1974. These factors have limited profitability of rice
farming and prolonged the period of recovery from the 1980's weather problems
compared to the 1973-1974 period.
TRENDS IN RICE PRODUCTION IN THE FUTURE
Clearly, there is a need to intensify rice production in
existing cultivable lands. Crop area in rice continues to decline and is
currently equal to the rice crop area in the early 1960s when population was
only 60 percent of current levels. The main concern over the next two decades
will be how to grow more rice on less land. The productivity of existing rice
land must be increased but, simultaneously, its fertility must be sustained and
the environment protected.
REFERENCES
David, C. 1985. Why the Philippines Imported Rice in Recent
Years. IRRI, Agri. Eco. Dept., Los Ba�os, Laguna, Philippines.
Hargrove, T. 1990. A Grass called Rice. IRRI, Los Ba�os, Laguna,
Philippines.
IRRI, 1989. IRRI Rice Facts. IRRI, Los Ba�os, Laguna,
Philippines.
UPLB, 1983. Rice Production Manual. Los Ba�os, Laguna,
Philippines.
Low-external Input Rice Production (IIRR, 292 p.)
Workshop participants
(introduction...)
Workshop contributors
Project managers
Editorial support
Artwork and graphics
Administrative and secretarial support
Low-external Input Rice Production (IIRR, 292 p.)
Workshop participants
1. Mr. Venancio A. Acebedo Agricultural Economist Appropriate
Technology Unit International Institute of Rural Reconstruction Silang, Cavite,
Philippines
2. Mr. Laurito B. Arizala Assistant Field Director Field
Operational Research Division International Institute of Rural Reconstruction
Silang, Cavite, Philippines
3. Mr. Ricardo C. Armonia Agricultural Rural Enterprise Engineer
Appropriate Technology Unit International Institute of Rural Reconstruction
Silang, Cavite, Philippines
4. Mr. Damaso P. Callo, Jr. Program Leader Technology Transfer
Program Philippine Rice Research Institute College, Laguna
5. Ms. Elvira A. Corcolon University Research Associate Seed
Science and Technology Division Department of Agronomy University of the
Philippines at Los Ba�os College, Laguna, Philippines
6. Mr. Ricardo El. S. Dayrit Livestock and Poultry Specialist
Appropriate Technology Unit International Institute of Rural Reconstruction
Silang, Cavite, Philippines
7. Mr. Franklin V. Fermin Aqua-culture Specialist Appropriate
Technology Unit International Institute of Rural Reconstruction Silang, Cavite,
Philippines
8. Dr. Pamela G. Fernandez Assistant Professor Seed Science and
Technology Division Department of Agronomy University of the Philippines at Los
Ba�os College, Laguna, Philippines
9. Ms. Blanquita S. Garcia University Researcher Seed Science
and Technology Division Department of Agronomy University of the Philippines at
Los Ba�os College, Laguna, Philippines
10. Ms. Angelina C. Ibus Appropriate Technology Management
Associate Appropriate Technology Unit International Institute of Rural
Reconstruction Silang, Cavite, Philippines
11. Mr. Eusebio T. Imperial Program Associate (Lowland
Ecosystems) Appropriate Technology Unit International Institute of Rural
Reconstruction Silang, Cavite, Philippines
12. Mr. Rafael U. Ledesma II Project Development Officer III
Department of Agriculture Special Concerns Office Diliman, Quezon City,
Philippines
13. Dr. Jose R. Medina Assistant Professor Department of
Entomology University of the Philippines at Los Ba�os College, Laguna,
Philippines
14. Mr. Joselito R. Madrigal Research Assistant Department of
Horticulture University of the Philippines at Los Ba�os College, Laguna,
Philippines
15. Mr. Dominador A. Martinez Project Director Quirino
Livelihood and Development Center, Inc Progreso, Aglipay 3403 Quirino,
Philippines
16. Mr. Eulogio Martin O. Masilungan Seed Technologist
Appropriate Technology Unit International Institute of Rural Reconstruction
Silang, Cavite, Philippines
17. Mr. Jose Avelino S. Obordo University Research Associate
Department of Agronomy University of the Philippines at Los Ba�os College,
Laguna, Philippines
18. Mr. Raquelito M. Pastores Agroforestry Specialist
Appropriate Technology Unit International Institute of Rural Reconstruction
Silang, Cavite, Philippines
19. Mr. Mark Irhwell R. Petalcorin Instructor Seed Science and
Technology Division Department of Agronomy University of the Philippines at Los
Ba�os College, Laguna, Philippines
20. Mr. Virgilio E. Pulgar Unit Head Livelihood Development and
Management Philippine Rural Reconstruction Movement 940 Kayumanggi Building
Quezon Avenue, Quezon City Philippines
21. Dr. Lydia J. Querubin University Research/Assistant for
Extension Nutrition Division University of the Philippines at Los Ba�os College,
Laguna, Philippines
22. Mr. Manuel A. Ramilo Extension Worker AGTALON 2nd Street,
Gracia Village Urdaneta, Pangasinan, Philippines
23. Ms. Ma. Concepcion C. Ramirez University Research Associate
II Seed Science and Technology Division Department of Agronomy University of the
Philippines at Los Ba�os College, Laguna, Philippines
24. Mr. Nestorio B. Roderno Animal Husbandry Technician
Appropriate Technology Unit International Institute of Rural Reconstruction
Silang, Cavite, Philippines
25. Mr. Wilfredo A. Santizo Farm In-charge PRRM DemoFarm on
Sustainable Agriculture (Lowland Ecosystem) Philippine Rural Reconstruction
Movement-Negros #33, 13th Lacson St. Capitol Subdivision, Bacolod City Negros
Occidental, Philippines
26. Mr. Vicente S. Saunar Crops Production Assistant Local
Resource Management-Bicol Sto. Domingo, Albay, Philippines
27. Mr. Teofilo N. Tabadero, Jr. University Research Associate
Seed Science and Technology Division Department of Agronomy University of the
Philippines at Los Ba�os College, Laguna, Philippines
28. Dr. Paul S. Teng Plant Pathologist and Coordinator,
Integrated Pest Management Division of Plant Pathology International Rice
Research Institute Los Ba�os, Laguna, Philippines
29. Ms. Malve S. Tolentino University Researcher Seed Science
and Technology Division Department of Agronomy University of the Philippines at
Los Ba�os College, Laguna, Philippines
30. Mr. Rolando O. Torres, Jr. Senior Research Assistant
International Rice Research Institute Los Ba�os, Laguna, Philippines
31. Mr. Manuel A. Velasco Program Head PRRM-Negros Livelihood
Assistance Program Philippine Rural Reconstruction Movement-Negros #33, 13th
Lacson Street Capitol Subdivision, Bacolod City Negros Occidental, Philippines
32. Dr. Oscar Zamora Department of Agronomy University of the
Philippines at Los Ba�os College, Laguna,
Philippines
Workshop contributors
1. Dr. Catalino dela Cruz Central Cordillera Agricultural
Programme (CECAP) SCO, DA Elliptical Road Dlliman, Quezon City, Philippines
2. Dr. Clive Lightfoot International Center for Living Aquatic
Resources Management (ICLARM) 3rd Floor, Bloomingdale Building Salcedo Street,
Legaspi Village Makati, Metro Manila, Philippines
3. Dr. Roger Pullin International Center for Living Aquatic
Resources Management (ICLARM) 3rd Floor, Bloomingdale Building Salcedo Street,
Legaspi Village Makatl, Metro Manila,
Philippines
Project managers
1. Dr. Julian F. Gonsalves Director Appropriate Technology Unit
International Institute of Rural Reconstruction Silang, Cavite, Philippines
2. Mr. Scott Killough Deputy Director Appropriate Technology
Unit International Institute of Rural Reconstruction Silang, Cavite, Philippines
3. Mr. Jaime P. Ronquillo Officer In-charge Communication
Department International Institute of Rural Reconstruction Silang, Cavite,
Philippines
SUBJECT MATTER CONSULTANT
1. Mr. Kenneth Schlather (Former IIRR Staff) Agronomy Department
Bradfield Hall Cornell University Ithaca, NY 14850 U.S.A.
DESIGN AND LAYOUT CONSULTANT
1. Ms. Ines Vivian D. Domingo (Former IIRR Staff) University of
California (Davis) c/o 208 Full Circle Davis, CA 95616
U.S.A.
Editorial support
1. Mr. Jaime P. Ronquillo
2. Mr. Scott Killough
3. Ms. Ines Vivian D. Domingo
4. Ms. Frederlinda N. Capistrano Section Head, Outreach
Communication Section Communication Department International Institute of Rural
Reconstruction Silang, Cavite, Philippines
5. Ms. Tara Gonsalves c/o International Institute of Rural
Reconstruction Silang, Cavite, Philippines
6. Ms. Donna F. Schlather c/o Mr. Kenneth Schlather Agronomy
Department Bradfield Hall Cornell University Ithaca, NY 14850
U.S.A.
Artwork and graphics
1. Mr. Florante C. Belardo Graphic Arts Coordinator
Communication Department International Institute of Rural Reconstruction Silang,
Cavite, Philippines
2. Mr. Ricardo E. Cantada Artist-lilustrator/VTR Cameraman
Communication Department International Institute of Rural Reconstruction Silang,
Cavite, Philippines
3. Mr. Bernabe M. Remoquillo Artist, Layout, Design Staff
Department of Development Communication University of the Philippines at Los
Ba�os College, Laguna, Philippines
4. Mr. C. Roger M. Villar Section Head, Field Communication
Section International Institute of Rural Reconstruction Silang, Cavite,
Philippines
Administrative and secretarial support
1. Ms. Violeta A. Alvez Steno-Typist I, Administrative Support
Services Department International Institute of Rural Reconstruction Silang,
Cavite, Philippines
2. Ms. Gina Marie M. Bautista Administrative Assistant I
Appropriate Technology Unit International Institute of Rural Reconstruction
Silang, Cavite, Philippines
3. Mr. Ronnie M. de Castro Janitor Administrative Support
Services Department International Institute of Rural Reconstruction Silang,
Cavite, Philippines
4. Ms. Estella S. Kasala Steno-Typist II Administrative Support
Services Department International Institute of Rural Reconstruction Silang,
Cavite, Philippines
5. Mr. Gerardo G. Medina Janitor I Administrative Support
Services Department International Institute of Rural Reconstruction Silang,
Cavite, Philippines
6. Ms. Eleanor G. Paredes Coordinator, Secretarial Services
Administrative Support Services Department International Institute of Rural
Reconstruction Silang, Cavite, Philippines
7. Ms. Leticia S. Pascua Office Machine Operator Administrative
Support Services Department International Institute of Rural Reconstruction
Silang, Cavite, Philippines
8. Ms. Erlinda A. Puspos Steno-Typist 11 Administrative Support
Services Department International Institute of Rural Reconstruction Silang,
Cavite, Philippines
9. Ms. Magdalena M. Reyes Steno-Typist 11 Administrative Support
Services Department International Institute of Rural Reconstruction Silang,
Cavite, Philippines
ADMINISTRATIVE AND SECRETARIAL SUPPORT/ PRINT PRODUCTION
1. Ms. Angelita T. Poblete Steno-Typist I Administrative Support
Services Department International Institute of Rural Reconstruction Silang,
Cavite,
Philippines