 |
| ||||||||||||||||||||||||||||||||||||
|
| ||||||||||||||||||||||||||||||||||||
Institut f�r berufliche Entwicklung e.V.
Berlin
Original title:
Arbeitsmaterial f�r den
Lernenden
“S�gen von Hand”
Author: Frank Wengh�fer
First edition © IBE
Institut f�r berufliche Entwicklung e.V.
Parkstra�e
23
13187 Berlin
Order No.: 90-35-3104/2
|
| ||||||||||||||||||||||||||||||||||||
1. Purpose of sawing
Sawing is cutting of workpieces in a narrow kerf by many chisel-type teeth on a saw blade arranged one after the other for the purpose of cutting off or of providing workpieces with slots or recesses.
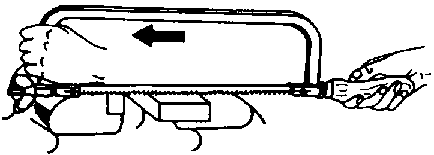
Figure 1 Sawing
Manual sawing is used only in single-piece production and repair work on small-section workpieces because it is hard and time-consuming manual work.
For bigger cuts hacksawing, circular sawing (slitting) and band sawing machines are used.
|
| ||||||||||||||||||||||||||||||||||||
2. Sawing tools
Tools for sawing are saw blades with teeth on one or two edges which are clamped in a hand hacksaw frame.
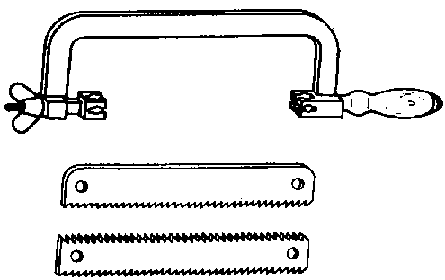
Figure 2 Hand hacksaw and saw blades
Different types of saw blades are used depending on the hardness of the material to be cut and on the type of cross-section of the workpiece.
The blades differ with respect to the saw tooth angles and the number of teeth on a fixed length of 25 mm (tooth pitch - 1).
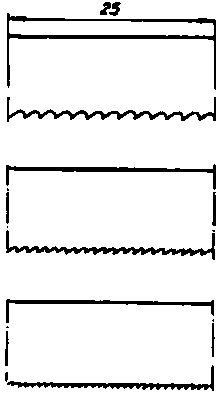
Figure 3 Saw blades with different
tooth pitch
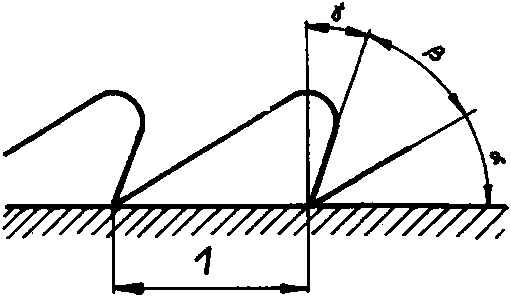
Figure 4 Angles at the saw tooth
Saw blades for different hardness of material:
|
Hardness of material |
Formation of chips at the saw tooth |
Clearance angle |
Lip angle |
Rake angle |
|
Hard |
Shaving -small quantity of chips |
40° |
50° |
0° |
|
Normal |
Cutting -small quantity of chips |
20° |
65° |
5° |
|
Soft |
Cutting -big quantity of chips |
30° |
50° |
10° |
Saw blades for different workpiece cross-sections and hardness of material
|
Type of saw blade |
Cross-section of workpiece |
Hardness of material |
Tooth pitch (number of teeth on 25 mm) |
|
Coarse |
- Solid Sections |
Soft steel, brass and bronze |
14 |
|
Normal |
- Normal sections (angles, sectional steel) |
Steel of normal hardness, harder light metals |
22 |
|
Fine |
- Light-steel sections |
Harder steel, cast iron |
32 |
Free cutting action of saw blades
Saw blades must not jam when penetrating into the kerf, therefore the width of the kerf must be bigger than the thickness of the saw blade.
Free cutting of the saw blade is achieved by:
- raker-set teeth or
- wave-set teeth of the saw blade.
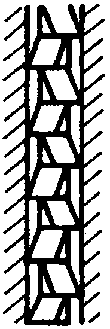
Figure 5 Raker-set teeth
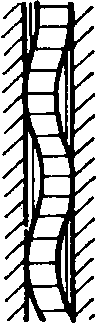
Figure 6 Wave-set teeth
After long use of saw blades the teeth will become dull and the free cutting facilities will also wear out.
Therefore, it is often not sufficient to sharpen the saw blade but restoring the free cutting facilities will also be necessary.
What makes the difference between the different types of saw blades?
_______________________________________________________
Which type of saw blade is used for sawing of steel of normal hardness?
_______________________________________________________
Why is the free cutting action necessary for saw blades?
_______________________________________________________
|
| ||||||||||||||||||||||||||||||||||||
3. Auxiliary means for sawing
Auxiliary means for sawing are clamping devices which are to be selected according to the purpose of clamping the relevant cross-section of the workpiece.
Requirements:
The workpiece is to be clamped so that the sawing cut is always vertical.The workpiece is to be clamped as firmly and deeply as to eliminate any springiness and displacement of the workpiece during sawing.
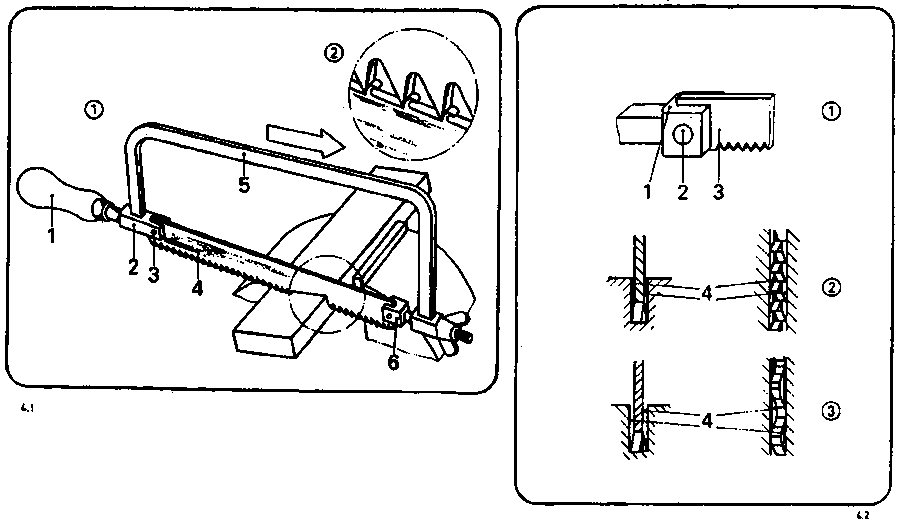
Figure
The following surveys should support the introduction to saw blades:
Saw blades for different material hardness
|
Hardness of material |
chip formation |
angle of clearance |
wedge angle |
rake angle |
|
hard |
shaving |
40° |
50° |
0° |
|
normal |
cutting |
20° |
65° |
5° |
|
soft |
cutting |
30° |
50° |
10° |
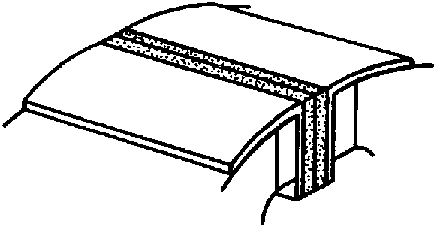
Figure 10 Protective jaws
Which requirements must be met when clamping workpieces for sawing?
_______________________________________________________
What is the most important auxiliary means for clamping of workpieces?
_______________________________________________________
|
| ||||||||||||||||||||||||||||||||||||
4. Operation of sawing
When pressing the saw blade onto the workpiece and vigorously pushing it at the same time, the teeth are cutting into the material removing chips.
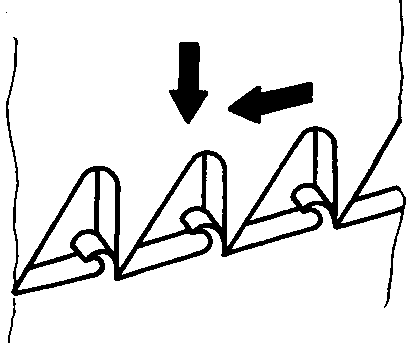
Figure 11 Action of the saw blade
The force applied is evenly distributed over all cutting teeth.
If only a few teeth are cutting (thin workpieces) there is a danger of hooking and breaking away!Therefore, the saw is to be guided so that many teeth are cutting at the same time!
|
| ||||||||||||||||||||||||||||||||||||
5. Standing position and guiding of the saw
Before beginning to saw make sure that the height of the vice is correct and that the workpiece is firmly clamped!
Procedure:
- The weight of the body is resting on one leg while the other leg is always straightened with both feet firmly on the ground.- The saw is moved with the arms and such movement may be slightly supported by the upper part of the body.
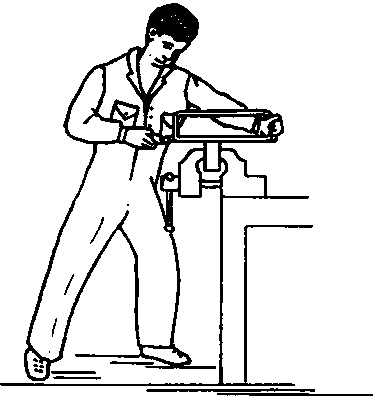
Figure 12 Standing position
- When pushing the saw is pressed onto the workpiece, pulling back is without exerting any pressure!- Shortly before the workpiece is sawn off the pressure is to be released so as to avoid the workpiece to be pulled away by the saw which might damage the saw blade I
Notes
- The total length of the saw blade is to be utilized when sawing.- Cutting oil is to be slightly applied to the sides of the sawing blade before use to minimize friction!
- Right-handed persons have to stand on the left of the vice so that the guiding hand will not be pulled over the vice - danger of injury!
Why should the saw be guided so that many teeth are cutting at the same time?
_______________________________________________________
What is attention to be paid to when sawing off workpieces?
_______________________________________________________
|
| ||||||||||||||||||||||||||||||||||||
6. Handling of the saw
The saw blade is to be clamped so that the teeth are showing into the pushing direction.
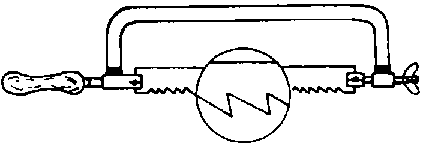
Figure 13 Correctly clamped saw blade
Before starting to saw it is useful to file a guiding groove beside the scribed line so that the saw will not slip off when starting.
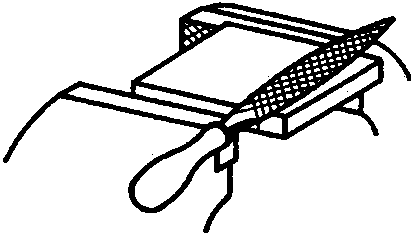
Figure 14 Filing of the guiding
groove
Flat workpieces are to be sawn on their wide face. This will achieve better guidance for the saw blade and a more accurate cut since many teeth are cutting at the same time.
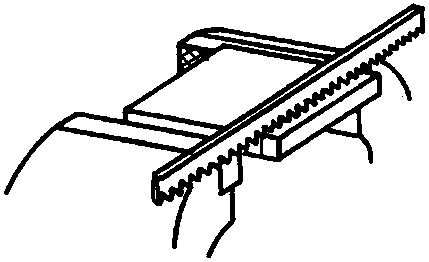
Figure 15 Sawing of flat parts on
their wide side
When sawing metal sheets the saw is to be positioned so that the cut in pushing direction will be slightly upwards so that many teeth are cutting at the same time.
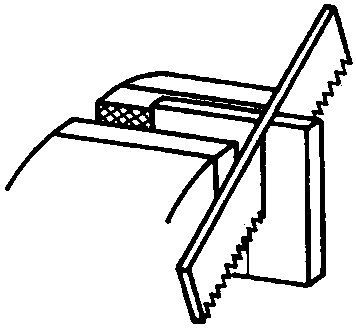
Figure 16 Sawing of sheets in upward
pushing direction
Tubes are not be sawn off in one pass because the teeth might hook at the inner tube wall and break away.
Therefore, proceed with sawing until the inner tube wall is reached and then constantly turn the tube in pushing direction while sawing until the tube is sawn off.
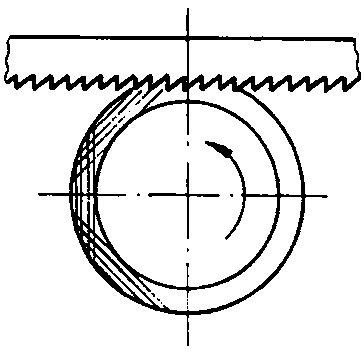
Figure 17 Sawing of tubes with
multiple re-clamping
Angle sections are always to be sawn on the wide face which necessitates re-clamping after the first sawing cut.
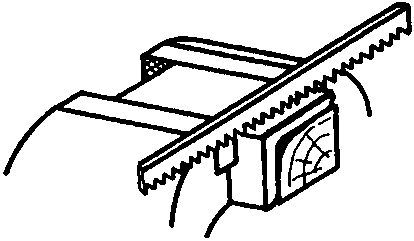
Figure 18 Sawing of angle sections on
their wide side
Deep cuts are to be sawn with laterally swivelled frame. Therefore, the saw blade is to be clamped at an angle of 90 degrees compared to the normal position.
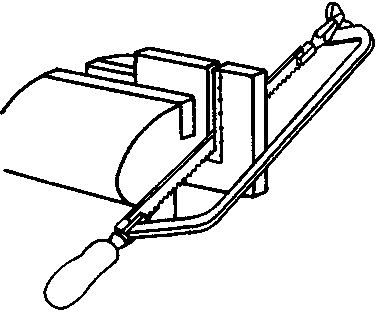
Figure 19 Sawing of deep cuts with
laterally swivelled frame
How is the saw to be handled when sawing thin metal sheets?
_______________________________________________________
How is the saw to be handled when sawing tubes and sections?
_______________________________________________________
|
| ||||||||||||||||||||||||||||||||||||
7. Labour safety recommendations
- Use hand hacksaws with crackless handle only - otherwise danger of injury!- Fastening elements of the saw blade roust not protrude at the side of the clamp dog - danger of injury!
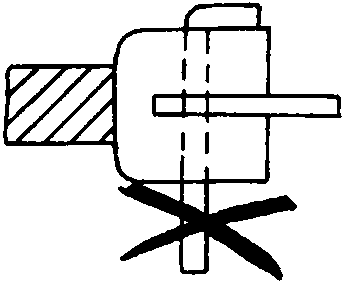
Figure 20 Protruding fastening
elements of the saw blade, a source of injuries
- Always guide the saw so as to pass by the vice - never work with the guiding hand above the vice - danger of injury when slipping off!