 |
| ||||||||||||||||||||||||||||
|
| ||||||||||||||||||||||||||||
Institut f�r berufliche Entwicklung e.V.
Berlin
Original title:
Arbeitsmaterial f�r den
Lernenden
“S�gen”
Author: Fritz Dienemann
First edition © IBE
Institut f�r berufliche Entwicklung e.V.
Parkstra�e
23
13187 Berlin
Order No.: 93-35-3302/2
|
| ||||||||||||||||||||||||||||
1. The Purpose of Sawing
Sawing means to separate wood and wood-based materials by cutting in a thin saw kerf.
We distinguish between
- sawing across the grain (cross cutting)
- sawing with the grain (ripping)
- curving and
- sawing for making wood joints.
|
| ||||||||||||||||||||||||||||
2. The Basic Construction of Sawing Tools
During sawing particles are removed by the sawing teeth in a saw kerf.
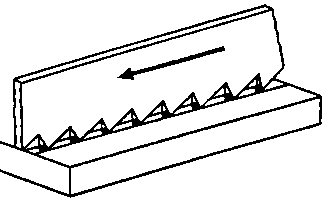
Figure 1 Cutting by saw teeth
Many triangular sawing teeth placed one after the other cut the wooden material.
Which parts does the sawing blade consist of?
1. ________________________
2. ________________________
3. ________________________
4. ________________________
5. ________________________
6. ________________________
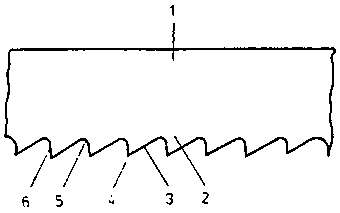
Figure 2 Parts of the saw blade
1 saw blade, 2 saw tooth, 3 tooth space, 4 tooth point, 5 tooth gullet, 6 tooth face
The angle between
- the tooth face and- the top line of teeth (breast) is responsible for the cutting efficiency of the different types of saws. This angle is called
- cutting angle.

Figure 3 Cutting angle
1 tooth face, 2 tooth top line, 3 cutting angle
For manual sawing the following types of teeth are used:
- The teeth are arranged for push-type cutting
· the cutting angle is 90°
· cutting is effected in pushing direction only
· high effort is necessary
· well suitable for sawing of wood with the grain
· not suitable for sawing of wood across the grain and of chipboards.
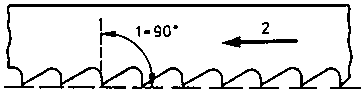
Figure 4 Push-type cutting teeth
1 cutting angle at 90°, 2 cutting is effected in pushing direction
- The teeth are arranged for push-and-pull type cutting
· the cutting angle is larger than 90°
· cutting is effected in pushing direction and scraping in the opposite direction
· low effort is necessary
· well suitable for sawing of wood across the grain
· when sawing wood with the grain there is a low cutting efficiency
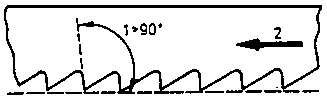
Figure 5 Push-and-pull type cutting
teeth
1 cutting angle larger than 90°, 2 cutting is effected in pushing direction
How do hand saws
work?
__________________________________________________________________________
__________________________________________________________________________
__________________________________________________________________________
The teeth of the saw blade are bent alternately to the left and to the right of the saw teeth top line to avoid jamming of the saw in the wood during sawing.
- This bending of the teeth is called setting.
- Set saws make it possible for the saw blade to move freely in the kerf.

Figure 6 Set teeth
- The kerf is wider than the saw blade’s thickness.
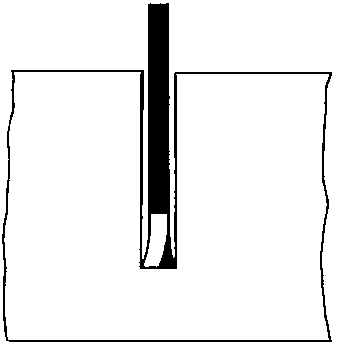
Figure 7 Saw blade with kerf
What are the reasons for jamming of saws in the
wood?
__________________________________________________________________________
__________________________________________________________________________
__________________________________________________________________________
__________________________________________________________________________
|
| ||||||||||||||||||||||||||||
3. Types of Saws
Different sawing tools are applied for the different requirements in manual woodworking and are divided into the groups of frame saws and frameless saws.
Frame saws
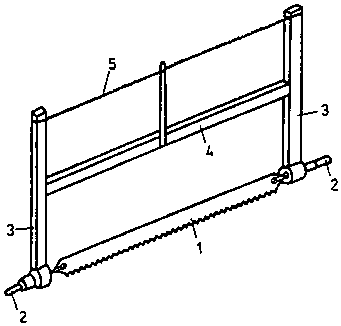
Figure 8 Frame saw
1 saw blade, 2 saw knobs, 3 saw arms, 4 stretcher, 5 tensioning device
The parts of a frame saw are called:
1. _________________________
2. _________________________
3. _________________________
4. _________________________
5. _________________________
- Frame saws are applicable for nearly all processes in manual woodworking.- The necessary tension of the saw blade in the frame is reached with the help of the saw arms, the saw knobs, the stretcher and the tensioning device.
- The saw blade can be fixed in any position to the arms.
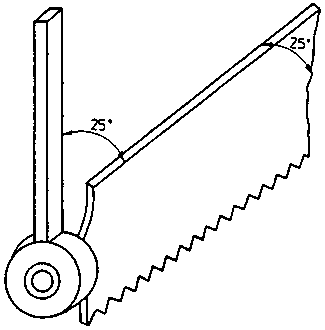
Figure 9 Adjustable saw blade
- In frame saws there can be clamped saw blades with push-type or push-and-pull type cutting teeth.
List 1 shows frame saws with their features and application.
Table 1: Frame saws with their features and application
|
Designation |
Features |
Application |
|
Ripping saw |
- cutting angle - 90° |
- cuts with the grain |
| |
- tooth depth = 5 mm |
- edging and dividing of boards |
| |
- coarse cuts |
|
|
|
- works fast |
|
|
Cross-cut saw |
- cutting angle = 120° |
- cuts across the grain |
| |
- tooth depth = 5 mm |
- cutting to length |
| |
- coarse cuts |
|
|
|
- works fast |
|
|
Slitting saw |
- cutting angle = 100° |
- short and precise cuts with the grain |
| |
- tooth depth = 3 mm |
|
|
|
- precise cuts with the grain |
- slitting |
|
Fine tooth wood saw |
- cutting angle = 110° |
- fine cross cuts |
| |
- tooth depth - 2 mm |
- cutting of steps |
| |
- precise cuts |
|
|
Fret saw |
- cutting angle = 110° |
- cuts in all directions |
| |
- tooth depth = 2 mm |
- cutting of bends |
| |
- blade width = 10 mm |
- cutting of curves |
| |
- the saw blade can be unhinged | |
What kind of cuts in wood are saws with push-and-pull
type teeth especially suitable
for?
__________________________________________________________________________
__________________________________________________________________________
__________________________________________________________________________
Frameless saws
Frameless saws consist of a saw blade and a handy grip. The saw blade has a sufficient stability or it is provided with a back support. Form and size of the saw blade as well as the tooth form are determined by its application. Table 2 shows frameless saws with their features and application.
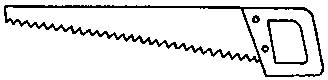
Figure 10 Cross-cut saw
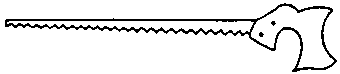
Figure 11 Compass saw
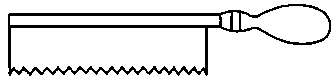
Figure 12 Fine saw

Figure 13 Arris saw
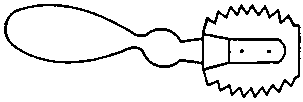
Figure 14 Veneer saw
Table 2 Frameles saws with their features and application
|
Designation |
Features |
Application |
|
Cross-cut saw |
- trapezoidal saw blade |
- for smaller sawing cuts |
| |
- tooth depth = 3...5 mm |
- for cutting of panels |
|
Compass saw |
- narrow, pointed saw blade |
- cutting out openings |
|
Fine saw |
- right-angled saw blade |
- cutting of strips (fillets) |
| |
- tooth depth = 1.5 mm |
- bevel cuts (mitre cuts) |
|
Arris saw |
- the blade’s back is tightly screwed in the wooden grip |
- cutting in grooves |
| |
- pull-type cutting |
|
|
Veneer saw |
- saw blade with double tooth shape |
- sawing of veneer |
|
| ||||||||||||||||||||||||||||
4. Sharpening of Sawing Tools
Only with perfect and sharp saws you can cut quickly, easily and precisely. Blunt saws make the job more difficult and cause a bad cutting quality.
The sharpening of saws is to be divided into the following steps:
- fasten the saw blade in the clamping device (hand vice)
- check the tooth top line and, if necessary, adjust it
- thereafter file out ground teeth
- set the teeth, i.e. the teeth are bent alternately
- sharpen the saw (file the teeth)
|
First set the teeth and then file! |
Sequence of operations
- Check the tooth top line; examine the tooth top line for straightness or standing out tooth points.
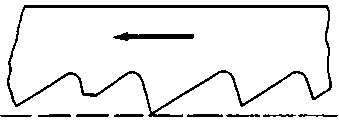
Figure 15 Unequal tooth points
- If there are standing out tooth points adjust them with a flat file.
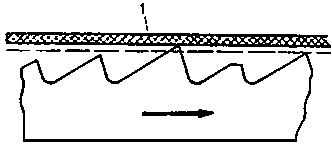
Figure 16 Adjusting the tooth points
1 flat file
- When adjusting smaller teeth file out with a three-square file.
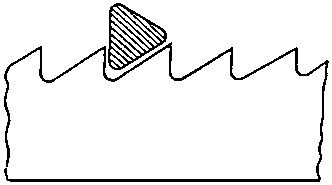
Figure 17 Filing out the tooth spaces
- Setting of the teeth
With an alternately lateral bending of the saw teeth out of the tooth top line a free cutting action of the saw is achieved.
Saws can be set with
· a saw set or
· a saw set plier.
With a saw set you set by bending off the upper part of the tooth.
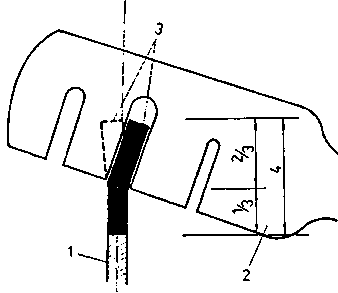
Figure 18 Saw set
1 saw blade, 2 saw set, 3 bent saw teeth, 4 saw tooth length
With a saw set plier saws are set more uniformly. The width of set can be adjusted with an adjusting screw on the plier.

Figure 19 Saw set plier
1 saw blade, 2 stationary lever of the plier, 3 movable lever which bends the saw tooth to the desired set width
What tools are saws set with before being
filed?
__________________________________________________________________________
__________________________________________________________________________
__________________________________________________________________________
- Sharpening of the saw (filing of the teeth)
· Select a three-square file with a cross-section that is equal to the form of the tooth space.· Guide the file at right angles to the saw blade and file the tooth face and the tooth back at the same time.
· Sharpen all teeth with the same number of file strokes.. Badly filed teeth are sharpened again with a few file strokes.
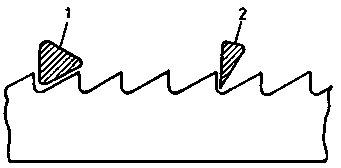
Figure 20 Cross-section of a file
1 correct cross-section, 2 wrong cross-section
Why must the file always fill out the whole tooth
space?
__________________________________________________________________________
__________________________________________________________________________
__________________________________________________________________________
|
Files must have a tight-fitting handle in order to avoid injuries. Sticking dirt has to be removed with a solvent from the file. |
What mistakes have been made with this useless and badly filed saw?
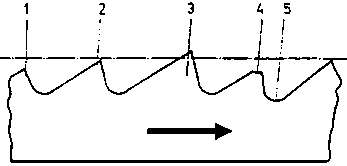
Figure 21 Badly filed saw teeth
1 correct tooth form, 2 tooth point too low, 3 tooth point too high, 4 broken-off tooth, 5 tooth space distance too much
1. Correct tooth form__________
2. _________________________
3. _________________________
4. _________________________
5. _________________________
|
| ||||||||||||||||||||||||||||
5. Working Rules for Sawing of Wooden Materials
- Selection of the appropriate saw.- Checking the saw for serviceability.
- The thumb of the left hand supports the correct placing of the saw close to the scribed line.
- With the first cut draw back the sawing tool at an acute angle.
|
Be careful with the first cut, avoid stumbling of the saw - risk of injury! |
- Firm stand, body at rest, only arm work out of the shoulder joint.- Move the sawing tool smoothly, slightly pushing it forward and drawing it back without pressure. Relax the arm and use the total blade length.
- Guide the saw blade vertically along the scribed line when sawing curves and sawing with the grain with the ripping saw, otherwise guide it along the scribed line at an acute angle to the surface of the workpiece.
- Use the full length of the saw blade.
- When the cutting through is nearly finished the left hand grips over the cut so that the falling piece will not break off. Lift both the parts a bit.
- Pay attention to the working data.
- Check the workpieces for wood defects and woodworking errors.
|
Badly placed cuts can be hardly corrected during sawing. Frame saws are stored unclamped and in hanging position after end of work. |
Why must the full saw blade length be used when
sawing?
__________________________________________________________________________
__________________________________________________________________________
__________________________________________________________________________
Why must the saws always be placed on the opposite side of the
marking?
__________________________________________________________________________
__________________________________________________________________________
__________________________________________________________________________