Special Public Works Programmes - SPWP - Planting Trees - An Illustrated Technical Guide and Training Manual (ILO - UNDP, 1993, 190 p.)
2. Preparing the planting site
(introduction...)
2.1 Clearing vegetation
2.2 Ground preparation
2.3 Marking where to dig the holes
2.4 Digging holes
2.5 Soil and water conservation measures
Special Public Works Programmes - SPWP - Planting Trees - An Illustrated Technical Guide and Training Manual (ILO - UNDP, 1993, 190 p.)
2. Preparing the planting site
Figure
The planting site should be completely prepared and ready for
planting when the first rains are due. There are two reasons for this - first,
because there is a rather short time interval in which the plant should be
planted to get the best possible start; and second because the rainy season is
the most work-intensive in rural areas and it is good to have as much work as
possible done before it starts. Site preparation should give the young trees a
good start and rapid early growth. The measures needed differ between different
types of sites and between different types of plantations. The following
measures may be taken:
- Clearing vegetation - Ground preparation -
Marking where to dig the holes - Digging holes - Water
conservation
Clearing vegetation
Ground preparation
Marking where to dig the holes
Digging holes
Water
conservation
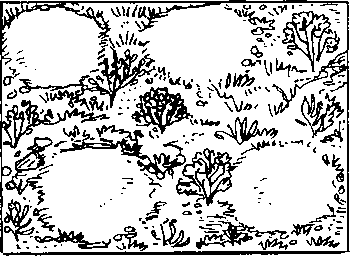
2.1 Clearing vegetation
On most sites trees, bushes and grass have to be cleared away to
prevent them from competing with the young plants. This is very important when
using light-demanding trees such as Eucalyptus, Pine or Cupressus. If more
shade-tolerant species are chosen, existing trees do not have to be cleared.
Total clearing of the grass and bushes is needed on moist
grassland sites and for species sensitive to grass competition, like some
Eucalyptus.
On sites where ground vegetation is below one metre, it is
normally sufficient to clear patches around the plants or strips along the lines
of plants. The strips should be about one metre wide. Patches a radius of about
1 metre radius can be cleared with the hoe when digging the planting hole.
Between the cleared patches and strips the vegetation should be
cut short, except on sites where reduction of the vegetation may result in
increased erosion. There the vegetation between the cleared patches should be
left as intact as possible.
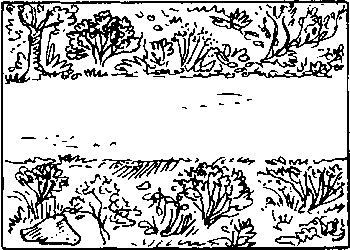
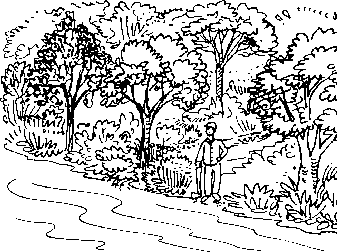
Existing trees should only be removed when they seriously
disturb the development of the plantation. Around water sources a vegetation
belt of at least 15 to 25 metres should be preserved. Trees along rivers and old
trees providing shade and beauty should always be saved.
Clearing
Total clearing
Path clearing
Strip clearing
Save trees around water sources
Tools required for clearing and grass-cutting
The type of tool used should be adapted to the land of
vegetation that is being cleared.
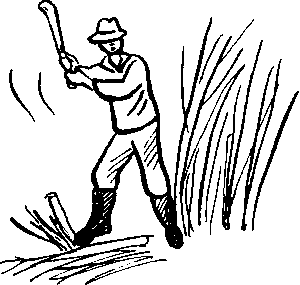
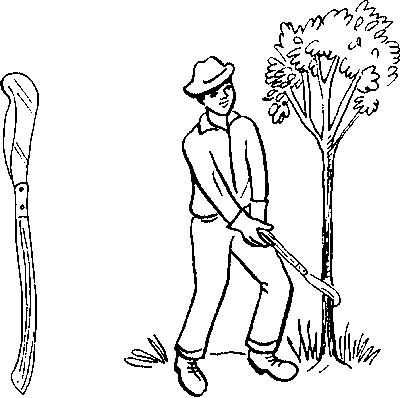
A brush hook might be the best tool to use for cutting
underbrush up to 20 cm in butt diameter. The weight of the brush hook is about
1.2 kg. The handle is about 0.6 m and the blade 0.2-0.3 m. The top of the blade
is formed as a hook. This will protect the edge if it hits a stone. The hook
also permits the worker to cut small brush with a pulling jerk. The brush hook
is used with two hands.
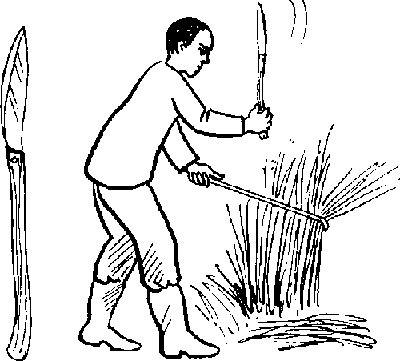
A machete can be used for cutting hard-stem grasses and
woody weeds. It is a long knife, also used for many other purposes, such as
cutting fence posts, trimming live fences and root pruning. The machete weighs
about 0.6 kg. The traditional machete has a handle of 0.1-0.15 m and a blade of
0.45 m in length. For grass-cutting a modified model has been developed. On the
grass-cutting machete the length of the handle is about 0.5 m and the blade
about 0.3 m. A grass-cutting machete is used with one hand and the long handle
allows the worker to maintain an upright position. Productivity can be increased
if the cutting is assisted by a wooden stick (see fig).
Tools for clearing and grass-cutting
Brushhook
Machete
Grass-cutting machete
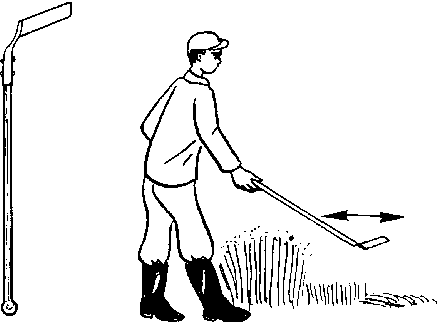
A scythe is useful for soft stem grasses. A scythe with a
short blade (0.3 m) is chosen when the terrain is rough and the grass dense. In
even terrain a longer blade (0.6 m) can be used. This will speed up the work. It
takes some training to get used to the scythe, but once the technique is
mastered productivity is good. The worker should stand with his back straight
and feet apart. To give power to the cutting swing, the muscles of the thighs
and the back should be used. The hands are used mainly for guiding the swing,
not for powering it. A well designed scythe is adjustable to individual
preferences and body sizes. In the middle of the handle there is a grip for the
right hand, and at the top there is another grip for the left hand (for
right-handed workers). The upper handle should reach the arm pit and the lower
should be placed one underarm's length lower.
A slasher is a double-edged tool, suitable for cutting
short grass. It has only limited applications in tree planting. A slasher weighs
about 0.6 kg, the length of the handle is around 0.8 m and the blade 0.05-0.1 m.
Holding the slasher in one hand, the worker swings it back and forth in a
sweeping motion.
Hoes, for completely removing vegetation on strips or
patches, are described in section 4.1.
Tools required for clearing and grass-cutting
Scythe
Slasher
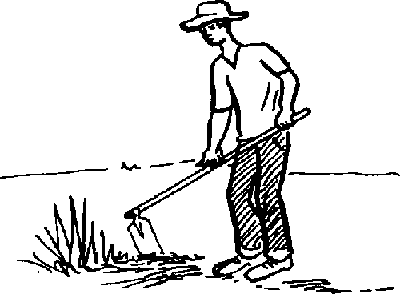
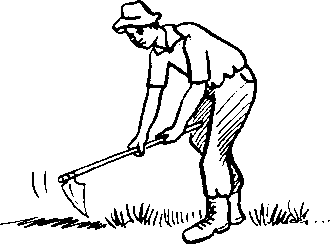
2.2 Ground preparation
Ground preparation is needed to soften the soil, and to allow
the roots to affix firmly and deeply. Since nutrients are washed out in the
surface soil layer, it is also important to mix soil for the deeper layer with
soil from the surface layer to guarantee availability of the nutrients needed by
the seedling.
The method depends on the site and the species planted. Usually
digging holes and uprooting grasses with the planting hoe about one metre around
the planting hole is enough.
The work should be carried out along the contour line,
not up and down the slope, otherwise rain water may start to wash away
the soil and form gulleys.
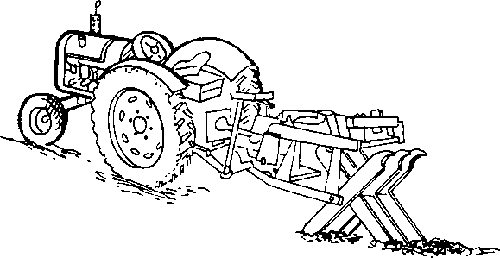
In sites with crusts, hard pans or other hard soil layers it may
be necessary to use mechanized soil preparation. For this a bulldozer, a
sub-soiler or a scarifyer drawn by a tractor can be used.
Ground preparation
Uprooting grass
Work along the contour lines
Tractor with
scarifyer
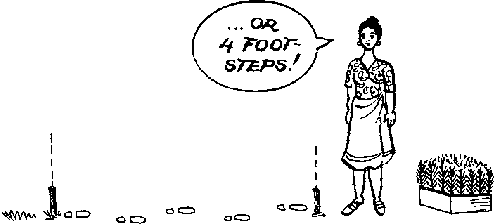
2.3 Marking where to dig the holes
It is not always necessary to mark where to dig the planting
hole. A well instructed planting crew working on well cleared ground may plant
without premarking the planting spots. They may space the distance using tool
handles or footsteps as measures for the planting work.
Even if it is necessary to mark on the ground where to dig the
planting holes, there is no need for accurate distances. It is more important to
find the best planting spot available for the plant. In sites with a lot of
vegetation it might, however, be preferable to plant in straight rows and with a
fixed distance between the plants, since this will make it easier to find the
plants during weeding.
Determine how many handle lengths or steps should separate the
trees. Then make a mark on the ground with the planting hoe. The planting spots
can also be marked out by sticks or
pegs.
2.4 Digging holes
If the soil is not too hard, the holes might be dug in advance
during the dry season. This will reduce the need for labour during the actual
planting. They can also be dug at the same time as the actual planting. How to
dig holes and examples of the different tools to use are described in Chapter 4.
Marking where to dig holes
Figure
Figure
Digging of holes
Figure
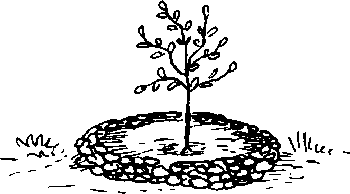
2.5 Soil and water conservation measures
In arid and semi-arid areas it is almost impossible to get the
seedlings to survive without some water conservation measures. In high rainfall
areas and on unstable soil, particularly on slopes, the soil often needs to be
protected against erosion until the tree crowns shelter the site. The aim of all
soil and water conservation measures is to reduce or retard the flow of surface
run-off water (water harvesting). This will diminish the erosion damage and
cause the water to soak into the soil, increasing the amount of soil moisture
available for the seedling.
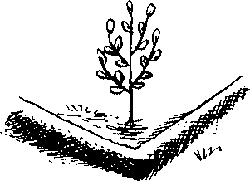
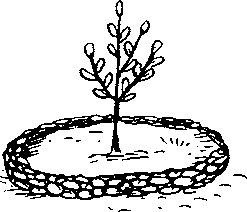
Microcatchments can be built in dry locations to trap the water
around the seedlings. They vary in shape and size and are relatively small and
cheap. If well constructed, they should last about five years, which will give
the plants tune to become well established.
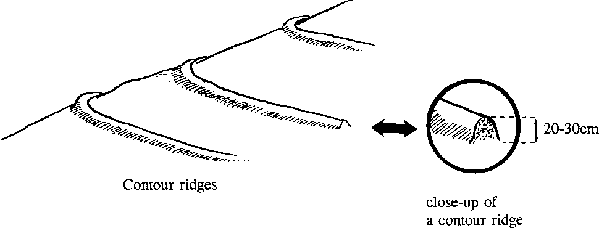
Contour ridges or diguettes serve as small dams to keep water
from running downhill. They consist of ridges dug out of the hill slope along
the contour lines and are used in heavy soil with low permeability.
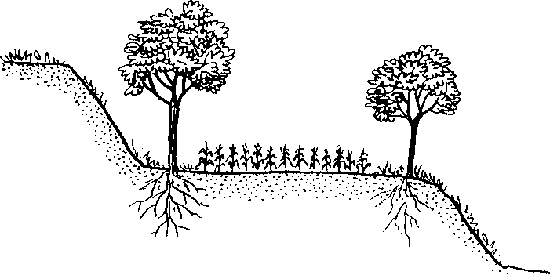
Bench terraces are series of narrow, more or less horizontal
steps cut into the hillside.
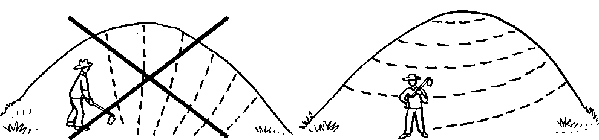
It is extremely important to space ridges and terraces properly.
If the structures are placed too far apart, they will be washed away or broken.
If they are placed too close, labour and land will be wasted.
Some guidelines of how to construct soil conservation structures
are given in Technical sheet 2. However, the size, type and spacing of earthwork
structures always have to be adapted to local conditions. Consult the national
extension agencies for soil conservation, soil survey and forestry for more
detailed advice.
Water conservation structures
Semi-circular
Vee-shaped
Micro-basin
Microcatchments
Terrace with trees and crop
Common mistakes when preparing the planting site
Insufficient site clearing and soil preparation.
Agricultural tools are used that are not suitable for the kind
of work and the soils found in tree planting.
Tools used have handles of inconvenient size, poor shape, badly
fixed and cutting edges are not regularly sharpened.
Soil and water conservation are too sophisticated and expensive
for tree planting. Water conservation measures used uniformly rather than
adapted to erosion risk (bigger and more closely spaced where risk high, widely
spaced or none at all where risk low).