Special Public Works Programmes - SPWP - Planting Trees - An Illustrated Technical Guide and Training Manual (ILO - UNDP, 1993, 190 p.)
5. Adapting planting techniques to different site conditions
(introduction...)
5.1 Favourable sites
5.2 Sites with high grass
5.3 Waterlogged sites
5.4 Dry sites
5.5 Eroding slopes and rocky sites
5.6 Steep slopes
5.7 Sand dunes
5.8 High altitudes with snow
Special Public Works Programmes - SPWP - Planting Trees - An Illustrated Technical Guide and Training Manual (ILO - UNDP, 1993, 190 p.)
5. Adapting planting techniques to different site conditions
Figure
How to plant on "normal" sites has been described in the
previous chapter, but the technique described has to be adapted to local
conditions. It is always wise to consider local experience and to learn from
previous mistakes and successes. Often the sites chosen for reforestation are
those not suitable for agriculture - the difficult sites. They will require
extra care. Below, some advice is given on how to adapt the general planting
method to various site
conditions.
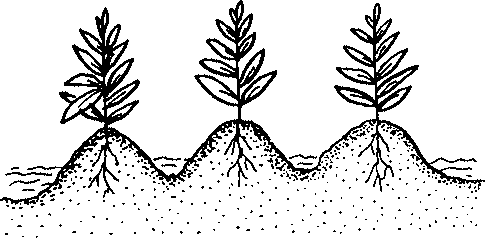
5.1 Favourable sites
On sites with light and soft soil where experience has shown
that regeneration is easy, the less expensive bare-rooted plants can be used.
Instead of actual holes simple slots in the ground suffice for planting small
bare-rooted seedlings (i.e. shoots less than 25 cm). For containerized seedlings
the planting holes do not need to be bigger than the container. One single
worker may then complete the whole planting operation.
When little clearing of planting spots is needed or when
clearing is carried out beforehand, an open-angle hoe can be used. The use of an
open-angle hoe has proven to be very fast and effective. While it takes some
training and practice, it permits workers to increase their productivity very
significantly compared to other methods.
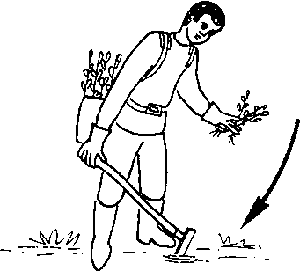
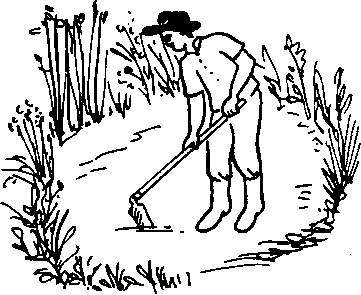
1. Hold the hoe in your right hand and take a number
of seedlings in your left. Start with around 10. Hold the seedling bunch with
two fingers and take one seedling between your thumb on one side and the
index and middle finger on the other (see picture on opposite page).
2. Swing the hoe upwards and let the handle slide through your
hand. Gloves should be worn otherwise the handle might not glide well and you
can burn your hand.
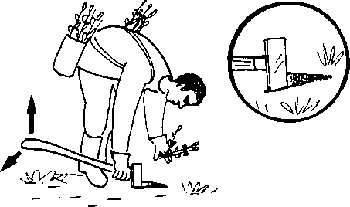
3. Thrust its blade into the ground by letting the hoe come
down. The force comes from the hoe's weight rather than from the worker's
effort. Just before the edge of the blade hits the ground, let the handle go,
so the shock does not hit your hand.
4. Grab the hoe close to the blade, move it up and down and then
outwards to open a triangular slot.
5. Place the seedling in the slot in front of the hoe's head
with the root collar at the same level as the surrounding soil surface or
slightly deeper. Lift the hoe from the slot.
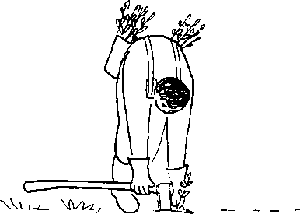
6. Push the soil around the seedling and firm soil carefully
with your foot. Then move to the next planting spot. As you get up from the
last seedling planted, use the momentum of your whole body to swing up the
hoe and the work cycle starts again ...
Favourable sites Planting with an open angle hoe
Figure
1. Hold the hoe in your right arm
and a few plants in your left
2. Lift the hoe with one hand
3. Thrust the blade into the ground
4. Open the hole by raising and
twisting the handle
5. Insert the plant
6. Raise the hoe and firm soil
around the
seedling
5.2 Sites with high grass
- Use a hoe to clear a patch with a diameter of at
least 1 metre around the planting hole. The grass has to be uprooted to reduce
competition.
- Remove as many grass roots as possible from the
soil before putting it back into the hole.
- Weed often. Use a hoe and uproot the grass around
the seedling. The success of the plantation will depend on the subsequent
weeding.
5.3 Waterlogged sites
- Plant on mounds or ridges to improve drainage for
the young plant.
- Plant at the end of the rainy season when the site
has dried up sufficiently. This will give the seedlings time to become well
established before the wet season starts.
Sites with high grass
Clear patches
Remove grassroots and weed often
Waterlogged sites
Planting on ridges
Plant at the end of the rainy
season
5.4 Dry sites
- Prepare micro catchments (as described in
Technical sheet 2).
- On dry sites it is even more important than otherwise that
planting is carried out at the right time, i.e. at the beginning of the rainy
season. Prepare planting holes in advance in order to complete planting as
quickly as possible.
- Use seedlings of best quality with a good root system.
- Use containerized seedlings if available. They generally
survive better than bare-rooted seedlings.
- With tall broad-leaved species, young shoots and part of the
foliage must be stripped off, as described in section 3.4.
- Make planting holes large and deep, 60 x 60 centimetre. A
large planting hole with plenty of refilled soil will help root development and
thereby increase the survival rate and growth.
- Pickaxe the bottom of the holes to make it easier for the
roots to penetrate.
- Form a basin around the seedling to catch as much water as
possible.
- Mulching with grass and leaves around the seedlings will
reduce evaporation and prevent the surface soil from hardening.
Dry sites
Prepare micro-catchments
Use containerized seedlings of best
quality
Planting technique for dry
sites
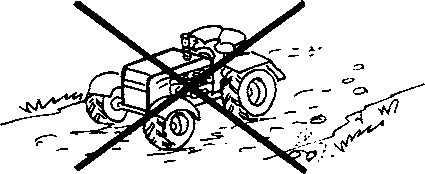
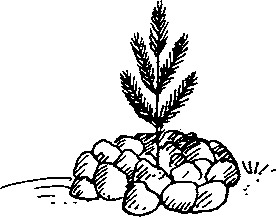
5.5 Eroding slopes and rocky sites
- Determine whether soil conservation measures such
as bounds or contour ridges are necessary. If so, construct them as described in
technical sheet 2.
- Use species with a deep, wide-spread root system and good
initial growth.
- Restrict weeding to the area around the seedling.
- On severely degraded sites put a tablespoon of complete
fertilizer at the bottom of the holes to provide a good start for the seedling.
- If stones are available, surround the plant with small stones.
- Avoid using vehicles that might damage the vegetation and the
soil. Rainwater might otherwise wash away soil and cause erosion.
- Do not plant in a regular pattern, the seedlings should always
be planted on the best available spot.
- When refilling the plant holes, remove all stones. Extra soil
might be
needed.
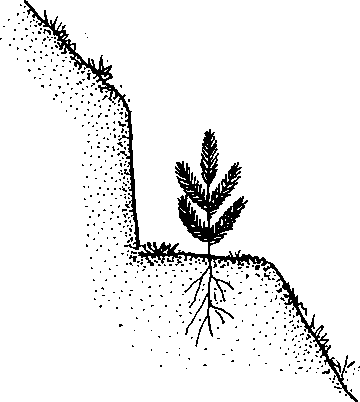
5.6 Steep slopes
- On steep slopes a small horizontal platform has to
be prepared where the planting hole will be dug.
- Work on a horizontal line to reduce physical
effort.
Eroding slopes and rocky sites
Avoid using vehicles
One spoon fertilizer
Stones around seedling
Steep slopes
Make
platform
5.7 Sand dunes
Before starting planting on sand dunes, the moving surface must
be stabilized. This can be done as follows:
- Drive wooden stakes into the sand and tie them
together with branches. The fence should be about 0.5-1 metre high. The sand
will pile up behind the fence. On the little hill formed a second fence can be
built, and so on until it is impossible for the sand to blow over
it.
- Cover the dune surface with a layer of branches,
palm leaves or the like.
- Sow grass or plant bushes or trees to cover the
ground and keep the sand in place. Local, fast-growing species with creeping
roots should be used.
Since sand dunes are often found in areas with scarce or very
unreliable rainfall, it is particularly important and difficult to pick the
right moment to plant. On some sites irrigation from a local well or using a
cistern truck or trailer may have to be provided for if the plantation is to
succeed at all. The high cost of irrigation is only justified where the
plantation protects such valuable assets as villages, roads or an oasis, and
where other measures like protection from grazing and direct sowing are not
effective.
5.8 High altitudes with snow
- Plant seedlings in groups on the best sites and
only where the snow disappears early in the spring. Over time the tree cover
will the spread to areas between the groups of seedlings i.e. into the less
favourable sites.
- Start planting as high up as possible on the slope
to facilitate the natural generation further down in the valley.
Sand dunes
Fence and cover dune surface
High altitudes with snow
Plant seedlings in groups
Common mistakes in planting on difficult sites
Local experience nor adequately considered. Contact local forest
officers if available.
Starting on too large a scale, and not allowing time to learn by
experience.