 |
| ||||||||||||||||||||||||||||||||||||||||||||||||||||||||||||||||||||||||||||||||

United Nations Development
Programme

International Labour Office
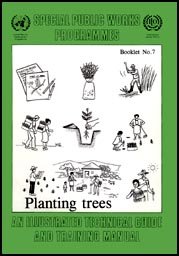
Booklet No. 7
Interregional project INT/86/036 for building up national capacity of LDCs for rural sector development and employment generation through Special Public Works Programmes
Copyright © International Labour Organization 1993
Publications of the International Labour Office enjoy copyright under Protocol 2 of the Universal Copyright Convention. Nevertheless, short excerpts from them may be reproduced without authorization, on condition that the source is indicated. For rights of reproduction or translation, application should be made to the Publications Branch (Rights and Permissions), International Labour Office, CH-1211 Geneva 22, Switzerland. The International Labour Office welcomes ouch applications.
ISBN 92-2-108518-X
First published 1993
This manual supersedes an earlier volume first published in 1986 under the title Planting techniques (Trainer's copy ISBN 92-2-105365-2; Trainee's copy ISBN 92-2-105364-4)
The designations employed in ILO publications, which are in conformity with United Nations practice, and the presentation of material therein do not imply the expression of any opinion whatsoever on the part of the International Labour Office concerning the legal status of any country, area or territory or of its authorities, or concerning the delimitation of its frontiers.
The responsibility for opinions expressed in signed articles, studies and other contributions rests solely with their authors, and publication does not constitute an endorsement by the International Labour Office of the opinions expressed in them.
ILO publications can be obtained through major booksellers or ILO local offices in many countries, or direct from ILO Publications, International Labour Office, CH-1211 Geneva 22, Switzerland. A catalogue or list of new publications will be sent free of charge from the above address.
|
Printed in Switzerland |
IDE |
|
| ||||||||||||||||||||||||||||||||||||||||||||||||||||||||||||||||||||||||||||||||
Preface
This manual has been prepared as part of the forestry programme of the Industrial Activities Branch of the International Labour Office (ILO), a programme which aims at the improvement of productivity, working conditions and training in this industry. Previously one illustrated training manual on ergonomics - Fitting the job to the forest worker - and one on nursery management - Tree Nurseries - have been published.
This publication was prepared in accordance with a request formulated by the Second Session of the Forestry and Wood Industries Committee in April 1991. In the Conclusions (No. 15) concerning future ILO activities in the field of forestry and wood industries, the Committee stressed that ILO should place great emphasis on support of training programmes and assistance to forest workers and management. It is also an input to the technical cooperation programme and in particular to the Special Public Works Programme. It replaces SPWP Training Element and Technical Guide Number 7, Planting Techniques. Financial support was provided by the Policies and Programmes for Development Branch of the Employment and Development Department, ILO. It was written by Kicki Johansson, ILO Industrial Activities Branch, and illustrated by Anja Laengst, external collaborator.
G. Stoikov
Chief Industrial
Activities
Branch
|
| ||||||||||||||||||||||||||||||||||||||||||||||||||||||||||||||||||||||||||||||||
Introduction
Why plant trees
There are many reasons to plant trees:
- to grow useful products for home use and consumption - for example, poles for construction purposes, fuelwood, fruit, fodder, nuts and oils.- to grow products to sell - for example, poles, fuelwood and charcoal, sawlogs, pulpwood, fruits, oils and resin.
- to keep water and wind from carrying away soil, to improve degraded land and to maintain soil fertility.
- to create shade and shelter from high winds or just to be able to enjoy their beauty.
It may take years before seedlings planted today grow into big trees. Therefore, planting trees is for the benefit not only of those who do it but also for future generations.
About this manual
This guide contains the basic information needed to plan, organize and carry out the planting of trees by hand. There are many differences between countries and regions regarding tree species grown, the climate, the soils, the tools available, the people, traditions and other factors. Tree planting projects vary greatly in their size, methods and type of produce that will be grown. Since mere is no substitute for local experience, this small booklet can only provide general information which has to be adapted to local conditions. The present manual can serve as a basis for local manuals in a number of ways:
- it draws attention to all the aspects that need to be considered in tree planting;
- it provides a range of technical solutions to choose from for local use;
- it gives an example of how the subject can be presented in a clear, easily accessible way e.g. by having a clear page lay-out, a limited text without technical jargon, a number of high-quality illustrations and the breakdown of operations into a sequence of steps.
The ILO welcomes reproduction and translation of all or part of this manual (please see copyright information on the page facing the table of contents). This booklet replaces SPWP Training Element and Technical Guide Number 7, Planting Techniques. Financial support was provided by the Policies and Programmes for Development Branch of the Employment and Development Department, ILO. It was written by Kicki Johansson, ILO Industrial Activities Branch and illustrated by Anja Laengst, external collaborator.
Why plant trees?

Products for home consumption

Products to sell
Soil and water conservation
Shade and
shelter
|
| |||||||||||||||||||||||||||||||||||||||||||||||||||||||
Special Public Works Programmes - SPWP - Planting Trees - An Illustrated Technical Guide and Training Manual (ILO - UNDP, 1993, 190 p.)
1. Planning a plantation
Figure
The choice of where and what to plant depends on the purpose of the plantation, on who the land and the trees belong to and on other possible uses of the land. The first step is to find out what the needs of the local populations are. What are the benefits they expect? Who in the local community benefits from a plantation and who might not benefit from it? How will the plantation affect other land-uses like food production or grazing? What are the potential conflicts in connection with the plantation? These factors have to be discussed until all concerned reach agreement. These discussions are very important and should start early during the planning of the plantation. Plantation programs which will result in reduced benefits for the population are not likely to succeed. More tree planting projects fail because of problems with the people involved than because of technical mistakes. This manual deals mostly with the work to be done after the basic agreement has been reached. The list of references at the end of this booklet includes useful documents on extension and people's participation in forestry projects.
When you start the technical planning take a close look at the area. Decisions have be made on:
- What regeneration method to use (whether to plant, rely on natural regeneration or seed directly on the site)?- What tree species to establish (matching species to planting purpose and site)?
- Whether to plant a single tree species or a mixture of several?
- What type of planting stock to use (bare rooted, potted seedlings or stumps, small or large seedlings)?
- What planting pattern to use and how many seedlings to plant?
- When to plant?
- How to protect the seedlings?
To make the right decisions you have to get to know the area. Start by drawing a simple map of the plantation site and calculate the area available. One way of doing this is described in Technical Sheet 1. Mark variations in site conditions on the map. Information that can be of importance for further work should be written down.
Planning a plantation
Where and what to plant?
What regeneration method?

What species?
Mixed or single species?
What type of planting stock?

What planting pattern?

When to plant?

How to protect the
seedlings?
1.1 What regeneration method to use?
You have to decide whether to plant seedlings, to seed directly on the site or to rely on natural regeneration and coppicing.
If natural vegetation exists on the site and the main objective is fuelwood supply or soil conservation, protecting and helping the vegetation to recover might be the cheapest and quickest way to ensure reforestation. This is especially true in dry, hilly and eroded areas. The area should then be closed from grazing and micro-catchments might have to be constructed to ensure that the shoots get enough water. After a cover of bushes and small trees has been established, the less desirable competing plants should be cleared away to promote sprouting in the more valuable species.
This method might be combined with enrichment planting. This means planting seedlings in groups or lines inside a growing stand between existing trees and bushes. Shade-tolerant tree species have to be used. Enrichment planting is not likely to succeed at sites with rich vegetation where the seedlings will not be able to compete with the herb vegetation.
Direct sowing on the site is sometimes used to establish a new stand. This may be a simple way of establishing tree cover but often the increased need for site preparation and weeding make it more expensive than planting. Direct sowing can be used for species with very rapid initial growth when seeds are plentiful and cheap and germination is reliable. Species possible to establish in this way include Acacia Senegal, Acacia nilotica, Acacia mearnsii, Cassia siamea and Neem (Azadirachta indica).
Where natural regeneration is not possible or too unreliable, or where the tree species that are to be established are not found in the natural vegetation on the site, trees have to be planted.
This booklet will mainly focus on the planting of trees.
Regeneration methods
Coppicing

Natural regeneration

Enrichment planting

Direct
sowing
1.2 What species to establish?
The choice of species is a most important and difficult decision to make. The choice depends primarily on three basic questions, which should be asked in the following order:
- what do the owners/beneficiaries of the project want from the plantation?
- what species are available that will produce what the people want?
- will these species grow on the sites available?
For soil conservation, for example, fast-growing species with an extensive root system are preferable. They quickly cover and bind the soil, protecting it from rain and wind. A plantation aimed primarily at construction poles or timber will require trees with relatively heavy, durable wood and a straight stem. For fodder production, ample leaf and seed production are essential and good regrowth after coppicing and browsing. If you grow trees together with agricultural crops or to rehabilitate wasteland, leguminous varieties (for example, the Acacia family) would be a good choice because of their soil-improving ability. (Most leguminous and some other tree species can extract nitrogen from the air with the help of little nodules on their roots. They then add nitrogen to the soil when the leaves fall off). Multipurpose tree species may combine a variety of different uses.
If local, indigenous, tree species, that you know grow well in the area, are available, it may be safer to use them than to try other, exotic ones. It is essential to select species that will be able to survive the first crucial years, that will withstand the environmental conditions on the specific site and that are easy to handle both in the nursery and in the field. Good coppicing ability (i.e. putting out new shoots from the stump after cutting) may be a special advantage.
What species to establish
What is the purpose of the
plantation?
What species are available that will
produce what people want?
Will these species grown on the site
available?
1.3 Whether to plant a single tree species or a mixture of several?
A plantation may consist of only one species or a mixture of several species.
A single-species plantation is easier to handle during both the planting and the maintenance phase. Planting a mixture of species will reduce the risk of failure if a certain species does not survive or grows badly. Mixing the species may also be desirable because of site conditions or to obtain several products from the same plantation. It all depends on the purpose of the plantation.
If you choose to create a mixed plantation, you have to decide what type of mixture will be most appropriate.
When planting bigger sites, the area should be subdivided into blocks. The different blocks can then be planted with different species. This will reduce the risk of damage caused by pests, insects and fire.
A site with varying soil or moisture conditions can be utilized best if several species that are adapted to the different conditions can be selected. The species should be planted in groups on the portions of the site matching the species' site requirements.
You can also create a mixture with slow-growing, valuable timber trees and faster-growing trees that will be used for fuel wood or fodder. An example is Teak (Tectona grandis) and Leucena (Leucena leucocephala). Leucena will be cut as fuelwood or fodder repeatedly until the Teak crowns form a close canopy and Leucena eventually is shaded out. In these kinds of mixtures two (or more) species are distributed evenly over the area or planted in alternate lines. There should preferably be an even mixture of light-demanding and more shade-tolerant species.
Mixed or single species plantations
Single species plantation
Blocks with different species

Mixed plantation
Mixture with
underplanting
1.4 What type of planting stock to use?
Bare-rooted seedlings are less expensive to grow and to transport. They are however, vulnerable to drying out and mechanical injuries during transport and planting. Any weak point in the chain - nursery work/distribution/planting - can result in severe loss of the plants' availability to survive. They have to be handled with care and should be stored for as short a time possible.
Containerized seedlings are less sensitive, less liable to dry out, or to get injured during transport and easier to plant without damaging the roots. They often have a higher rate of survival than bare-rooted plants. They are, however, more expensive to produce. Handling and transport will also be more expensive because of the considerable weight of the earth in the pots. If no experience or information is available on the survival rate and establishment cost for the two methods, both could be tried experimentally to clarify the choice.
The seedlings should have a root system that is between half the size to the size of the shoot. Big seedlings cost more to produce but are necessary for planting difficult sites. The seedlings may be separated according to quality and the seedlings of better quality used on the most difficult or inaccessible sites. The quality and grading of the seedlings are described in more detail in section 3.3.
Cuttings are sections of roots, stems or branches that will, when placed in moist soil, grow into new plants. Cuttings can be grown into plants in the nursery. For some species they can also be planted directly on the planting site. Stumps are a special type of cutting. They consist of a short, pruned stem and a strong pruned taproot derived from nursery stock.
Planting stock
Bare-rooted seedling
Containerized seedling
Cuttings
branch cutting
stump
1.5 What planting pattern to use and how many seedlings to plant?
The most commonly used planting patterns are square spacing or triangular spacing where the distance between the rows are the same as along the rows. If strip clearing or weeding are used, a rectangular pattern, where trees are closer in the rows, than between the rows might reduce labour input. For very harsh climates and on poor soils, it might be appropriate to plant in clusters.
The appropriate spacing varies with the site, the purpose of the plantation and the species chosen. It is also a compromise between expected yield and the cost of establishing the plantation. Wider spacing (more than 3x3 m) is preferred:
- for fruit trees;- when planting on agricultural or grazing land;
- to reduce the cost of planting;
- in arid areas to avoid competition for water and nutrition;
- to reduce the number of thinnings (if the aim of the plantation is large diameter timber).
Closer spacing (3x3 m or closer) is preferred:
- to avoid expensive replacement planting;- to give early soil cover;
- when weed competition needs to be suppressed by early tree canopy closure;
- for slow-growing species when aiming for good quality sawlogs, i.e. small branches/knots;
- when there is a market for smaller dimension wood from thinnings;
- for fast-growing species such as Willows and Eucalyptus, when using short rotation to produce mostly smaller dimension wood (e.g. for fuel).
On dry sites most trees are now planted with an average of 3 or 4 metres between trees (i.e. 1100 or 625 trees/ha, respectively). On fresh sites in tropical highlands and in temperate climates a spacing of 2 square metres (i.e. 2500 trees/ha) is common. The table on the following page can be used when calculating how many seedlings will be needed for a site.
Spacing

Square spacing

Rectangular spacing
Triangular spacing
Clusters
Calculating the number of seedlings needed
If you know how many plants you want to plant per hectare, you can calculate the square spacing using the formula:

If on the other hand you know what spacing you want, you can calculate the number of seedlings needed using the formula:
10,000/(distance a x distance b) = Number of seedlings per ha
|
Spacing between lines (m) |
Spacing within lines (m) |
Space per seedling (m2) |
Seedlings per hectare |
|
1 |
1 |
1 |
10000 |
|
2 |
2 |
4 |
2500 |
|
2.5 |
1.6 |
4 |
2500 |
|
3 |
3 |
9 |
1111 |
|
4 |
2 |
8 |
1250 |
|
4 |
4 |
16 |
625 |
|
10 |
10 |
100 |
100 |
1.6 When to plant?
Planting should be completed early in the rains in as short a time as possible. The trees must be given time to become well established prior to the dry season. A good rule of thumb is to start planting when the soil is moist to a depth of 15-25 cm or to the bottom of the planting hole. Failures because planting is too late are more common than failures because of planting too early. In many tropical sites, the optimum planting time is two to four weeks each year. To obtain good results and avoid labour shortage in these areas considerable preparatory planning is needed. The size of the plantation might have to be adapted to the availability of labour. If dry sites cannot be planted in time, planting should be postponed until the next season.
1.7 How to protect the seedlings?
Tree seedlings may be harmed by browsing, fire, insects and diseases. The risk of damage should be assessed and protection ensured during planning.
In most areas some sort of agreement and protection is needed to keep livestock out of the plantation during the establishment phase. Goats and sheep chew leaves and shoots and tear off the bark. Cattle can quickly destroy a plantation by trampling on the young seedlings.
Forest fires are often man-made. If the plantations benefit all members of the community, prevention of fires is mostly a matter of public relations and information. Sharing the produce of the plantation is one way of increasing the interest of the local population. Permanent guarding, fire breaks and controlled grazing or grass-cutting are also means of preventing fire.
Insects and diseases are often species-specific. Species liable to damage should be avoided. Pesticides or chemically treated plants may also be used.
Protection measures are described further in Chapter 6.
When to plant

Planting should start early in the
rain

How to protect the seedlings
|
|
|
|
|
|
Browsing |
Fire |
Insects |
Diseases |


Figure
1.8 The plantation plan
When all decisions are made and the basic information collected, a plantation plan should be prepared. It should consist of a plantation record and a map. An example of a form to use for the plantation record is given on the opposite page.
The map is the main tool for planning (guidelines on how to draw a map are given in technical sheet 1).
If you want to create a plantation with different species mixed in groups, you have to decide where to plant the different species to best utilize the varying site conditions within the plantation area. This should be marked on the map.
Mark also access roads, suitable seedling depots (with water and shade) and where to start planting. In dry areas start the annual plantation work at the driest part of the site. This will give the seedlings as long a time as possible before the beginning of the dry season. If you have decided that the best quality seedlings, or larger holes or other special measures are needed in certain areas, this should be clearly indicated on the map.
|
|
Plantation record |
|
Village: Kovali |
District Tiruchirappalli |
|
Site name: |
Area: 35 ha |
|
Batcha plain Owner: |
Kovali village community |
|
Type of plantation: |
Soil conservation/fodder |
|
Previous vegetation: |
Waste land with scattered bushes (Cassia and Prosopis) |
|
Terrain: |
Flat |
|
Main soil type: |
Sandy loam |
|
Method of clearing: |
No clearing needed |
|
Risk/need for protection: |
Grazing, termites |
|
Transport: |
Truck hired from Mr. Schultz |
|
Tools required: |
20 planting hoes (ordered 12.1.93) |
|
Workdays required: |
See attached workplan |
|
Date of planting: |
26 April to 20 May 1993 |
|
Nursery of origin: |
Keela Kolathur village nursery |
|
Spacing: |
4x4 metres |
|
Water conservation measures: |
None |
|
Fertilizer: |
Not applied |
|
Species and number of plants: |
Local name |
Botanical name | |
| |
Velvel |
Acacia leocophloea |
12,000 |
| |
Vagai |
Albizia lebbek |
4,000 |
| |
Usilam |
Albizia amara |
6,000 |
Seed lots No.:
Weeding 1:
Weeding 2:
Weeding 3:
Survival count:
Beating-up:
Average plant
height:
Protection applied:
Area to be planted
Map of the area to be planted
|
Common mistakes when planning Not enough attention to discussions on the needs, benefits and potential conflicts in connection with tree planting project. No agreement on the rights and duties of all involved, particularly concerning protection. As a result, a dissatisfied group sabotages the project (uproots trees, burns plantation or lets cattle destroy the trees, etc.). Species are not well suited for the purpose of plantation. Suitable local species are not utilized because there is no information in books and manuals. Local people's knowledge of sites and trees not used. Lack of coordination between nurseries and the plantation programme. Need for protection is underestimated. |
|
| ||||||||||||||||||||||||||||||||||||||||
Special Public Works Programmes - SPWP - Planting Trees - An Illustrated Technical Guide and Training Manual (ILO - UNDP, 1993, 190 p.)
2. Preparing the planting site
Figure
The planting site should be completely prepared and ready for planting when the first rains are due. There are two reasons for this - first, because there is a rather short time interval in which the plant should be planted to get the best possible start; and second because the rainy season is the most work-intensive in rural areas and it is good to have as much work as possible done before it starts. Site preparation should give the young trees a good start and rapid early growth. The measures needed differ between different types of sites and between different types of plantations. The following measures may be taken:
- Clearing vegetation
- Ground preparation
- Marking where to dig the holes
- Digging holes
- Water conservation

Clearing vegetation
Ground preparation

Marking where to dig the holes

Digging holes
Water
conservation
2.1 Clearing vegetation
On most sites trees, bushes and grass have to be cleared away to prevent them from competing with the young plants. This is very important when using light-demanding trees such as Eucalyptus, Pine or Cupressus. If more shade-tolerant species are chosen, existing trees do not have to be cleared.
Total clearing of the grass and bushes is needed on moist grassland sites and for species sensitive to grass competition, like some Eucalyptus.
On sites where ground vegetation is below one metre, it is normally sufficient to clear patches around the plants or strips along the lines of plants. The strips should be about one metre wide. Patches a radius of about 1 metre radius can be cleared with the hoe when digging the planting hole.
Between the cleared patches and strips the vegetation should be cut short, except on sites where reduction of the vegetation may result in increased erosion. There the vegetation between the cleared patches should be left as intact as possible.
Existing trees should only be removed when they seriously disturb the development of the plantation. Around water sources a vegetation belt of at least 15 to 25 metres should be preserved. Trees along rivers and old trees providing shade and beauty should always be saved.
Clearing

Total clearing
Path clearing
Strip clearing
Save trees around water sources
Tools required for clearing and grass-cutting
The type of tool used should be adapted to the land of vegetation that is being cleared.
A brush hook might be the best tool to use for cutting underbrush up to 20 cm in butt diameter. The weight of the brush hook is about 1.2 kg. The handle is about 0.6 m and the blade 0.2-0.3 m. The top of the blade is formed as a hook. This will protect the edge if it hits a stone. The hook also permits the worker to cut small brush with a pulling jerk. The brush hook is used with two hands.
A machete can be used for cutting hard-stem grasses and woody weeds. It is a long knife, also used for many other purposes, such as cutting fence posts, trimming live fences and root pruning. The machete weighs about 0.6 kg. The traditional machete has a handle of 0.1-0.15 m and a blade of 0.45 m in length. For grass-cutting a modified model has been developed. On the grass-cutting machete the length of the handle is about 0.5 m and the blade about 0.3 m. A grass-cutting machete is used with one hand and the long handle allows the worker to maintain an upright position. Productivity can be increased if the cutting is assisted by a wooden stick (see fig).
Tools for clearing and grass-cutting
Brushhook

Machete
Grass-cutting machete
A scythe is useful for soft stem grasses. A scythe with a short blade (0.3 m) is chosen when the terrain is rough and the grass dense. In even terrain a longer blade (0.6 m) can be used. This will speed up the work. It takes some training to get used to the scythe, but once the technique is mastered productivity is good. The worker should stand with his back straight and feet apart. To give power to the cutting swing, the muscles of the thighs and the back should be used. The hands are used mainly for guiding the swing, not for powering it. A well designed scythe is adjustable to individual preferences and body sizes. In the middle of the handle there is a grip for the right hand, and at the top there is another grip for the left hand (for right-handed workers). The upper handle should reach the arm pit and the lower should be placed one underarm's length lower.
A slasher is a double-edged tool, suitable for cutting short grass. It has only limited applications in tree planting. A slasher weighs about 0.6 kg, the length of the handle is around 0.8 m and the blade 0.05-0.1 m. Holding the slasher in one hand, the worker swings it back and forth in a sweeping motion.
Hoes, for completely removing vegetation on strips or patches, are described in section 4.1.
Tools required for clearing and grass-cutting

Scythe
Slasher
2.2 Ground preparation
Ground preparation is needed to soften the soil, and to allow the roots to affix firmly and deeply. Since nutrients are washed out in the surface soil layer, it is also important to mix soil for the deeper layer with soil from the surface layer to guarantee availability of the nutrients needed by the seedling.
The method depends on the site and the species planted. Usually digging holes and uprooting grasses with the planting hoe about one metre around the planting hole is enough.
The work should be carried out along the contour line, not up and down the slope, otherwise rain water may start to wash away the soil and form gulleys.
In sites with crusts, hard pans or other hard soil layers it may be necessary to use mechanized soil preparation. For this a bulldozer, a sub-soiler or a scarifyer drawn by a tractor can be used.
Ground preparation
Uprooting grass
Work along the contour lines
Tractor with
scarifyer
2.3 Marking where to dig the holes
It is not always necessary to mark where to dig the planting hole. A well instructed planting crew working on well cleared ground may plant without premarking the planting spots. They may space the distance using tool handles or footsteps as measures for the planting work.
Even if it is necessary to mark on the ground where to dig the planting holes, there is no need for accurate distances. It is more important to find the best planting spot available for the plant. In sites with a lot of vegetation it might, however, be preferable to plant in straight rows and with a fixed distance between the plants, since this will make it easier to find the plants during weeding.
Determine how many handle lengths or steps should separate the trees. Then make a mark on the ground with the planting hoe. The planting spots can also be marked out by sticks or pegs.
2.4 Digging holes
If the soil is not too hard, the holes might be dug in advance during the dry season. This will reduce the need for labour during the actual planting. They can also be dug at the same time as the actual planting. How to dig holes and examples of the different tools to use are described in Chapter 4.
Marking where to dig holes

Figure
Figure
Digging of holes
Figure
2.5 Soil and water conservation measures
In arid and semi-arid areas it is almost impossible to get the seedlings to survive without some water conservation measures. In high rainfall areas and on unstable soil, particularly on slopes, the soil often needs to be protected against erosion until the tree crowns shelter the site. The aim of all soil and water conservation measures is to reduce or retard the flow of surface run-off water (water harvesting). This will diminish the erosion damage and cause the water to soak into the soil, increasing the amount of soil moisture available for the seedling.
Microcatchments can be built in dry locations to trap the water around the seedlings. They vary in shape and size and are relatively small and cheap. If well constructed, they should last about five years, which will give the plants tune to become well established.
Contour ridges or diguettes serve as small dams to keep water from running downhill. They consist of ridges dug out of the hill slope along the contour lines and are used in heavy soil with low permeability.
Bench terraces are series of narrow, more or less horizontal steps cut into the hillside.
It is extremely important to space ridges and terraces properly. If the structures are placed too far apart, they will be washed away or broken. If they are placed too close, labour and land will be wasted.
Some guidelines of how to construct soil conservation structures are given in Technical sheet 2. However, the size, type and spacing of earthwork structures always have to be adapted to local conditions. Consult the national extension agencies for soil conservation, soil survey and forestry for more detailed advice.
Water conservation structures
Semi-circular
Vee-shaped
Micro-basin
Microcatchments
Terrace with trees and crop
|
Common mistakes when preparing the planting site Insufficient site clearing and soil preparation. Agricultural tools are used that are not suitable for the kind of work and the soils found in tree planting. Tools used have handles of inconvenient size, poor shape, badly fixed and cutting edges are not regularly sharpened. Soil and water conservation are too sophisticated and expensive for tree planting. Water conservation measures used uniformly rather than adapted to erosion risk (bigger and more closely spaced where risk high, widely spaced or none at all where risk low). |
|
| ||||||||||||||||||||||||||||||||||||||||
Special Public Works Programmes - SPWP - Planting Trees - An Illustrated Technical Guide and Training Manual (ILO - UNDP, 1993, 190 p.)
3. Handling seedlings

Figure
3.1 Packing and transport of seedlings
The time between the seedlings, leaving nursery and their being planted should be as short as possible. They must be constantly protected from strong light, heat and drying out. There are small root hairs that will dry out and wither in seconds if left exposed to the sun or dry winds. The seedling should be thoroughly watered before leaving the nursery. This will provide the seedling with the largest possible reserve of water and minimize the risk of soil being shaken out of the pots during transport.
Containerized seedlings
Only the containers should be held when containerized seedlings are carried. Seedlings should never be held by the shoots. Whenever possible, use boxes for transport.
Metal platforms of vehicles often get very hot, and this will burn the root tips at the bottom of the pots. Pour water over the platform and/or spread out soil, straw or twigs. It is especially important to put a thick layer over the exhaust pipe otherwise the heat may destroy some of the seedlings. If the seedlings are loaded onto carts, pickups or trucks, load densely and upright. Make sure that they do not fall over during the transport. If necessary, water the plants on the arrival at the planting site.
If a vehicle is carrying the plants, it should travel at moderate speed and the plants should be covered by a layer of grass, a mat or a tarpaulin to prevent them from being dried out by the wind.
Transport from the nursery to the planting site is often a limiting factor, slowing the progress of the planting work. Simple metal structures with several shelves, as shown in the illustration on the preceding page, can multiply the capacity of trucks and trailers several fold.
Packing and transport of seedlings

Water seedlings before they leave
the nursery
Containerized seedlings

Never pull by the shoots

Use trays and boxes for transport

Spread straw or twigs

Load upright

Cover plants with a mat
Bare-rooted seedlings
Bare-rooted seedlings have to be packaged in order for the roots to be well protected from drying out. Sacking, banana leaves, plastic bags with ventilation holes or cans may be used for packing and wrapping. To preserve moisture, the roots can be covered with wet grass, leaves, sawdust or a mixture of water and clay.
3.2 Storing seedlings
If the seedlings have to be stored a few days before planting, keep them in a dark and cool place, a cool cellar or elsewhere in the shade. If bare-rooted seedlings are packed in bags, the bags should not be opened.
Bare-rooted seedlings which cannot be planted in a few days must be healed-in close to the planting site to minimize later transport. "Healing-in" means temporarily putting bare-rooted seedlings in moist soil, under shade, until they can be used for planting. Healing-in should be avoided but it may sometimes be necessary.
Bare-rooted seedlings

Gunny sacking

Banana leaves

Polyethylene bag with ventilation
holes

Can
Stored seedlings

Figure
Healing in
Dig a trench under a shade tree in loose, well drained, but moist soil.
Separate the seedlings from the bundles. On one side of the trench, which should be slightly sloping, arrange the seedlings individually in upright position. Cover the roots with soil taken from the opposite side of the trench, thus making room for the next row of seedlings. The roots should be covered up to, or a little above, the root collar. Firm the soil with the hands. Then place the next row of seedlings. During dry weather the seedlings have to be watered. If the location is not very shady, the seedlings should be covered by brush to discourage the emergence of shoots.
Healing-in

1. Dig a trench in the shade

2. Arrange the seedlings

3. Cover the roots with soil

4. Firm the soil

5. Place the next row of seedlings

6. Several rows of seedlings placed
and covered with
soil
3.3 Quality of seedlings and grading
You should only use seedlings of good quality. Never use seedlings left over from the year or the planting season before. Replacement is much more expensive than seedling production.
Seedlings of good quality have:
- a shoot between one or two times the length of the root (or the pot);
- a sturdy, woody stem with a strong root collar;
- a symmetrical, dense crown;
- a root system with many thin roots in addition to the tap root;
- no signs of fungus or insect attack.
Seedlings of inferior quality should never leave the nursery. If they have, they should be rejected at planting stage. If the plantation site is varied, it may be useful to separate the plants into two or three quality classes. The best plants should be used on the most difficult or inaccessible part of the site. Second quality plants should be used on the more favourable part of the site where replacement planting is less costly.
3.4 Stripping and trimming
With tall, broadleaved species, young shoots and part of the foliage must be trimmed or stripped off to reduce transpiration until the roots have had a chance to reestablish their water supply function. Some species such as Azidirachta indica and Khaya senegalensis should be stripped of all leaves except for the terminal bud and two or three near it. Remove the leaves carefully. The terminal bud must not be damaged. If possible the plants should be stripped in the nursery before lifting out.
Overgrown seedlings of some broadleaved species like Eucalyptus can be trimmed back to the right root: shoot ratio with a pruning shear. After planting they survive much better than seedlings that are too large.
Good quality plant
|
|
Root: shoot ratio 1:1 to 1:2 |
|
|
¬ Symmetrical dense crown |
| |
¬ Woody stem with strong root collar |
|
|
¬ Dense root system |

Grading

1st class

2nd class

3rd class not to be planted
Stripping

Figure
Trimming

Figure
3.5 Transporting seedlings from the road to the planting site
Seedlings often have to be transported from the road to the planting site by pack animal or man. Since this is hard work, pack animals are preferable. The total weight to be carried during one day is considerable. In places where roads are sparse the seedlings may have to be transported long distances. If the planting site is large, a number of small deposit points should be set up so that hand carrying can be kept to a minimum.
Tools required for transporting seedlings
A back-pack model seedling carrier is preferable if seedlings have to be carried over long distances, and particularly when the terrain is steep and rough. These may be constructed from traditional baskets and can be used for both bare-rooted and containerized seedlings.
For bare-rooted seedlings there is one model where the seedlings are laid down with the roots toward the middle and secured with a cloth.
When seedlings are delivered in light-weight trays, a carrier on which the trays can be fastened is preferable. Wooden trays are heavy and should only be carried relatively short distances.
Yokes are less convenient than backpacks, but it is still far easier to use one than to carry the plants with ones arms. Yokes are sticks of a suitable shape put across the shoulders. The load is suspended on strings at each end.
Back-pack carriers

for containerized seedlings

for bare-rooted seedlings

yoke
|
Common mistakes in handling seedlings Poor planting stock is not sorted out leading to low survival. The seedlings are pulled by the shoots, thereby breaking them and causing deformation of the future trees. Containerized seedlings are not transported upright and well secured. The earth-balls around the roots break up and therefore the advantage of using an expensive containerized seedling is lost at the last moment. Seedlings are stored too long before planting. Seedlings are not adequately protected against drying out. |
|
| |||||||||||||||||||||||||||||||||||
Special Public Works Programmes - SPWP - Planting Trees - An Illustrated Technical Guide and Training Manual (ILO - UNDP, 1993, 190 p.)
4. Planting techniques
Figure
Prior to planting, bare-rooted seedlings should stand in a mixture of water and earth/clay for a few hours and containerized seedlings should be thoroughly watered. Excessively long roots (longer than 25cm) should be pruned with a machete or an axe.
Planting consists of the following operations:
- Digging of the holes;
- On-site distribution of the seedlings;
- Planting;
- Use of fertilizers (if required).
If the holes have not been made beforehand, the work may be conducted by gangs of two workers. The first digs the planting hole, the second distributes the plants and completes planting. On difficult sites more diggers than planters have to be assigned. Where holes are more easily dug, the ratio may be reversed. Another method is to let one worker distribute the plants to 10-20 planters who will dig the holes and plant. One single worker may also complete the whole operation of digging, carrying the seedlings and planting.
Planting techniques
Planting gangs of two
Planting in bigger groups
Planting
alone
4.1 Digging the holes
Hoe an area of about 1 square metre around the planting holes. The area should be cleared of all vegetation to eliminate competition for nutrients and water. Dig the planting holes. Holes are required for all containerized plants and for big bare-rooted seedlings. The digging can be done at the same time as planting or some weeks in advance. If holes are dug before the rainy season, labour demand will not interfere with the agricultural season and the actual planting work will be faster. Even when the holes are dug in advance, the plantation worker should bring a hoe to be able to make the holes deeper or to adjust them.
For containerized forest trees the holes should be about 20-40 centimetres in diameter and slightly deeper than the length of the container. For fruit trees the hole should be larger (up to 60 x 60 x 60 cm). The harsher the site, the deeper the holes should be.
For bare-rooted seedlings make sure that the hole is deep enough to allow the taproot to hang down vertically without bending its tip.
Pile the soil on the sides of the hole without scattering it too much. Loosen, if necessary with a pickaxe, the bottom of the hole to make it easier for the plant roots to penetrate the soil.
On favourable sites small bare-rooted seedlings and cuttings may also be planted by just making a slot with a planting hoe (see 5.1).
Digging the holes
Hole for containerized seedling
Hole for bare-rooted seedling

Bigger hole for fruit trees
Tools required for digging
Normal agricultural tools are often not suitable for forestry work. Agricultural hoes, for example, have a wide, straight-edged blade and are heavy. They are therefore difficult to use on most tree planting sites. Suitable tools include the following:
An oval-blade planting hoe is the best planting tool for general purposes The oval blade penetrates the soil more easily than a blade with a straight edge. For containerized seedlings a hoe with a narrow blade can be used; for bare-rooted seedlings a hoe with a wider blade is preferable.
An open-angle hoe has an angle of 100-120° between the blade and the handle. The open angle makes it easier to plant bare-rooted seedlings straight, thus increasing productivity.
The "grubbing mattock" and the "planting mattock" have sturdy narrow blades with straight edges. They should be used if the planting site is stony and difficult.
A pickaxe which has one pointed and one narrow blade edge and a shovel can be used in hard soil when digging deep, big holes. The soil can be loosened with the pickaxe and removed with the shovel.
A wooden dibble or an iron bar can be used when planting cuttings. If loose soil is not available all over the site, extra soil has to carried for filling the holes. Dibbles or bars should only be used in sandy soil, which is not likely to become compacted.
Tools should be adapted to body sizes and for work in particular soils or terrains. The length of the handle should be adapted to the length of the worker. A hoe with a long handle is generally more efficient since it will allow work to be done in an upright standing position. When planting on a steep slope, it is preferable to use a short handed hoe to get a good work posture. Women and elderly workers should have lighter tools than fit male adults. The handle should provide a good grip, and an oval handle is preferable to a round one.
The edges of the planting hoes must be kept sharp with a file, to maintain them in good working condition. The handle should have an oval shape so that it does not twist in the hand. It should have a raised grip to prevent the hands from sliding off. Always keep the handle tightly fastened to the head.
Tools required for digging
Open angle hoe

Straight back planting hoe

Oval blade planting hoe

planting mattock
grubbing mattock
pickaxe

shovel
wooden
dibble
4.2 On-site distribution of the seedlings
The supply of plants should be arranged so that planting is never held up for lack of plants. At the same time, the number of plants kept in temporary storage near the work site should be as small as possible.
Carrying seedlings is heavy work, especially when containerized seedlings with plenty of water-soaked earth are being carried. Appropriate tools for carrying should be available and work rotation used. Teams may change between, for example, distribution and planting work every 2 hours.
During planting, great care must be taken to ensure that the seedlings do not dry out. The roots should always be moist and never exposed to sunlight. This is especially important with bare-rooted seedlings. Seedlings whose roots are exposed to the sun for only a few minutes can already be seriously damaged and may not survive. Wet spongy material, for example grass, should cover the bottom of baskets, boxes or trays used for carrying the seedlings. With containerized seedlings the soil in the pot should always be moist at the time of planting.
If the distribution and planting of the seedlings is done by the same person, it is easier to ensure that the seedling will not dry out.
On-site distribution of seedlings
Figure
|
Storage in the field as short a time as possible. |
Protect roots from drying out (e.g.
with wet grass)
Equipment required to distribute the seedlings on the planting site
When plants have to be carried long distances to planting sites, back-pack carriers or yokes should be used (described in section 3.5). When carrying seedlings on the site during planting, other types of carriers are preferable.
A shoulder-carried seedling container or basket will leave the hands free for planting. The harness should have a well-padded belt and shoulder straps. They should be adjustable to allow the weight of the seedlings to be distributed between the shoulders and the hips. A more comfortable model is a shoulder harness, with the trays or bags for seedlings hooked onto it.
A plant tray or a basket carried in the hand and put down on the ground during planting can also be used. Plant trays are especially useful for bare-rooted seedlings. Moist spongy material underneath and over the seedlings will protect the sensitive bare roots from drying out.
On-site distribution of seedlings
Shoulder-carried seedling containers
Bags hooked on harness, padded belt
and shoulder straps
Plant
tray
4.3 Planting
Planting containerized seedlings
When planting containerized seedlings, fill topsoil back into the hole until the hole is as deep as the container: Cut the container open with a knife or the edge of the hoe and remove the bag. Care should be taken not to break up the earthball. Place the earthball into the planting hole, the upper part of the ball should be slightly deeper than the surrounding soil surface. Put the remaining soil into the hole until it is filled to the rim.
Firm the soil carefully with your hands or with your heel. Do not leave air pockets around the ball or the plant will dry out and die. Check that the fuming is sufficient by gently pulling the plant. The plant should rest firmly in the ground.
Seedlings should never be left in their containers. It will restrict the growth of the root system and cause the death of the young tree some years later.
The most critical factor for all kinds of vegetation on dry to semi-dry land is access to water. After the hole is filled, a layer of loose soil is left around the plant. Shape the loose soil into a shallow depression. This will cause the surface water to concentrate around the seedlings and they will get as much water as possible.
Planting containerized seedlings
1. Fill soil back into hole
2. Place container in the hole
4. Back fill
3. Cut container open

5. Firm soil from two three
directions to remove airpockets

6. Make slight depression and mulch
where possible
Planting larger bare-rooted seedlings
When planting bare-rooted stock, put the seedling into the hole with the root collar 2-3 cm below ground level. The roots should be well centred. They must not be bent or curved and must never be allowed to get twisted or bent in the planting hole. If the tap root is too long it should be cut to about 20-25 cm. Put the soil back into the hole. Make sure that the seedling stands straight. At the same time sort out stones and green grass. Firm the soil with the heels or hands from two or three directions to remove air pockets. Take care not to damage the seedling.
Planting mistakes to avoid
Air around roots

Bended roots

Roots too shallow

Roots out of hole
Seedling not straight
Planting bare-rooted seedlings
1. Hold tree with root collar 2-3cm
below ground level
2. Put soil around the roots avoid
air pockets

3. Fill up the hole
4. Firm soil carefully
Planting cuttings
Branch cuttings should be about 35-45 cm long with at least two leaf buds in the upper 10-15 centimetres. They should be planted in a slanting position with about 3/4 of their length in moist soil. Care should be taken that they are not planted upside down. Planting cuttings upside down will delay or prevent the rooting process.
Stumps (also called root-shoot cuttings) should be 20-25 cm, about 80% root and about 20 % shoot. The diameter at the base of the stem should be between 1 and 3 cm. Stumps should be planted in a vertical position, with the root collar just at ground level.
All cuttings should be planted in premade holes. They should not be forced into the ground. Take care that cuttings are not planted upside down. Cover the upper cut with mud to protect it from direct sunshine.
4.4 Use of fertilizers
For some species and on poor sites fertilizers may be needed. Manure can be used if only a few trees are being fertilized close to home. In plantations choose a well balanced complete chemical fertilizer containing nitrogen, phosphorus and potassium. If a chemical fertilizer is used, mix one tablespoon of fertilizer with the soil at the bottom of the planting hole. Direct contact between the roots and the fertilizer should be avoided as it would "burn" the roots. If 2,500 seedlings per hectare are treated with 1-2 tablespoons (about 20 grams) of fertilizer, one bag (50 kg) will be needed per hectare.
Planting cuttings
Planting branch cuttings
Planting stumps
1. Prune tap root and trim lateral
roots
2. Place stump in prepared hole and
fill up
3. Firm soil around stump. Allow 1-2
cm of shoot above ground.
|
Common mistakes during planting Planting holes made too shallow. |
|
| |||||||||||||||||||||||||||||||||||||||||||||||||||||||
Special Public Works Programmes - SPWP - Planting Trees - An Illustrated Technical Guide and Training Manual (ILO - UNDP, 1993, 190 p.)
5. Adapting planting techniques to different site conditions

Figure
How to plant on "normal" sites has been described in the previous chapter, but the technique described has to be adapted to local conditions. It is always wise to consider local experience and to learn from previous mistakes and successes. Often the sites chosen for reforestation are those not suitable for agriculture - the difficult sites. They will require extra care. Below, some advice is given on how to adapt the general planting method to various site conditions.
5.1 Favourable sites
On sites with light and soft soil where experience has shown that regeneration is easy, the less expensive bare-rooted plants can be used. Instead of actual holes simple slots in the ground suffice for planting small bare-rooted seedlings (i.e. shoots less than 25 cm). For containerized seedlings the planting holes do not need to be bigger than the container. One single worker may then complete the whole planting operation.
When little clearing of planting spots is needed or when clearing is carried out beforehand, an open-angle hoe can be used. The use of an open-angle hoe has proven to be very fast and effective. While it takes some training and practice, it permits workers to increase their productivity very significantly compared to other methods.
1. Hold the hoe in your right hand and take a number of seedlings in your left. Start with around 10.
Hold the seedling bunch with two fingers and take one seedling between your thumb on one side
and the index and middle finger on the other (see picture on opposite page).2. Swing the hoe upwards and let the handle slide through your hand. Gloves should be worn
otherwise the handle might not glide well and you can burn your hand.3. Thrust its blade into the ground by letting the hoe come down. The force comes from the hoe's
weight rather than from the worker's effort. Just before the edge of the blade hits the ground, let
the handle go, so the shock does not hit your hand.4. Grab the hoe close to the blade, move it up and down and then outwards to open a triangular slot.
5. Place the seedling in the slot in front of the hoe's head with the root collar at the same level as the
surrounding soil surface or slightly deeper. Lift the hoe from the slot.6. Push the soil around the seedling and firm soil carefully with your foot. Then move to the next
planting spot. As you get up from the last seedling planted, use the momentum of your whole
body to swing up the hoe and the work cycle starts again ...
Favourable sites Planting with an open angle hoe

Figure

1. Hold the hoe in your right arm
and a few plants in your left

2. Lift the hoe with one hand
3. Thrust the blade into the ground
4. Open the hole by raising and
twisting the handle
5. Insert the plant

6. Raise the hoe and firm soil
around the
seedling
5.2 Sites with high grass
- Use a hoe to clear a patch with a diameter of at least 1 metre around the planting hole. The grass has to be uprooted to reduce competition.
- Remove as many grass roots as possible from the soil before putting it back into the hole.
- Weed often. Use a hoe and uproot the grass around the seedling. The success of the plantation will depend on the subsequent weeding.
5.3 Waterlogged sites
- Plant on mounds or ridges to improve drainage for the young plant.
- Plant at the end of the rainy season when the site has dried up sufficiently. This will give the seedlings time to become well established before the wet season starts.
Sites with high grass
Clear patches

Remove grassroots and weed often
Waterlogged sites
Planting on ridges
Plant at the end of the rainy
season
5.4 Dry sites
- Prepare micro catchments (as described in Technical sheet 2).- On dry sites it is even more important than otherwise that planting is carried out at the right time, i.e. at the beginning of the rainy season. Prepare planting holes in advance in order to complete planting as quickly as possible.
- Use seedlings of best quality with a good root system.
- Use containerized seedlings if available. They generally survive better than bare-rooted seedlings.
- With tall broad-leaved species, young shoots and part of the foliage must be stripped off, as described in section 3.4.
- Make planting holes large and deep, 60 x 60 centimetre. A large planting hole with plenty of refilled soil will help root development and thereby increase the survival rate and growth.
- Pickaxe the bottom of the holes to make it easier for the roots to penetrate.
- Form a basin around the seedling to catch as much water as possible.
- Mulching with grass and leaves around the seedlings will reduce evaporation and prevent the surface soil from hardening.
Dry sites

Prepare micro-catchments

Use containerized seedlings of best
quality

Planting technique for dry
sites
5.5 Eroding slopes and rocky sites
- Determine whether soil conservation measures such as bounds or contour ridges are necessary. If so, construct them as described in technical sheet 2.- Use species with a deep, wide-spread root system and good initial growth.
- Restrict weeding to the area around the seedling.
- On severely degraded sites put a tablespoon of complete fertilizer at the bottom of the holes to provide a good start for the seedling.
- If stones are available, surround the plant with small stones.
- Avoid using vehicles that might damage the vegetation and the soil. Rainwater might otherwise wash away soil and cause erosion.
- Do not plant in a regular pattern, the seedlings should always be planted on the best available spot.
- When refilling the plant holes, remove all stones. Extra soil might be needed.
5.6 Steep slopes
- On steep slopes a small horizontal platform has to be prepared where the planting hole will be dug.
- Work on a horizontal line to reduce physical effort.
Eroding slopes and rocky sites
Avoid using vehicles

One spoon fertilizer
Stones around seedling
Steep slopes
Make
platform
5.7 Sand dunes
Before starting planting on sand dunes, the moving surface must be stabilized. This can be done as follows:
- Drive wooden stakes into the sand and tie them together with branches. The fence should be about 0.5-1 metre high. The sand will pile up behind the fence. On the little hill formed a second fence can be built, and so on until it is impossible for the sand to blow over it.
- Cover the dune surface with a layer of branches, palm leaves or the like.
- Sow grass or plant bushes or trees to cover the ground and keep the sand in place. Local, fast-growing species with creeping roots should be used.
Since sand dunes are often found in areas with scarce or very unreliable rainfall, it is particularly important and difficult to pick the right moment to plant. On some sites irrigation from a local well or using a cistern truck or trailer may have to be provided for if the plantation is to succeed at all. The high cost of irrigation is only justified where the plantation protects such valuable assets as villages, roads or an oasis, and where other measures like protection from grazing and direct sowing are not effective.
5.8 High altitudes with snow
- Plant seedlings in groups on the best sites and only where the snow disappears early in the spring. Over time the tree cover will the spread to areas between the groups of seedlings i.e. into the less favourable sites.
- Start planting as high up as possible on the slope to facilitate the natural generation further down in the valley.
Sand dunes

Fence and cover dune surface
High altitudes with snow
Plant seedlings in groups
|
Common mistakes in planting on difficult sites Local experience nor adequately considered. Contact local forest officers if available. Starting on too large a scale, and not allowing time to learn by experience. |
|
| |||||||||||||||||||||||||||||||||||||||||||||
Special Public Works Programmes - SPWP - Planting Trees - An Illustrated Technical Guide and Training Manual (ILO - UNDP, 1993, 190 p.)
6. Maintaining plantations
Figure
Planting trees is one thing, protecting them during the critical first three to six years, however, is something else. Far too many plants that have been raised and planted with care, effort and knowledge, die due to lack of maintenance of the plantations.
The maintenance operations and protection that might be needed are:
- Weed control
- Protection from grazing
- Fire prevention
- Protection from insects, diseases and rodents
- Fertilizers
- Replacement planting
Maintaining plantations
Weed control
Protection from grazing
Fire prevention

Protection from insects, diseases
and rodents

Fertilizers
Replacement
planting
6.1 Weed control
Grasses, herbs and other vegetation on the planting site compete with the seedlings for light, water and nutrients. Cutting or removing the vegetation from around the seedlings reduces the competition. If weeding is neglected, the seedlings will die. How often and in which way the weeding is carried out depends on the climate, the soil, the species planted and the size and quality of the seedlings used.
The more hot and humid the climate, the more weeding operations are needed. Depending on weed competition in some places it will be enough to weed once during the first year. In other places three or more weedings per year might be needed. If small and poor quality seedlings are used, the number of weeding operations needed will increase. As a general rule of thumb there should be:
2-3 weedings during the first year after planting;
1-2 weedings during the second year after planting;
0-1 weeding during the third year after planting.
Weeding must be carried out early, before the seedlings suffer from being smothered by weeds. Since the growth of grasses is fastest during the rainy season, the first weeding should begin immediately after the planting is finished at the end of the rainy season. If the weeding is carried out too late, the seedling will not be able to survive the sudden exposure to light after the weeding and it will die.
Cutting grass and other vegetation is a less effective form of weeding, since the grass roots remain in the soil and keep competing with the roots of the trees. On sites where competing vegetation is less vigorous and where more weed-tolerant tree species have been planted, however, cutting weeds in a 1m-wide circle around each tree seedling is sufficient.
Weed control

2-3 weedings during the 1st year
1-2 weedings during the 2nd year

0-1 weeding during the 3rd year
If weeding is too late, the seedling
will die because of the sudden exposure
Grass-cutting on the entire site is also a way of harvesting the grass. It is recommended in areas where the grasses grow high and are hard-stemmed, and also when seedlings are small, because the light competition and physical damage of the tall grass can suppress seedling growth. It also helps to reduce the risk of bush fires. If grass is cut for fodder the nutritive value will be highest when the grass is young and green immediately after the rains, before flowering. If the grass is not carried away from the plantation and used it should be mulched around the seedling. If thick enough the mulching layer will suppress the further growth of weeds, reduce water loss and provide the seedling with nutrients. Mulching may, however, attract termites and rodents and should be avoided in areas where such damage is common.
Cutting the vegetation alone is not adequate on sites with heavy grass competition, when the seedlings are small and for some weed-sensitive species (teak, some eucalyptus species). Hoeing should also be done, preferably in dry weather. At least one square metre around the plant should be hoed.
A very effective way to ensure that the weeding is carried out well and that the seedlings are protected is to intercrop trees and agricultural crops for the first 1-2 years after planting. For a description see section 7.4. Tools required for grass-cutting are the same as for clearing. They are described in section 2. 1.
A sickle is an additional tool, useful for cutting soft stem grasses. It should be used if the seedlings are small and difficult to locate, because the cut is easy to control. The scythe is otherwise preferable since it permits work in an upright position. A sickle weighs about 0.3 kg and the length of the sickle blade is about 0.3 m. It is used with one hand and the cutting swing is made away from the seedling.
It might be necessary to remove climbing vines in moist and humid regions. The best method is to use a Y-shaped stick to push the vine up. The vines thus removed from the tree should not be cut, as they would sprout again, but curled up and deposited at the base of the tree.
Grass-cutting

Grass-cutting decreases competition
and provides fodder

Figure
Mulching:
- suppresses weedgrowth
- reduces waterloss
- provides nutrition
Often both grass-cutting and hoeing
is needed
Sickle
Removal of
climbers
6.2 Protection from grazing
Tree seedlings may also be harmed by animals. Cattle, sheep, goats and sometimes wild animals must be kept out of the plantation until the trees are big enough to withstand grazing. This problem is most acute in dry areas with sparse vegetation where animals turn to planted trees for food. Without the cooperation of the livestock owners protection will be difficult. It is therefore essential to discuss the problem very early during planning and to meet regularly after planting to sort out problems.
When bigger areas representing a large portion of the accessible grazing lands are being planted and where grazing is scarce, it might be necessary to divide the planting area into compartments and to plant them one at a time. The livestock is then allowed into the first compartment when the second one is being planted some years later, and so on. In this way the area where grazing has to be avoided is minimized. It may also be necessary to use species that are not readily grazed by the animals (for example prosopsis, ailanthus and some eucalyptus). If these measures are not sufficient, fences should be built before or during planting.
For smaller plantations fences can be built with branches cut from thorny trees or other suitable material to protect the plants for the first couple of years. However, these lands of fences require a large quantity of branches and may put an additional pressure on an already stressed forest or bushland.
Hedges of closely planted bushes and trees (live fences) can also be created. Thorny plants such as Cactus, Euphorbia, Aloe, Sisal, Acacia or Juniperus can be used. Species that can be grown from large cuttings are preferable. Live fences must, however, be planted some years before the trees are planted and be given time to reach a sufficient size to keep out the animals.
All types of fences have to be maintained. Where fences alone do not protect the plantation, a watchman can also be used to look after the plantation.
Protection from grazing
|
|
|
|
|
|
|
|


Hedges

Thorny branches
Bamboo fence combined with thorny
branches

Bamboo fence combined with hedge
Live
hedge
6.3 Fire prevention
Bush fires in planted areas are almost always man-made. Fire is used to clear land, to improve grazing and to chase away wild animals. Fires may also be caused by carelessness during charcoal burning and honey collection.
Prevention of fire depends to a great extent on information and extension work. An understanding of the value and benefits of the forest for all members of the community must be reached. Where the plantation to be protected does not belong to individual private owners or to the local community, the interest of the local population can be increased by sharing the produce of the plantation. This can be done in several ways. Local people can be given the right to collect non-wood products like grass, mushrooms, honey, etc. They can also be offered a share of the wood or other products from the plantation. To protect large areas of state forest plantations, local people can be given private wood-lots to form a protective belt around the state forest.
Firebreaks combined with a well designed road system may keep the fire from spreading. Firebreaks consist of corridors about 20 m wide that are kept without vegetation cover. Maintenance of firebreaks is simple but labour intensive. They must be cleared at least once a year at the beginning of the dry season. Controlled grazing or cutting grass for stall-feeding can be used to minimize the amount of flammable dry grasses in the forest. Controlled grazing can also be used for clearing firebreaks.
Plantation staff and peasant association members may be trained in fire control. Small fires might be extinguished with water or plantation tools such as hoes or spades. If a fire has spread over a bigger area, the only practical way to control the fire is to remove flammable fuel from the path of the fire by opening up corridors without vegetation (fire lines). Already existing fire lines such as firebreaks and roads can be enlarged. Large forest fires can be fought with the help of backfire. A backfire is started on a strong fire line and directed towards the main fire. A wide corridor will be burned and when the two fires meet they will die for lack of fuel. Backfiring techniques need a lot of labour and should only be used under the supervision of an experienced fire fighting crew since there is always a danger that the fire can spread away from the back of the fire, starting new main fires.
Fire prevention

Fire prevention depends upon
information
Share benefits of the forest

Firebreak

Fire fighting
crew
6.4 Protection from insects, diseases and rodents
Tree seedlings may also be harmed by insects, diseases and rodents.
Species liable to insects and diseases should be avoided. The best form of protection is to diversify the plantation, using various tree species. Treatment with pesticides or dipping of plants (i.e. planting seedlings treated with pesticides) may also be used. Some safety guidelines for the use of pesticides are given in section 9.5.
Rodents may cause damage to saplings, especially at high altitudes. The best form of protection from rodents is to keep the soil around the seedlings bare, i.e. well weeded. Rodents avoid bare soil where they are visible to birds of prey. Therefore, weeding limits the damage that can be done by rodents above the soil surface. Mechanical protection of the lower stem of young trees also works quite well. A suitable protection would be a split bamboo tube. The two halves of the tube are placed around the stem and tied together with a string. Protecting seedlings from rodents that damage the roots underground is more difficult. Traps, repellants or poisoning may be used.
6.5 Fertilizers
On poor sites a dose of manure or chemical fertilizer may be valuable. It should be applied during a rather dry period towards the end of the rainy season, preferably hi combination with weeding in order to avoid run-off or absorption by weeds. The simplest method is to apply about one tablespoon of chemical fertilizer in two small patches on each side of the tree, 15-30 cm from the stem, and hoe it in.
Protection from insects, diseases and rodents
Choose resistant species

A variety of species reduces risk of
damage

Protection from insects

Rodents avoid bare soil
Rodent protection with bamboo tube
Protection from rodents
Fertilizers
On poor sites fertilizer may be
used
6.6 Replacement planting
Even if the seedlings are of good quality, carefully planted and suitable to the site conditions, there will always be a number of seedlings which do not survive. Replacement or "beating up" is always expensive. Therefore it is necessary to decide carefully, whether replacement is required or not. This depends on the percentage of seedlings that died and on their distribution on the site.
Replacement will be necessary only if more than two in ten plants have died and only where at least two neighbouring seedlings have died. If the rate of failure is below 20 per cent, replacement will only have to be done if the failures are concentrated in particular areas of the site.
A method of establishing survival rates is described in Technical sheet 3. The survival count should be carried out at the end of the dry season following planting. Replanting is then done at the beginning of the rainy season that follows.
For replacement, big seedlings of the best quality should be planted at the beginning of the rainy season. If one person completes the whole replanting operation - carrying of the seedlings, digging the holes, planting the seedling - a minimum of time will be spent for walking and locating where planting is needed.
There might be a need for more than one replacement planting. But where after two replanting operations the area is still not adequately stocked, a thorough check is necessary as regards suitability of planting techniques, plant quality, weeding practices, choice of species and the quality of the work.
In the long run it is better to invest more in site preparation, planting and weeding than in replacement.
Replacement planting

Less than 20% dead ® no replacement
Less than 20 % but concentrated
® replacement

More than 20% dead ® replacement
|
Common mistakes in maintaining plantations Weeding too late. Not continuing weeding long enough. No, or insufficient, protection from grazing. Protection from grazing and fire relies too much on technical means such as fences and firebreaks rather than on reaching agreement with the local population. |
|
| ||||||||||||||||||||||||||||||||||||||||||||||||||
Special Public Works Programmes - SPWP - Planting Trees - An Illustrated Technical Guide and Training Manual (ILO - UNDP, 1993, 190 p.)
7. Planting trees outside woodlots and forests

Figure
In many areas land is scarce and it is not possible to set aside a plot only for planting trees. In such cases trees can often be planted in ways that do not require a separate plot. Trees may be combined with agricultural crops or grazing, they may form a shelterbelt, or be planted along roads and rivers or around homesteads. The selection of species, spacing and protection are different in these cases from those described for woodlots.
7.1 Trees in crop and grazing land
The most common form of agroforestry is simply to have trees scattered in grazing land or in fields. The trees can supply such useful products as food, fuel, fodder or gum. The trees can also provide shade, improve soil fertility and conserve soil moisture.
Agroforestry trees should have a light crown so that the shade provided is not too great for the agricultural crops. They should tolerate pruning (i.e. the cutting of branches) and regenerate well afterwards (e.g. Grevillea robusta or Cordia species) so that their leaves can be used as fodder and the shading of crops can be controlled. Preferably they should be able to fix nitrogen to improve the soil. The roots should be deep rather than close to the surface. Aggressive species that invade agricultural or growing land with root suckers or abundant regeneration from seed have to be avoided.
Seedlings may be planted or natural regenerated sprouts of desired species can be located and protected. Some simple protection measures for sprouts are shown on the opposite page. Protection of an entire field from grazing for some years will also allow the trees to regenerate naturally. Seedlings may also be planted. The spacing should be wider than in ordinary forestry plantations, maybe 10 x 10 metres.
Trees in crop and grazing land
|
|
= Abroforestry |
|


Good characteristics for trees for
agroforestry

Protecting natural generated sprouts
from
grazing
7.2 Alley cropping
When field crops are planted in alleys between hedgerows of trees and shrubs it is called alley cropping. The hedgerows provide fodder, green manure and mulch material. This is rather labour intensive since they have to be kept pruned throughout the cropping season to control shading and competition. Trees for alley cropping should fix nitrogen, coppice very easily after trimming and have leaves that are preferred by livestock or that decompose easily when applied as mulch. On dry sites competition for water may be so strong that alley cropping damages the crop. It should therefore not be practised on such sites.
7.3 Intercropping in rotation
When intercropping trees and crops, follow in sequence and combine restoration of the soil by trees with agriculture. The land is usually devoted to food growing for some years before trees are planted. Thereafter the agricultural crop is grown together with tree seedlings for some years until the shade from the trees interferes with the growth of the crop or the agricultural crop with the growth of the trees.
Alley cropping

Crops between hedgerows of trees and
shrubs
Intercropping as a rotation

Figure
7.4 Intercropping for tree planting
It is also possible to intercrop only for a few years while a woodlot or tree plantation is being established. This is known as the Taungya system. The trees benefit from the soil preparation and weeding for the agricultural crop. The farmer will protect both his food crops and the seedlings. As a result, the trees survive much better and grow much faster. This form of intercropping can be practised by individual farmers or by landless cultivators that lease the land for two or three years. In the latter case it is important that the responsibilities and rights of the farmer and the landowner are clearly explained and that a contract is drawn up. The lease usually specifies who is responsible for planting and caring for the tree seedlings. Each cultivator is allocated about 0.5 to 1.5 ha of land. Leasing procedures are often complicated by the fact that the local population distrusts the forest service or the state, because of bad experiences in the past (such as unclear ownership or expropriation without compensation).
After ground preparation food crops are planted. Normally annual crops are cultivated such as beans, maize or sweet potatoes. A particularly good combination are sweet potatoes cultivated on ridges, as shown in the figure opposite. Sweet potatoes can grow on relatively poor sites, they are quite shade-tolerant and the ridges provide excellent soil and water conservation. Perennial crops like bananas, papaya and cocoa can also be grown. Tree seedlings are planted at the same time, or one or two years after the food crop. Large tree seedlings should be used because they are sturdy and easily seen. Spacing between the rows of trees should be wider than for a normal plantation to delay the time when the canopy of leaves closes over and shades the food crop.
The raising of food crops continues until the shade from the trees prevents satisfactory growth. This may last up to four to five years depending on tree growth, initial spacing and the kind of food crops grown. The area is abandoned by the farmer when it is no longer suitable for growing food. Normally, he will already be working in a new area nearby. The farmer may also work several small areas at the same tune, clearing a new one each year.
Intercropping for tree planting

On own land

or leased land
Example for intercropping with sweet potatoes and trees

year 1

year 2

year
3
7.5 Shelterbelts
Shelterbelts or windbreaks are strips of trees and other vegetation that reduce the force of the wind. They are very important in areas with frequent high winds and windblown sand. Often they consist of several rows of shrubs and trees of different heights.
Shelterbelts are most effective if they do not block the wind completely, like a wall, but force it to slow down. If the wind cannot pass through the shelterbelt at all, it will try to pass underneath it or over the obstacle. If it flows over the shelterbelt, it produces turbulence which is harmful for the crops behind the belt. If it goes underneath, the belt acts like a funnel and the wind becomes very strong. Therefore choose large trees for the centre row. On each side of this row plant one or two rows of smaller species. Outside these rows shrubs or other vegetation can be planted to make sure that the wind cannot pass underneath the belt. Plant the trees with close spacing, e.g. 1-2 m apart.
The trees need to be able to stand up to the wind and to have flexible branches and medium dense crowns. The crowns should be long and narrow rather than spreading (the Casuarina species, for example, forms ideal windbreaks). The species should preferably be able to provide by-products. A well chosen mix will not only provide shelter from the wind but will also yield fruits, firewood, etc. If Shelterbelts are planted across grass and cropland where animals are grazing, it will be advantageous to plant thorny shrubs along the edges so that the shelterbelts can provide protection from livestock, like a live fence.
The shelterbelts should be planted perpendicular (at a right angle) to the direction in which the wind usually blows. The length of the zone protected is about 10 times the height of the shelterbelts. If large areas are to be protected, parallel shelterbelts should be planted. The spacing between the shelterbelts should then be 10-20 times the height of the tree.
Shelterbelts

front view

side view one row of shrubs three
rows of trees

Schematic representation

good shelter belt = moderately dense

shelterbelt too dense - causes
turbulence
7.6 Road-sides and river-sides
Land along roads, canals and rivers is often available for planting multipurpose trees and shrubs. When trees are grown individually or with wide spacing, they will grow much faster than in plantations because there is less competition. They can be a significant source of tree products. Trees will also provide shade and stabilize roadsides and river banks. Ownership of the land concerned is not always clearly or visibly defined. Land along the bigger roads, canals and rivers often belongs to the government or local communities. Before planting, ownership of the land, harvesting rights and responsibilities for management and protection have to be clearly defined.
Trees along the road should be planted so that they leave room for the safe passage of people, animals and vehicles. Trees should not be planted on the inside of a curve where they might block the view of oncoming vehicles.
Along waterways it is usually easy to establish trees, unless the banks are steep or rocky. If banks are flooded during the rainy season, the plant should be planted right after the rains to be well established before the next flooding. Species known to grow naturally close to water, and thus tolerating seasonal changes in water level, should be chosen.
To stabilize the banks, a strip of grass should be planted along the water. Further from the water a strip of shrubs and thereafter trees.
Roadside planting

Plant 2-3m from road

No trees on the inside of curves:
they block the view!

Trees only on outside of curves:
good view
Planting along waterways

Figure
7.7 Homesteads and public places
The household compound and public places (school yards etc.) are important areas for tree planting. Trees often add to the comfort, beauty and utility of the place.
It is practical to have trees around the house where they can be protected and tended with ease. Most people are more likely to benefit from a few trees planted in their home garden than from central woodlots or forest plantations. In many countries it is the women who are responsible for homesteads. Trees planted around the homestead might therefore directly benefit the women, a group which is often difficult to reach through tree planting projects.
The choice of species for homesteads and public places must be made by the people who will live in and use the areas. However, fruit trees and multipurpose trees are often preferred. Trees with noxious odours or irritating pollen (for example, the Croton species) should be avoided.
Homesteads and public places

Shade

Home garden

Tended with care
|
Common mistakes in planting trees outside forests Ownership, duties and rights not clearly defined. Advantages and harvest are expected too fast. Farmers get disappointed and stop caring for the trees. Expectations must be set realistically. Suitable species, such as fruit trees and agroforestry trees, are not available from nurseries. As regards leasing of land: Contracts are too complicated. The legal framework is not clear. |
|
|
| |||||||||||||||||||||||||||||||||||||||||||||||||||||||
Special Public Works Programmes - SPWP - Planting Trees - An Illustrated Technical Guide and Training Manual (ILO - UNDP, 1993, 190 p.)
8. Organizing the work

Figure
8.1 Planning
Well organized work and good planning are essential for the success of larger-scale plantations. Lack of planning and poor organization lead to delays, waste of time, poor timing, misunderstanding, irritation and, above all, plantations of poor quality at excessive cost.
To get the work to run smoothly, it must be made certain that:
- funding is ensured (often a cause for delay);
- plants, transport and manpower are available;
- appropriate tools and other materials are available;
- the workers are instructed;
- work is properly organized and coordinated;
- working conditions are safe and productive.
Productive work requires good leadership, fair and regularly paid wages, clean drinking water, food and camps where required, safety precautions and first-aid.
To make sure that all points have been taken into account, annual plans should be drawn up specifying the type and volume of work, the location, the timing of operations, the need for manpower, equipment and material, and the working method to be used. Costs and available means should be indicated.
Planning
Organization and planning are
essential
8.2 Workforce
The organization of the work depends on who will carry it out.
The planting workforce can be employed directly, or payed by a project or a company. The employers are then responsible for work organization, supervision and safety. A permanent skilled workforce is desirable for large, longer term plantation work. Forest workers are, however, often hired as casual labour, working only part of the year with forestry.
A contract can also be established with local groups, which are commissioned for a special task and payed after the task is fulfilled. In this case the work is organized by the individual group. The role of the forest service or the project is mostly to advise and to provide certain material. The cost of supervising is thus considerably reduced.
The planting may be carried out individually by the owner of the land and his/her family.
A group of people, for example a community, a school or an organization, may plant an area on common land for their own mutual benefit. In the latter two cases the landowner or the community contribute their labour without pay. It is then important that the long term tenure of the land is clear, as well as the distribution of benefits.
No matter which group does the work, it is essential to ascertain that enough suitable workers will be available for the various operations.
Workforce
Hired workers
Workers are employed
Contract is established with local
groups
Planting on private or common land
The work is carried out by the owner
of the land
Community planting of common
land
8.3 Labour requirements over the year
Labour requirements and labour availability have seasonal and long term variations. The peak season for agricultural activities often clashes with the peak season for forestry activities. In the case of larger-scale tree planting projects this can be a problem. As much work as possible should be completed outside the agricultural season (i.e. surveys, clearance, soil conservation measures, etc.).
An example of a form to use for planning the monthly labour requirements over the year is given on the opposite page. To get an idea you need to know which area will have to be worked, at what time of the year this work is due and how many workdays are needed to complete a task (clear one hectare, plant 2,000 seedlings, etc.). The latter is known as a work norm. A further explanation is given on the following page. Planting is the most critical activity as far as timing is concerned. It should always be carried out at the beginning of the rainy season. All the other operations should be planned around the planting.
To ensure an adequate supply of labour, sufficient pay, good working conditions and job security are essential. Sudden recruitment drives or large-scale labour redundancies must be avoided. For this, planning is needed.
Example: MONTHLY LABOUR REQUIREMENTS
|
Operation |
Area to be treated ha |
Worknorm wd/ha |
Total wd required |
Estimated no. of full time workers |
Time chart for operations and distribution of labour by workdays | |||||||||||
|
YEAR 1. |
J |
F |
M |
A |
M |
J |
J |
A |
S |
O |
N |
D | ||||
|
Survey |
35 |
1 |
35 |
1.5 |
35 | | | | | | | | | | | |
|
Clearance |
35 |
10 |
350 |
10 | |
130 |
130 |
90 | | | | | | | | |
|
Pegging out |
30 |
4 |
120 |
10 | | | |
40 |
80 | | | | | | | |
|
Micro catchments |
10 |
20 |
200 |
10 | | | | |
60 |
140 | | | | | | |
|
Planting |
35 |
25 |
875 |
30 | | | | | |
250 |
500 |
125 | | | | |
|
Weeding 1 |
35 |
20 |
700 |
30 | | | | | | | |
225 |
275 |
200 | | |
|
Weeding 2 |
35 |
15 |
525 |
26 | | | | | | | | |
100 |
125 |
300 | |
|
Total workdays - Year 1. |
2805 | |
35 |
130 |
130 |
130 |
120 |
390 |
500 |
350 |
375 |
325 |
300 |
- | ||
|
YEAR 2. | |
| | | | | | | | | | | ||||
|
Survival count |
35 |
0.5 |
18 |
2 |
18 | | | | | | | | | | | |
|
Replanting |
10 |
16 |
160 |
15 | | | | | |
120 |
40 | | | | | |
|
Weeding 3 |
30 |
4.5 |
135 |
12 | | | | | | |
45 |
45 |
45 | | | |
|
Total workdays - Year 2. |
313 | |
18 |
- |
- |
- |
- |
120 |
85 |
45 |
45 |
- |
- |
- | ||
8.4 Worknorms
A worknorm is the time it normally takes to carry out a certain operation. In forestry worknorms are usually expressed as the number of days of work (8-hours per day) needed to complete a certain task for 1 hectare. Worknorms are necessary for planning labour requirements but also for budgeting and for determining wages if piecework or task work are used (see section 9.3).
The worknorms for different planting operations differ widely and it is impossible to establish general worknorms. The time needed for planting work depends among other things on site conditions, the number, type and size of plants, the distance to the road, the quality of work required, tools and techniques, and the workforce (training and motivation). They can also differ because the effective workday may be shorter or longer than the standard 8 hours.
In light soil, for example, one worker may dig 80 holes in one day, while if the soil is stony and difficult he may be able to dig only 30.
The number of workdays needed per hectare also depends on the spacing chosen, i.e. the number of plants per hectare.
Examples of worknorms given on the opposite page might be used as a reference for initial planning. These worknorms originate from large-scale plantation and do not include stafftime.
Every large-scale planting project should establish its own worknorms in order to be able to plan in the best possible way.
As a minimum, productivity (wd/ha) should be calculated from the records of the previous season (numbers of hectares planted: workdays for each operation). Where possible, norms should be calculated separately for different conditions (dense and wide spacing; slope and flat terrain, etc.). Even better are direct observations in the field.
|
Worknorms (workdays/ha) |
Worknorms (workdays/ha) | ||
|
China, afforestation on steep slopes (15-30 degrees), bare-rooted seedlings, mostly poplars, spacing 2 x 2 m, 2,500 pl/ha | |
Malaysia, pine plantation, spacing 3.5 x 5 m, 700 pl/ha |
|
|
Site preparation |
|
Site preparation |
|
|
Terraces |
135-240 |
Pegging |
2-11.4 |
|
Planting holes |
210 |
Planting | |
|
Contour ridges |
45 |
Potted plants (including digging of holes |
20-35 |
|
Planting |
60 |
Stumps |
2.4 |
|
Seed treatment and sowing |
30 |
Replacement planting |
1.5-24 |
|
Maintenance |
|
Weeding |
13.7-29.6 |
|
Weeding |
45 |
Total |
37.2-100 |
|
Prevention - mice, disease and insects |
45 |
Nigeria, moist lowland forest, spacing 8 x 8 m, 156 pl/ha |
|
|
Protection from grazing |
45 |
Clearing |
11.4 |
|
Total (terraces, planting and maintenance) |
382 |
Collecting pegs Pegging |
1.94 |
|
Rwanda, SPWP, 1,000 pl/ha | | | |
|
Pegging |
2 |
Carrying (containerized seedlings - depot to site with headpans) |
2.3 |
|
Planting |
52 |
Planting | |
|
Total |
54 |
Potted plants (including digging of holes) |
5.7 |
| | |
Stumps |
1.2-2 hour/ 100 stumps |
| | |
Weeding Total |
3.5-14.5 |
| |
| |
28.8-38.8 |
1) Yingmin, W. 1985. A report on worknorms and operational efficiency in soil and water conservation and planting of trees and fodder crops in Xiji County, Ningxia Hui Autonomus Region China. Proceedings of an International Workshop held at Olmotony, the United Republic of Tanzania, 14-27 January 1985. ILO.(2) Information from a Special Public Works Project
(3) FAO. 1975. Plantation management procedures for large-scale plantations in penisular Malaysia.
(4) Allison C.E. & Egbuta L.U.. 1982. Standard times for operations in forest plantations in Nigeria. FAO.
8.5 Coordinating the work
The main work items in establishing a large-scale plantation are listed on the opposite page. Planting should start at the beginning of the rainy season. This date is therefore more or less fixed and inflexible. Dates for the other items have to be calculated backwards or forwards from the planting date.
Plants, tools and other materials can be ordered at the same time for all the plantations in the area. Transport of plants and, if needed, of workers should be coordinated. In many plantation programs transport problems are one of the major causes of work delay.
Manpower needs, recruitment and a training program should be planned at the management level. The building up of a skilled labour force with sufficient pay and job security is one of the best ways to ensure high quality and productive work.
When planting operations are to be carried out on a number of sites one particular year, sites in the same area or along the same road or trail should be given priority. This will facilitate the coordination of the work and efficient management. after before
Figure
8.6 Tools and equipment
The importance of suitable tools and equipment can not be over-emphasized. "Suitable" means "adapted to the work and the workers". Inappropriate, broken and poorly maintained tools and equipment slow down the work and may cause injuries.
It is preferable to provide the workers with the appropriate tools rather than asking them to bring their own several-purpose, agricultural tools to the workplace. People from different areas, males and females differ in body size. The tools should be adapted in size and weight to the different body sizes of the workers. Providing good tools is a relatively inexpensive way to raise productivity. Tools can be issued every morning and returned in the evening, or they can be issued for longer periods. A record should be kept of which tools are issued and to whom. An inventory of all tools and equipment should be made regularly. It is important not to reissue damaged or badly worn tools to the workers. Material and tools for maintenance should be available at the site.
With time and heavy use, blades will become blunt, will chip and even break. Blunt or broken blades affect productivity, apart from being uncomfortable to work with. Regular maintenance is important.
Loose handles are dangerous and should be fixed immediately. Raised safety grips on the handles reduce the force needed to guide the tool and prevent tools from slipping out of the hands. Repair or maintenance can be done by sharpening the blade with a file or, when the blade is extremely damaged, by cutting back the blade and then sharpening it again.
Check regularly that tools are in good working order. Supervisors play a major role in observing if the tools are suitable for the different tasks, if they are properly maintained and sufficiently durable.
Tools and equipment
Tools should be adapted to the body
size of the workers
Tools should be maintained fix handles

1. Use a conical handle
2. Saw a small slot in the end of
the handle
3. Push the blade in place
4. Hammer a wooden wedge into the
slot

Handles should have raised safety
grip
Sharp
blade
8.7 Supervision and control
Supervisors and foremen are the key persons. They should ensure that the work runs smoothly in the field.
The bigger the workforce, the greater the need for supervision. One foreman is usually needed for ten to fifteen workers and one supervisor, usually a technician, has to be appointed for each worksite. The supervisor is responsible for organizing the workers, for giving clear instructions on the work to be done, for motivating and encouraging workers to perform well, and for controlling and correcting the work. The supervisor must know the methods and techniques used arid be able to demonstrate them.
The supervisor and/or the foremen should be responsible for controlling the quality of the work, the presence of the workers, instruction and training, the work achieved and the stock and maintenance of tools. The supervisor should also be responsible for checking that safety rules are kept, that working conditions are appropriate and that first aid equipment is available at the worksite. To effectively supervise the work, inspections have to be carried out on a regular basis at least once or twice a day. The work should be regularly checked and corrected. The better the control, the easier it is to correct problems when they are still minor.
To improve planning and coordination of the work, there must be regular feedback from the supervisors on the sites to the planners.
Supervision and control
Responsibility of the
supervisor
8.8 Records to keep
Information about performance and about the cost of the different operations is essential for future planning. This information will help to improve work organization and forestry activities. A number of records has to be kept.
These include:
- daily worker attendance sheets and payrolls;
- records on silvicultural operations completed and costs (number of workdays/ha and other costs);
- records on inventories of plant performance (for different species and provenance).
A form summarizing performance and costs is given on the opposite page as an example. On this sheet it can be seen that that the total cost forecast agreed rather well with the actual cost. It can also be seen that pegging was carried out on only two-thirds of the area planned and that micro-catchments were constructed on a bigger area than planned. This might be taken into account for planning the next plantation.
The first part of the plantation plan is filled out at the planning stage (page 21). All operations and vital information should be added to this form and the associated map. A form containing the information for a two year old plantation is shown on the next page.
A copy of the plantation record, or for larger plantations a specification for each task, should always be available to the supervisor at the site. This should contain information on the type of activity, the scale and timing, the number of workdays planned, worknorms and the tools needed.
SUMMARY OF PERFORMANCE AND COSTS (suggested contents)
|
TOTAL AREA: ____ |
YEARS: SITE: |
|
SITE: ______________ |
|
|
Operations |
Unit of Measurement |
Quantity |
Work days |
Cost (15/Rp/workday) |
Cost | ||||||
| |
|
Forecast |
Actual | | | | |||||
|
| |
ha |
no. |
ha |
no. |
Forecast |
Actual |
Forecast |
Actual |
Rp/ha |
unit |
|
Brash clearing |
(ha) |
35 | |
35 | |
350 |
350 |
5250 |
5250 |
150 | |
|
Pegging out |
(ha) |
30 | |
20 | |
120 |
93 |
1800 |
1395 |
70 | |
|
Micro catchments |
(ha & no.) |
10 |
6250 |
15 |
9400 |
200 |
330 |
3000 |
4950 |
330 |
0.5 |
|
Planting |
(ha & no.) |
35 |
21875 |
30 |
19000 |
875 |
800 |
13125 |
12000 |
400 |
0.6 |
|
Weeding 1 |
(ha) |
35 | |
30 | |
700 |
712 |
10500 |
10680 |
356 | |
|
Weeding 2 |
(ha) |
35 | |
26 | |
725 |
509 |
7875 |
7635 |
294 | |
|
Weeding 3 |
(ha) |
35 | |
20 | |
160 |
124 |
2400 |
3600 |
180 | |
|
Replanting |
(ha) |
10 | |
10 | |
160 |
172 |
2400 |
3600 |
360 | |
|
Overheads | |
| | | | | |
6000 |
6000 |
170 | |
|
Wet pay, Sick pay |
| | |
| |
100 |
123 |
1500 |
1845 |
53 | |
|
Total |
3390 |
3213 |
53850 |
56955 |
COST/HA 1627 | ||||||
Plantation plan
|
Village: Kovali |
District: Tiruchirappalli | |||
|
Site name: Batcha plain |
Area: 35 ha | |||
|
Owner: |
Kovali village community | |||
|
Type of plantation: |
Soil conservation/fodder | |||
|
Previous vegetation: |
Waste land with scattered bushes (Cassia and Prosopis) |
|||
|
Terrain: |
Flat | |||
|
Main soil type: |
Sandy loam | |||
|
Method of clearing: |
No clearing needed | |||
|
Risks/needs for protection: |
Grazing, termites | |||
|
Transport: |
Truck hired from Mr. Shultz | |||
|
Tools required: |
20 planting hoes (ordered 12.1.93, received 4.3.93) | |||
|
Workdays required: |
See attached workplan | |||
|
Date of planting: |
20 May to 26 April 1993 | |||
|
Nursery of origin: |
Keela Kolathur village nursery | |||
|
Spacing: |
4 x 4 m | |||
|
Water conservation measures: |
None | |||
|
Fertilizer: |
Not applied | |||
|
Species and number of plants: |
Local name |
Botanical name |
| |
|
|
Velvel |
Acacia leocophloea |
12,000 | |
| |
Vagai |
Albizia lebbek |
4,000 | |
| |
Usilam |
Albizia amara |
6,000 | |
| | | |||
|
Seed lots No.: |
Acacia leocophloea |
A 12 | ||
| |
Albizia lebbek |
D 16 | ||
| |
Albizia amara |
E 24 and E23 | ||
| |
| |||
|
Weeding 1: |
5 - 15 June 1993 | |||
|
Weeding 2: |
3 - 12 August 1993 | |||
|
Weeding 3: |
10 - 14 Feb 1994 | |||
| |
| |||
|
Survival count: |
15 Feb 1994 | |||
| |
Overall survival: 85 % Velvel 80 % | |||
| |
Vagai 87 % | |||
| |
Usilam 92 % | |||
|
Beating-up: |
28 May 1994 - Velvel - 400 plants | |||
| | | |||
|
Average plant height: |
Acacia leocophloea |
2 year - 20 cm | ||
| |
Albizia lebbek |
2 year - 60 cm | ||
| |
Albizia amara |
2 year - 10 cm | ||
|
Protection applied: |
One guard employed by the village (contract attached) |
|||
|
Common mistakes in organizing the work Arrival of funds delayed. Insufficient planning leading to delays in the work due to, for example, lack of transport or lack of manpower. Appropriate tools not available; use of poorly maintained agricultural tools results in low productivity. Workers not motivated (by fair wages, training and information on the objective of the plantation). Information from records, monitoring and work-studies not continuously used to improve work organization. |
|
| ||||||||||||||||||||||||||||||||||||||||
Special Public Works Programmes - SPWP - Planting Trees - An Illustrated Technical Guide and Training Manual (ILO - UNDP, 1993, 190 p.)
9. Working conditions

Figure
Productivity can be raised substantially through relatively small investments to improve working conditions. Working conditions include:
- hours of work and rest;
- nutrition and amenities;
- wage systems;
- training, job content and labour-management relations;
- safety.
9.1 Hours of work and rest
Planting is heavy and strenuous work. Rest should therefore be taken for five to ten minutes every hour. Shade and shelter from rain and strong winds should be provided on the planting sites for use during breaks. If it is hot, work should be carried out during the cooler morning hours or in the afternoon.
Working conditions

Working time

Nutrition and amenities

Wage system

Training

Safety

Shelter during breaks

Avoid
heat
9.2 Nutrition and amenities
Safe drinking water should be available in sufficient quantity, especially during hot weather. Water should be drunk frequently in small quantities. In hot surroundings it may be necessary to drink 5 litres or more during a day. To replace salt lost by sweating, 1 gram of salt may be added to one litre of water.
Planting is heavy work and the worker will need food at regular intervals. Workers suffering from malnutrition cannot sustain this kind of work. If the workforce is large enough, traditionally acceptable food should be provided on site. This will ensure that the workers receive a balanced diet suitable for their work. This will raise productivity and decrease the number of accidents and absenteeism from work. It may be difficult to introduce a change of eating habits because of traditional customs or for religious reasons. However, workers usually respond favourably to measures for the improvement of food supplies.
If possible, transport should be provided for workers between the dwelling and the plantation areas, to save time and energy if the worksite is distant. Loads carried over longer distances should not exceed 10-15kg.
The workers should be provided with appropriate tools (see page 124). They should be equipped with adequate footwear and protection from the rain. A wide-brimmed hat provides protection from the sun.
Nutrition and amenities

Sufficient water supply

Drink frequently

Add salt

Figure
Regular food supply is needed for heavy work

Transport of workers

Tools adapted to body size
Adequate clothing

Shoes

Wide-brimmed hat
Camps
When too much time would be required for transport to a distant site, it is better to build camps near the worksite.
Camp sites must be carefully located in healthy, pleasant surroundings. They should be some distance from noisy, dusty roads and in a well-drained place.
Adequate water supply is crucial. Piped water to which taps and showers can be connected is preferable.
Sleeping quarters must provide sufficient air and floor space and be screened from mosquitoes.
Kitchen facilities, which may be combined with a canteen, should be kept separate. Food storage and preparation require greatest care. There should always be a plentiful supply of clean drinking water.
Proper toilet facilities and adequate disposal of waste and sewage are indispensable to prevent the spreading of diseases.
Remote camps should have a health dispensary.
Camps

Adequate water supply

Sleeping quarters in pleasant
surrounding

Kitchen facilities

Canteen

Adequate toilet facilities and waste
disposal

Dispensary
9.3 Wage systems
Where no heavy machinery is used, about three-quarters of the cost of establishing a plantation costs for wages. Fair wages are a strong motivator for work and an essential requirement for job satisfaction. Wages can be determined in different ways. The different forms have a strong influence on productivity and the quality of work.
Time wages are payment according to the time worked. They may be used for foremen and motivated workers and for all work tasks for which worknorms are difficult to establish, such as transport of plants or plantation maintenance. It is also probably more appropriate to pay wages on a time basis for operations where quality is more important than speed.
In task work a wage is paid once a specific task has been accomplished. This enables the. worker to go home earlier and to do other work.
Piece work means that the worker is paid for a certain output (e.g. per 1,000 seedlings planted or per hectare weeded). The piece rate (worknorm) is the payment per unit output. Piece work enables the worker to increase his earnings by working harder. Productivity is usually higher than under time-based wages. The piece rate has to be set carefully to motivate the worker to be productive without being careless. The quality of the work, which is crucial for the survival of the trees and the success of the plantation, must not decrease. To consider quantity more important than quality when planting trees is expensive in the long run. The risk of an increased number of accidents or excessive strain should also be taken into consideration.
When a bonus system of payment is used, the salary can partly be based on the time worked and partly on quality of the work, e.g. the survival of the plants. Incentive wages make the work of the supervisor easier as the worker is self-motivated. The supervisor becomes more of a quality controller.
Wages

Time wage

Task wage

Piecework

No bonus

Bonus
Manner of payment
Payment need not necessarily all be made in cash. It can also be partly in kind, often in the form of food. Usually food is given in the form of rations for the household but it could also be in form of free meals on the worksite. International labour standards state that 50 per cent of the wages or more should always be payed in cash. This will ensure that workers are able to meet then: non-food needs.
To support a large-scale plantation programme, big amounts of food are brought into an area. If workers have to sell substantial quantities of this food to get cash, this may influence the price of agricultural products and be a threat to the agriculture in the area.
Other forms of payment in kind are less common but may be very attractive to the workers. These could include good tools and agricultural implements, seed material, and so on, to which the local population might not otherwise have access.
Payment in kind

At least 50 % of the wage should
always be payed in cash

Distribution of food rations

Food distribution at
worksite
9.4 Training, job content and labour-management relations
Training of workers
Instruction is important. The quality of planting improves when workers are well instructed and well motivated.
Basic instruction and training should be carried out in small groups so that activities can be well explained and shown in detail. It should start early so that no time is lost when the planting season begins. The training should include general information on the objective of the plantation. The training programme should be designed to update the skills of the workers and foremen regularly. No matter how experienced the workers are, instruction in the correct techniques should be repeated every season.
Instruction should be practical and consist of five steps: explanation, demonstration (by instructor), imitation (by the trainee), correction (by instructor), practice and improvement (by trainees). Common mistakes should be mentioned and opportunities for questions given. Experienced workers have often found better ways to do a job. They should be encouraged to contribute their knowledge. When new methods, tools or equipment are introduced training is particularly important. Through training, the need for the changes can be explained and the new methods learned.
Everyone involved in the operations should know where his/her responsibilities begin and end. If everyone is sure of the contents of his/her job, the work will run more smoothly. The training of foremen should include safety aspects and first aid.
With competent workers, job rotation and job enlargement are possible. In job rotation, two teams or two workers change jobs at regular intervals, e.g. distributing seedlings, digging holes and planting. In job enlargement, a larger number of different tasks is given to the worker or the team, e.g. planning, digging holes and planting. This makes the work more varied and interesting and reduces the need to spend prolonged periods in unfavourable working positions and/or carrying heavy workloads.
Training of workers

Small group instruction

Practical demonstration

Practice

Discussion, questions and ideas

Different training steps
Job rotation: changing jobs at regular intervals

Job enlargement: a larger number of
different tasks are carried out by one worker
Labour-management relations
For planting work temporary workers are usually hired. It is essential to explain carefully all the general working conditions: who is responsible, the, duration of working time, how the wage is calculated, possible entitlement to social benefits, the basic safety requirements, and the long-term purpose of the work.
Mutual understanding and an open dialogue between management, supervisors and workers are the basis for efficient work and satisfied workers. If two-way communication exists between workers and management, the work needs less supervision and there is greater flexibility in work organization.
In many developing countries forestry and agricultural workers do not belong to a trade union which settles basic labour matters by means of a collective agreement. In the absence of trade unions, workers on large-scale projects may form a workers' council and select a spokesperson to discuss with a representative of management the problems which may arise.
Labour-management relations

Temporary workers are hired

One-way information

Less supervision with open two-way
communication
Spokesperson

Spokesperson for larger-scale
projects
9.5 Safety
First aid
Planting is often carried out in remote areas with limited access to medical help. All foremen should undergo instruction in first aid. At each worksite a first aid box should be available, containing adhesive plaster, bandages, sterile compresses, triangular bandages, safety pins, a pair of scissors, forceps, a disinfectant and a short first-aid guide written in the local language.
Minor open wounds should be dressed with adhesive plaster to prevent infection. Triangular bandages are used to support injured limbs or to dress other parts of the body.
In the case of a larger open wound which bleeds heavily, the wound should be covered by sterile compresses. A pressure cushion should be placed on top (a roll of bandage, a small piece of bark or wood, or a small, smooth stone). This should be tightly fixed with a roll of bandage or a triangular bandage, and the injured part of the body should be raised high.
Broken limbs should be fixed by means of splints.
Transporting severely injured persons to the roadside must be done with the greatest of care. Stretchers for transport can be made from wooden poles (or long tool handles) and plastic sacks or jackets.
First aid

First aid box

Adhesive plaster

Triangular bandages

Dressing open wounds

Raise injured part high

Fix broken limbs by means of splints

Stretchers for transport made from
sacks or jackets
Using chemicals
If chemicals (insecticides, pesticides or herbicides) or chemically treated plants are being used, they must be handled with care and used correctly to avoid injury to people or the environment. The workers must be made aware of the risk of poisoning. Protective clothing (mask, apron, rubber gloves and boots) should be supplied to all people handling and applying chemicals and the following basic rules must be observed.
- Bare skin should never come into contact with the chemicals.- Do not eat, drink or smoke when applying pesticides.
- Always spray in the direction in which the wind is blowing.
- Change gloves often and wash gloves every day.
- Clean sprayer and containers after work; wash hands and face with soap.
- Do not spray chemicals close to lakes or rivers.
- The packaging in which the pesticides came should be destroyed and under no circumstances should it be used for other purposes.
- Store chemicals out of the reach of children and animals.
- Symptoms of poisoning are: dizziness, headache, nausea, vomiting, blurred vision, watering of the eyes and tiredness. If one of the symptoms occurs, immediately stop working and rush to the doctor.
- If medical attention is needed, show the doctor the label of the pesticide package.
Using chemicals

Protective clothing

No eating, drinking or smoking

Spray in wind direction

Cleanliness

Destroy packages

Store safely

In case of accident, show the doctor
the label
|
Common mistakes with regard to working conditions Insufficient training on safety and the ergonomic aspects of the work. Poor working conditions and malnutrition leading to low productivity. |
|
| |||||||||||||||||||||||||
Special Public Works Programmes - SPWP - Planting Trees - An Illustrated Technical Guide and Training Manual (ILO - UNDP, 1993, 190 p.)
Appendices - Technical sheets
Appendix 1 - Surveying and mapping of large planting sites

Figure
Basic forest surveying and mapping is needed for efficient planning and management in reforestation. Information on the area is gathered and a sketch drawn in the field. The final map is completed in the office.
1. Recording of field data and drawing of field sketch
To collect and record the field data, a box compass is needed and sheets for field notes should be prepared. Try to get hold of maps and aerial photographs of the area, on as large a scale as possible. This will make the work easier.
The field work can be divided into three main areas:
(a) General orientation.
(b) Gathering of field data.
(c) Drawing the field sketch.
(a) General orientation
First, acquire a general knowledge of the area. Consult maps, note key points such as forest zone corners, rivers, roads or trails. Familiarize yourself with the terrain by walking around it and get an overview of the variation in site conditions.
Surveying and mapping
General orientation

1. Consult map

2 Walk around
Gathering field data
Compass

Aiming
Drawing the map

Protractor

Drawing
(b) Gathering field data
When you have a general overview of the area, start gathering the field data. Choose a starting point (point 1) that is easy to relocate and describe. Note it on the sheet.
Example: Point 1 - Corner road and plantation, big Acacia tree, 60 cm in diameter.
Now you have to use the compass. A second point (point 2) along the side you want to measure has to be chosen. Always choose a clear landmark to point the compass at - for example, a characteristically shaped tree or a rock.
Occupy point 1, facing the direction of point 2. Hold the compass steady in both hands with your elbows against your body. Then sight point 2 by pointing the front sight of the compass to the landmark chosen as point 2. When the needle stops swinging, read the bearing to the nearest degree. Record the compass reading in the column provided in the field note sheet in line with point 1-2.
When using the compass, make sure that it is free from the effects of magnetism due to iron objects carried by yourself or in nearby surroundings. Otherwise you will get false readings.
Measuring the distances between the points can be done by pacing. The number of paces for 100 metres has to be known so that you later can convert the number of paces recorded into metres. The pace length is individual and must be measured for each person. For exact maps, a tape chain or a rope with metre graduations can be used for measuring. Note on the sheet the number of steps taken to cover the distance. Describe easily defined points and corners in the field note under the column "note". For example: Stone 1 x 2 m, 1 m high, east bank of river.
Survey field notes - suggested outline
|
Location: _________ |
District: ______________ |
|
Plantation: ________ |
Date inspected: ________ |
|
Area: ____________ |
Inspected by: __________ |
|
POINT |
COMPAS READING (degrees) |
DISTANCE |
NOTES | |
| |
|
Paces |
Metre |
|
|
1 |
- | | |
corner road/plantation acacia tree 60 m |
|
1 -2 |
334 | |
150 |
heavily eroded area |
|
2-3 |
356 | |
210 |
big stone 4x8 metre |
|
3-4 |
360 | |
250 |
dry hilly area |
|
4-5 |
360 | |
300 |
after 140 m, high grass |
|
5-6 |
265 | |
250 | |
|
6-7 |
256 | |
100 |
40-100 metres wet |
|
7-8 |
181 | |
200 |
high grass, 10 m crossing path |
|
8-9 |
182 | |
400 |
termites, high grass after 310 m |
|
10- 11 |
100 | |
100 |
30 m river (no problems crossing) |
|
11 - 12 |
177 | |
360 |
eroded area after 130 m |
|
12- 13 |
136 | |
110 | |
|
13- 1 |
214 | |
320 |
along the road |
| |
| | |
|
|
| | |
| |
| | |
| | |
| |
| | |
|
|
| | |
| |
(c) Drawing the field sketch
At the same time as you collect the compass bearings, trace a field sketch. Orient the sketch so that the top of the map indicates the North.
In the field sketch, mark the starting point as point 1. Mark point 2 and draw the line between point 1 and point 2. This is just a field sketch and there is no need to be exact but try to use a convenient scale (do not make the sketch too small) and to make the line more or less follow the direction in which you are going (the compass bearing). Then indicate the details of the area traversed.
As you proceed to the next station, take note of and indicate carefully the vegetation cover and natural land marks you come across. If you come across roads, trails streams, take a compass bearing of their direction. Mark them in the sketch with arrows.
Show the approximate extent of different vegetation covers by drawing light lines. Use a square on the sketch to indicate corner points.
Large areas may be divided into numbered compartments of 10-20 ha, and sub-compartments of 1-3 ha, to facilitate orientation, planning and management.
It is preferable to subdivide areas according to natural features (rivers, ridges), existing roads or tacks, and distinctively different ground cover (rocky areas, swamps, rich vegetation, poor vegetation).
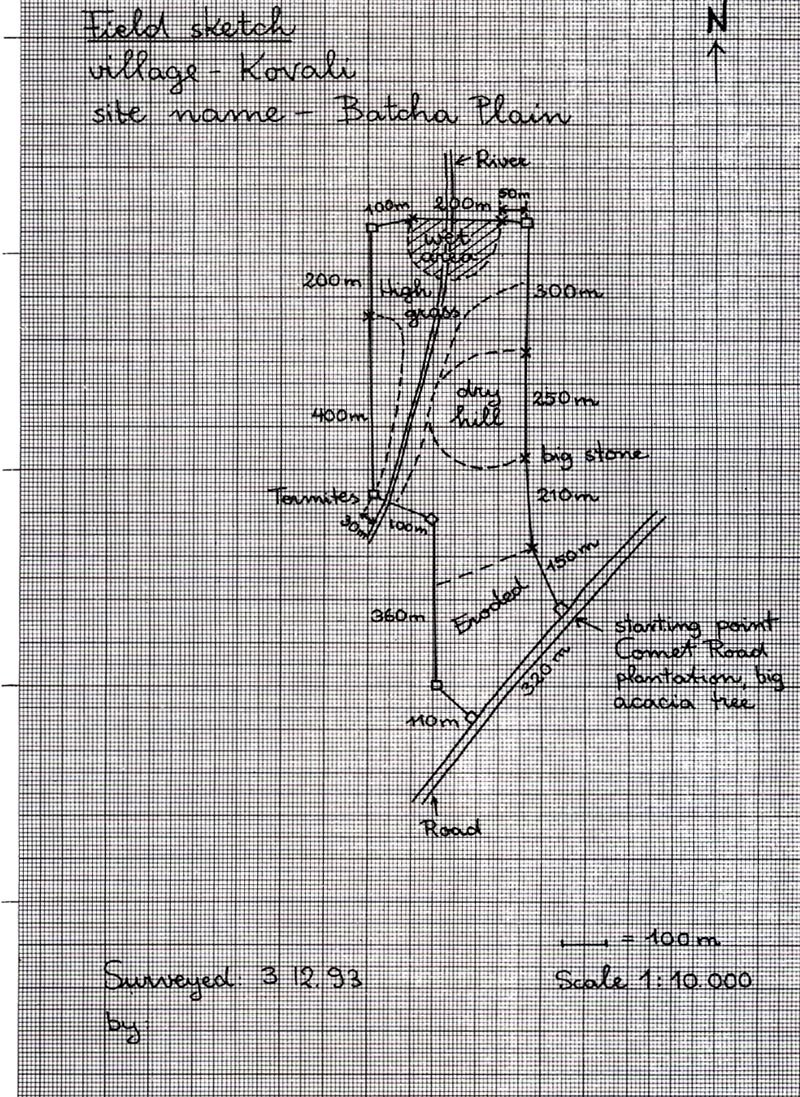
Figure
2. Tracing the final sketch
Now the rough field sketch should be turned into a more exact final sketch using all the information collected.
(a) Decide the scale of the map.
(b) Plot the map.
(c) Correction of the sketch.
(d) Determining the area.
(e) Add the details.
(a) Decide the scale of the map
To produce a map of a convenient size, the actual measurements on the ground have to be reduced to a certain scale. According to the scale chosen, the map is a projection in proportion to the reality.
The scales most commonly used in forestry are 1:5,000, 1:10,000 and 1:20,000.
If the scale used is 1:5,000, 1 cm on the map represents 50 m on the ground and 100 m on the ground represent 2 cm on the map. If the scale used is 1:20,000 then 1 cm on the map represents 200 metres on the ground and 100 metres on the ground represent 0.5 cm on the map. The smaller the scale, the bigger the resulting map of a certain ground measurement.
Select an appropriate scale so that when plotted, the map is well contained on the sheet and the details can be clearly seen.
(b) Plot the map
Use graph paper. Always consider the top of the plotting paper as North. In the upper right hand corner of the sheet, place an arrow pointing north and the scale adopted for the map.
Examine the field notes and the field sketch to determine the length and the general direction of the surveyed area. Thereafter decide where on the sheet you should start so that the sketch is placed more or less at the centre.
To transfer the bearings measured with the compass onto the sheet, a protractor is eded. There are two kinds of compasses. One divides the circle into 360 degrees, the her into 400 degrees. Be sure that the protractor has the same number of degrees as the compass used.
Mark point 1 with a dot on the plotting paper and place the protractor so that point p coincides with the dot.
Then mark the reading or bearing by a light dot called a "guide dot". Place a ruler with the "0" graduation of the scale over point 1, and its edge touching the guide dot. Plot the distance between point 1 and 2 according to scale adopted.
The procedure is repeated until all the stations of the survey are plotted. Indicate the corner stations by enclosing them with squares.
(c) Correction of the sketch
When plotted, the final line seldom closes the area completely, because of errors in taking the bearings and measuring distances. When correcting this, point 1, the starting point, remains fixed, and the other corner stations have to be adjusted.
One method of deciding on the adjustment is to draw a straight, horizontal line AB. The length of this line should equal the total length of the measured sides of the area. Use the same scale as used when plotting the map - e.g. 1:20,000. On this line, mark off corner stations from point A at intervals equal to their respective plotted distances. At point B draw a perpendicular line equal in length to the gap between the first and last station when plotted "y". This line is called BC. Then draw the line AC. Erect lines from every point (each indicate one corner station) to line AC. These lines determine the distances by which the stations will have to be moved in order to close up the area.
The broken line figure at the foot of the opposite page is the first sketch plotted. Draw from the corner stations, light lines parallel to line "y". Along these parallel lines the stations are moved downwards, and the distance is determined for each point above (the distances between AC). The adjusted stations in the figure are connected by a solid line which now represents the area surveyed.
In this example the stations had to be moved downwards. If the last station on the sketch ends up below the starting point they will have to be moved upwards.

Figure
(d) Determining the area
The sketch is drawn on graph paper, which is divided off into squares. To determine the area, count the number of squares representing the plantation inside the area. The portion of divided squares is estimated and added to the area of whole squares. If the scale is 1:5,000 and the size of the squares is 0.5cm by 0.5cm, one square equals 625 square meters (25x25 meters). Sixteen squares would make one hectare.
(e) Add the details
Transfer all important details from the field sketch to the final sketch. Show the different vegetation covers by light lines. Indicate them by using abbreviations or with different coloured pencils.
Explain all signs and colours used to avoid misinterpretation.
Final
map
Appendix 2 - Laying out and preparing soil and water conservation structures

Figure
In order to be efficient conservation structures have to be spread over an entire slope. All structures should be built along the contour lines. Otherwise the flow of run-off water will be concentrated and the structures damaged or destroyed.
Finding the contour lines
It is impossible to find the contour lines by eye. A simple and practical way to find them is to use a hosepipe water level. This method requires three workers.
Take two stakes, sticks or poles about 2 metres tall and mark them halfway with a series of lines one quarter of a centimetre apart. Tie the open ends of a narrow transparent hosepipe, 10-20 metres long, to each of the poles. Fill the hose with water. Water is added or tipped out until the water level lies between the marked lines on the poles. All air bubbles have to be expelled.
Whenever the bottoms of the two poles are level, the water in each end of the hose will reach the same mark on the poles. These places should be marked with sticks. By moving one of the poles to a position in which the water level in each end of the hose is the same, the contour line may be staked out.
The contour lines can also be found with the help of a water level. Fix a rope (about 10m long) to each end of a pole (at 100cm above ground level). Mark the middle of the rope with a knot. Hang the water level in the middle of the rope. Place the poles so that the water level shows that there is ne elevation. Mark with stakes.
Finding contour lines
Pole moved until water reaches mark
Open ends of transparent hose tied
to stakes

stakes level

stakes not level

Using water level
Microcatchments
The size and layout of microcatchments varies according to rainfall and soil type. Where rainfall is high, a large number of smaller catchments should be used to collect enough water but to avoid overflowing. In dryer areas the catchments need to cover a larger area in order to collect enough water to sustain the trees during the dry season.
Microcatchment areas range from about 25 square metres in areas with 400 mm annual rainfall to about 100 square metres in areas with about 200 mm annual rainfall. In areas with over 500 mm of annual rainfall microcatchments should generally not be used because of the risk of overflowing. The catchments are constructed from loose soil and stones.
Triangular microcatchment
A triangular microcatchment is made of V-shaped bunds. They work best on moderate slopes (3-5 %).
Two contour lines have to be established. The tips of the V-shape should be placed on the upper contour line and the corner on the lower. Dig a pit in the corner of the V-shape. In areas with between 200-400 mm rainfall, the pit should be about 2.5 x 2.5 metres wide and 40 centimetres deep.
Use the soil from the pit to construct the bunds. They should be 5 to 10 metres long and about 25 centimetres high. Compact the bunds well.
Plant the seedling in the corner of the pit at the base of the bund.
Microcatchments

The size and layout vary according
to rainfall and soil type
Figure

Triangular microcatchment
Semicircular microcatchments (half moons)
The tips of the semicircular microcatchments should be on the contour line. The radius should be about 3 metres and the tree should be about 1 metre uphill from the lowest point in the semicircle. The catchments may be linked together by channels in the shape of "fishbones" (see opposite page). They will channel the water towards the seedlings.
Semicircular bunds (half moons) can also be constructed around existing trees. In dry areas tree species often become like bushes as a result of grazing and lack of water. They will, however, often start to grow into trees when provided with water, pruned and protected from grazing.
Contour ridges
Contour ridges are ridges dug out of the hill slopes along the contour lines. They are used in heavy soil with low permeability. Proper spacing of the ridges is important. If the ridges are spaced too far apart, they will be washed away.
Dig a shallow trench, 5-15 centimetres deep, along the contour line. Compact the earth, preferably mixed with stones, to a ridge 30 centimetres high on the downhill side. The barrier can be strengthened by means of branches and other material secured with stakes.
Semicircular microcatchments

Natural regeneration
Fishbone water catchment
Contour ridges
Figure
Terraces
Terraces are strips levelled for tree planting along contours. They are mainly used on rather steep slopes (more than 20 %). Usually they are constructed with about 2.5 m vertical intervals. A soil depth of at least 0.5 m is needed. For forestry plantations narrow level strips along the contour lines are normally sufficient. Wider terraces are expensive to build, as they require a considerable amount of manpower or heavy equipment, such as bulldozers. Wider terraces should only be built if the area will also be used for crops or grazing.
1. First find the contour lines and mark them with pegs.2. Remove the topsoil and save it above the terrace. Mixing fertile top soil with infertile subsoil should be avoided.
3. Dig the step. Place the excavated material downhill to extend the terrace.
4. Replace the fertile topsoil.
On wide terraces it may be advantageous to mix trees with crops. The trees can be planted along the edge or at the toe of the terraces, while crops can be grown in the centre. In dry areas the trees will grow better along the toe, which is the wettest section of the terrace. On steep slopes where narrow terraces have to be constructed, fruit trees may be preferable.
Terraces

1. Mark contour lines with pegs

2. Remove top soil, save above
3. Excavate
4. Replace topsoil
Terraces with trees and
crops
Appendix 3 - Survival count

Figure
Replacement planting is an expensive measure. The cost per seedling is double or triple compared with the first planting. Therefore it is necessary to decide carefully if replacement is needed or not. This is done by calculating the survival rate.
Survival is difficult to estimate by simply looking at a plantation site. As looking at each and every seedling planted would be extremely time-consuming, the survival of a portion of the plants is checked. The check should include all sections of the plantation (not only the one closest to the road). The best procedure is to check a number of rows equally distributed across the planting area. In areas of less than 2 hectares, you should sample every 5th row and in areas of above 2 hectares you should sample every 10th row.
For every spot in the row where a tree was planted, mark on a piece of paper whether it is dead/missing or alive. An example of a survival count form is given on the following page. Recording plant survival separately for each line will help you to see in which part of the plantation replacement planting might be needed.
If the plantation consists of more than one species, survival should be checked species-wise. This together with information on how many seedlings were planted of each species (noted on the plantation history form), will make it possible to get a good idea of the survival of the different species. Together with estimates of the average height of the species, it can also provide useful information for planning future plantations.
The survival rate is calculated by dividing the number of surviving plants by the total number of plants and multiplying by 100.

Replacement is needed only if more than two out of ten plants are dead and only where at least two successive seedlings have failed. If the overall rate of failure is less than 20 per cent, replanting is carried out only in places where failures are heavily concentrated.
To make replacement planting easier, bring sticks or ribbons along when counting. Mark any part of the plantation with a high failure rate.
The difference in size between the plants used for replacement and the plants at the site should be kept as small as possible to minimize competition. The survival rate should be checked in time to carry out the replacement planting one year after planting, at the latest, in fast-growing plantations. In slower-growing plantations it should be checked in tune to carry out replacement planting during the second year after planting.
During the survival count, the height growth should be estimated and noted.
Survival count form
|
Plantation: __________ |
Date inspected: ____________ |
|
Area: ______________ |
Inspected by: ______________ |
|
Planting date: _______ | |

Figure
SURVIVAL RATE

ROUGH SURVIVAL RATE SPECIESWISE


Estimated height
Velvel 0.6 m
Vagai 0.4 m
Usilam 0.2
m
|
| ||||||||||||||||||||||||||||||||||||||||||||||||||||||||||||||||||||||||||||||||
Some useful guides/handbooks
Evans, J. 1992. Plantation forestry in the tropics. 471 pp. ISBN 0-19-854257-7 Pbk, Oxford University Press, New York, USA.
FAO. 1977. Savanna afforestation in Africa. FAO Forestry Paper no. 11. 312 pp. ISBN 92-5-100273-8.
FAO. 1978. Establishment techniques for forest plantations. FAO Forestry Paper no. 8. 206 pp. ISBN 92-5-300535-1.
FAO. 1985. Tree growing by rural people. 130 pp. FAO Forestry Paper no. 64. ISBN 92-5-102341-7.
FAO. 1987. Soil and water conservation in semi-arid areas. FAO Soil Bulletin no. 57. 172 pp. ISBN 92-5-102606-8.
FAO. 1991. Community forestry - ten years in review. Community Forestry Note no. 7. 32 pp.
FAO publications are available from: Distribution and Sales Section, FAO. Via delle Terme di Caracalla, 00100 Rome, Italy.
FAO. 1988. Planning forestry extension programmes. GCP/RAS/11 I/NET. Available from: Regional Wood Energy Development Programme in Asia, c/o FAO, Maliwan Mansion, Phra Atit Road, Bangkok 10200, Thailand.
Fraser, A.I., 1979. A manual on the management of plantation forests. 127 pp. Natraj Publishers, Dehra Dun, India.
Forestry Commission of Zimbabwe. Undated. Planting and managing of woodlots. Booklet No 2. 23pp. Rural Afforestation Division. Harare, Zimbabwe. Available from: Publicity and Extension Officer, Rural Afforestation Division, P.O. Box HG 139 Highlands, Harare, Zimbabwe.
Galloway, G. & Borgo, G. 1984. Gu�a para el establecimiento de plantaciones forestales en la sierra Peruana. Proyecto FAO/Holanda/INFOR. Lima, Peru. 144 pp. Available from: Cahuide 805-Piso 7, Jes�s Mar�a, Apartado Postal 11016, Lima 14, Peru.
GTZ. 1976. Manual of reforestation and erosion control for the Philippines. 569 pp. ISBN 3-88085-020-8. Available from: German Agency for Technical Co-operation (GTZ), P.O. Box 5180, D- 6236 Eschborn, Germany.
Hurni, H. 1986. Soil conservation in Ethiopia. Community forests and soil conservation Development Department, Ministry of Agriculture, Ethiopia. Available from: Soil Conservation Research Project, P.O. Box 2597, Addis Ababa.
ICRAF. 1988. Agroforestry in dryland Africa. 311 pp. ISBN 92-9059-049-1. International Council for Research in Agroforestry, Nairobi, Kenya.
ILO. 1982. Implementation of appropriate technology in Philippine forestry. 246 pp.
ILO. 1983. Soil conservation: Project design and implementation using labour-intensive techniques. 206 pp. ISBN 92-2-103395-3.
ILO. 1992. Fitting the job to the forest worker: An illustrated training manual on ergonomics. 128 pp. ISBN 92-2-107113-8.
ILO publications are available from: Distribution, International Labour Office, 1218 Geneva 22, Switzerland.
Pohjonen, V. 1989. Establishment of fuelwood plantations in Ethiopia. 388 pp. Silva Carelica 14. ISBN 951-696-839-2 Available from: Joensuu University Library. P.O. Box 111 SF-80101 Joensuu, Finland (exchange) or Toivo & Toivo, Joensuun yliopiston, ylioppilaskunnan kirjakauppa, Siltakatu 14 A, SF-80100 Joensuu, Finland (sale).
Weber, F.R. 1986. Reforestation of arid lands. Action/Peace Corps Program & Training Journal Manual Series No 5, 335 pp., ISBN 0-86619-264-6. Available from: VITA, 1815 North Lynn St., Suite 200, Arlington, Va 22209, USA.
Weber, F. & Hoskins, M. W. 1983. Soil conservation technical sheets. 94 pp. International Training Division, Office of International Cooperation and Development of the U.S. Agency of International Development, Washington, DC.
|
| ||||||||||||||||||||||||||||||||||||||||||||||||||||||||||||||||||||||||||||||||
Titles in the series of training elements and technical guides for SPWP workers
|
Number |
Title |
|
1 |
Anti-Erosion Ditches |
|
2 |
Stone Masonry |
|
3 |
Gabions |
|
4 |
Gully correction |
|
5 |
Small Earth Dams |
|
6 |
Tree Nurseries |
|
7 |
Planting Trees |
|
8 |
Stone Paving-Blocks: Quarrying Cutting and Dressing |
Also available:
Community Water Supply: A Community Participation Training Element for SPWP User Beneficiaries
Standardised Procedures for the Presentation of Work Plans
Price: 20 Swiss Francs